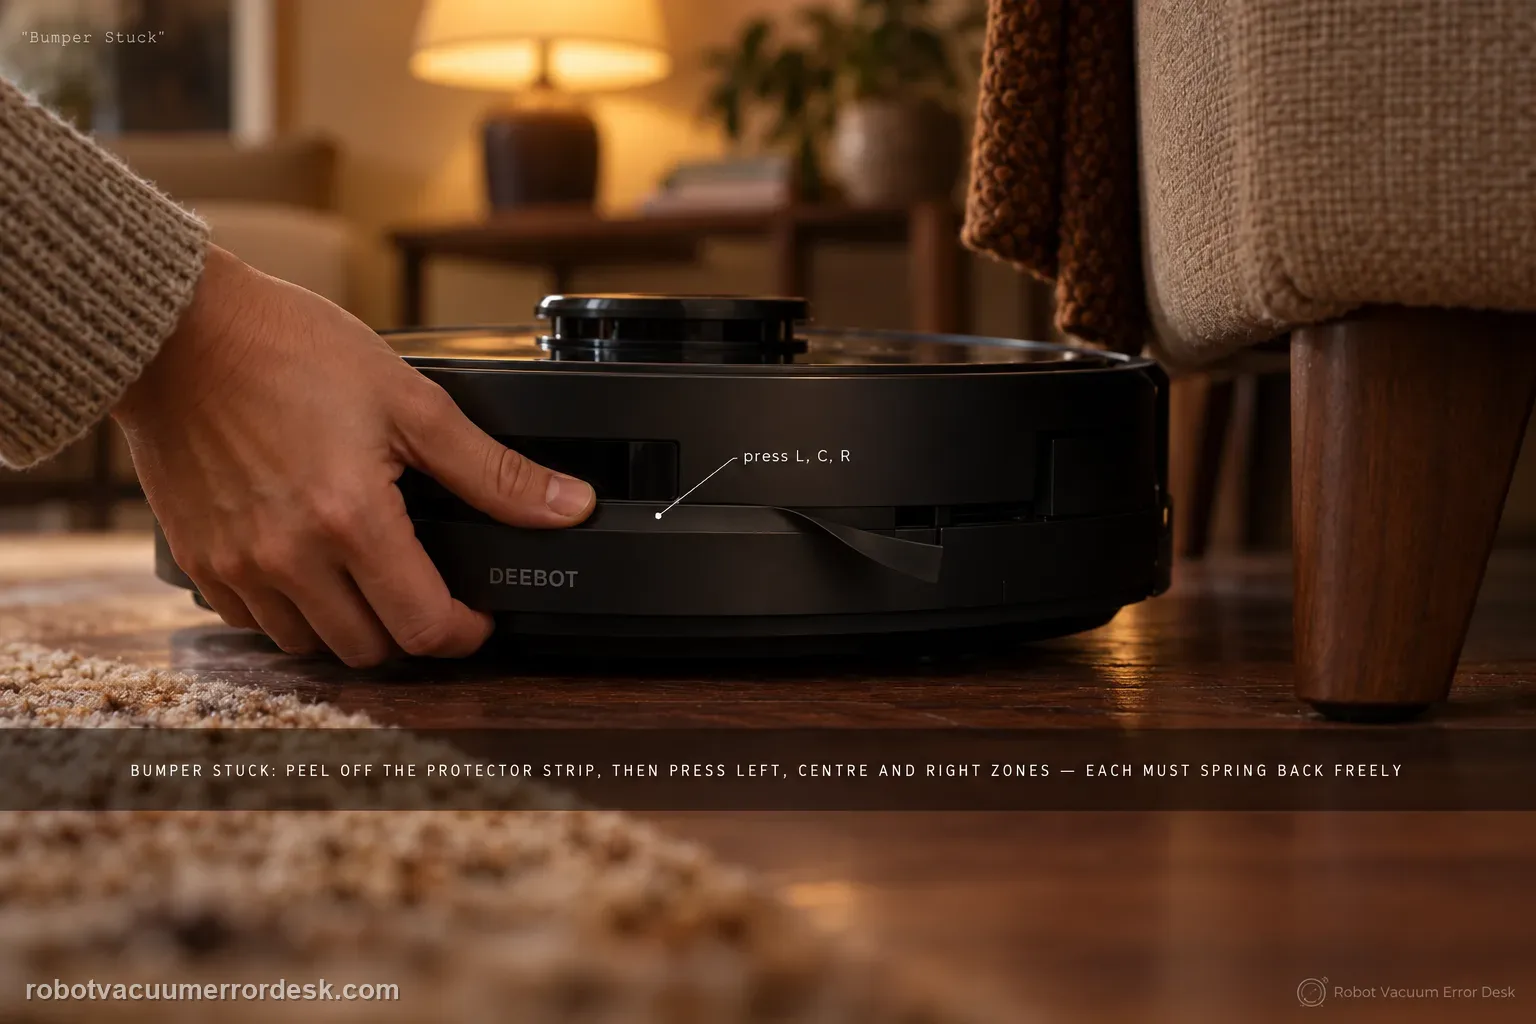
For the T80 OMNI Bumper Stuck alert, ECOVACS asks for a direct mechanical spring-back test, not a map reset. Remove the bumper protector strip, then press/tap the left, center and right bumper zones separately. Each zone should move inward and return freely. Clean only accessible debris around the bumper seam, then run a short open-floor test. If one zone remains depressed, returns slowly or the alert recurs immediately with free visible movement, stop prying at the bumper assembly and send ECOVACS a video of the three-zone comparison.
Confirm the exact model and exact code, light pattern or symptom.
Run the lowest-risk physical or software check first.
Use each pass condition to decide what the result actually narrows down.
Is this the problem you’re seeing?
- The app or robot reports Bumper Stuck on a DEEBOT T80 OMNI.
- The robot repeatedly thinks it is touching an obstacle even in clear open space.
- One section of the front bumper looks held inward or does not rebound as quickly as the other sections.
- A temporary bumper protector/transport strip is still fitted and may be limiting normal movement.
- You need to distinguish a physical bumper mechanism problem from obstacle avoidance or saved-map behavior.
Likely root causes, ranked
The bumper protector strip is still installed or interfering with normal travel
Dust, grit or a small foreign object is trapped in the accessible bumper seam
One of the left/center/right bumper zones is mechanically sticking and does not spring back
The bumper moves normally but the alert state requires a restart/short test to prove it has cleared
A bumper switch/mechanism fault remains when all external zones move freely
What the result narrows down
| What you observe | What it narrows down | Next move |
|---|---|---|
| Protector strip is still fitted | Bumper travel has not been tested in the intended operating state. | Remove the strip first, then repeat the left/center/right spring-back check. |
| Only one bumper zone returns slowly | The fault is localized mechanically rather than a map-wide problem. | Inspect the accessible seam for debris and film the asymmetry if it persists. |
| All three zones spring back freely | The obvious mechanical jam is not present. | Run a short open-floor test after clearing accessible debris; do not delete the map first. |
| Alert occurs only when contacting thin/black objects | That may involve obstacle-detection behavior rather than a stuck bumper. | Use the obstacle-avoidance guide if the bumper itself passes the spring test. |
| Immediate alert with freely moving clean bumper | Owner-level mechanical checks are exhausted. | Record the three-zone test and app alert and contact ECOVACS. |
Do not factory-reset by default. Use the exact model’s reboot/network-reset procedure only when the manufacturer path calls for it.
Checks to run, in sequence
Confirm the exact Bumper Stuck alert in clear space
Move the T80 into open floor space and note the exact app/voice wording before touching the map. If the robot is simply making more contact with thin or dark obstacles but no Bumper Stuck alert appears, use the obstacle-avoidance diagnostic instead. This page is for the bumper mechanism state. A clear-space reproduction is useful because it removes furniture contact as the immediate reason the bumper is being held in.
Remove the bumper protector strip
ECOVACS explicitly tells T80 owners to remove the robot's bumper protector strip before performing the spring-back check. Inspect the strip and surrounding edge for packaging material or residue that could limit travel. Do not replace it during the diagnostic. The bumper must be tested in its normal operating configuration; otherwise a perfectly good mechanism can appear stiff because an external shipping/protection part is still loading it.
Compare left, center and right spring-back
Gently press or tap the left, center and right sections one at a time. Watch the speed and completeness of the return rather than only whether the bumper moves. All three zones should spring back instead of remaining depressed. Compare them directly: a center section that returns normally while the right side stays inward is more useful evidence than saying the whole bumper 'feels weird.' Do not strike the bumper hard; light travel is enough to reveal a sticking zone.
Clear only accessible debris around the seam
With the robot stopped, look along the visible gap where the bumper moves. Remove loose grit, hair or a small object you can reach without dismantling the bumper. Use a soft brush or cloth and avoid forcing tools deep behind the shell. Recheck the same left/center/right zones after cleaning. If a small piece of debris was the cause, spring-back should improve immediately; if it does not, deeper disassembly is not the next owner step.
Run a short open-floor test before touching the map
Start a short cleaning run in the same clear area. Watch whether the Bumper Stuck alert returns immediately and whether the robot responds normally to a real obstacle. A bumper that passes the hand test and runs normally does not need a map deletion merely because the alert happened once. If the robot now shows a different behavior—such as failing to avoid obstacles while the bumper remains free—move to the obstacle-avoidance path because that tests the front laser/AIVI settings instead.
Escalate with a three-zone video instead of prying the bumper
If one zone still sticks, returns slowly or the alert persists even though all external travel looks free, record a close-up of left, center and right presses and the resulting app alert. This gives ECOVACS a direct view of the mechanism state. Do not remove the bumper shell, bend tabs or spray lubricant into the seam. Those actions can damage switches or contaminate sensors and make the original fault harder to diagnose.
Escalate when the protector strip is removed, accessible debris is cleared and the left/center/right bumper zones have been compared, yet one zone remains mechanically stuck or the Bumper Stuck alert returns immediately with all three zones moving freely. Do not pry off the bumper shell or spray lubricant into it. Send ECOVACS a short three-zone spring-back video plus a screenshot of the alert; state whether the issue occurs in open floor space or only during obstacle contact.
Information to have ready for support
Support can skip the basic troubleshooting script when you provide a reproducible case. That keeps the results of your checks from getting lost.
- Exact model name and the error code / voice prompt exactly as shown
- A photo or screenshot of the app error and the time it occurred
- A short list of the checks already completed and what happened after each one
- Map/station screenshot when the problem involves return-to-station or mapping
Source and evidence level
ECOVACS T80 OMNI — Bumper Stuck Alert
ECOVACS' exact T80 bumper article instructs owners to remove the bumper protector strip and check the left, center and right bumper zones for normal spring-back. The diagnostic path then uses a controlled open-floor comparison, accessible-debris check and escalation package without treating a physical bumper alert as a map problem.
Additional official source: ECOVACS T80 OMNI — obstacle avoidance check ↗Additional official source: ECOVACS T80 OMNI product support hub ↗Last editorial review: September 5, 2026Regional note: manufacturer help centers, model suffixes, mains-power requirements and warranty procedures can differ by country. If the source redirects to a local support site, confirm that the model/hardware scope still matches before following a region-sensitive step.
This guide is rated Official model support. See what each evidence label means →
Common questions
How do I fix a DEEBOT T80 Bumper Stuck alert?
Remove the bumper protector strip first, then gently press the left, center and right bumper zones separately. ECOVACS says each section should spring back. Clear only visible accessible debris around the moving seam and run a short open-floor test. If one zone remains depressed or the alert returns immediately with free movement, record the comparison and contact ECOVACS rather than removing the bumper shell.
Should I reset the map for a T80 bumper-stuck warning?
No. The official first-line test is physical bumper movement. A map cannot make a mechanically depressed bumper spring back, so resetting it first removes useful navigation context without testing the documented cause. Only return to mapping if the bumper alert is gone and you have a separate map or navigation symptom that persists.
Why test the left, center and right parts of the bumper separately?
The comparison can localize the mechanical problem. If two zones return freely and one remains slow or stuck, you have stronger evidence of a local obstruction or mechanism/switch issue than a general navigation fault. Film that asymmetry for support. Press lightly; the goal is to observe normal travel and spring-back, not to force the bumper past its designed range.
Can obstacle avoidance problems look like a stuck T80 bumper?
They can feel similar to an owner because both involve collisions, but the evidence is different. If all bumper zones move freely and there is no Bumper Stuck alert, use the T80 obstacle-avoidance guide, which checks the front laser and AIVI 3D setting. Keep the mechanical bumper alert separate from sensing behavior so each fix is testable.
When should I contact ECOVACS about the T80 bumper?
Contact support if a bumper zone stays depressed, returns noticeably slower than the others after accessible debris is removed, or the alert persists immediately even though all three zones move normally. Send a close-up video of the left/center/right spring test and the app alert. Avoid prying off the bumper or adding lubricant, which is outside the published owner procedure.
Did this diagnostic narrow the fault?
Use this as an editorial signal, not a popularity counter. If a feedback address is configured you can email the note; otherwise you can copy it for your own support record.