Search the model-specific troubleshooting library
212 issue-level diagnostics backed by manufacturer support or manuals. Filter before opening a guide instead of scrolling through every brand.
How this library is organized
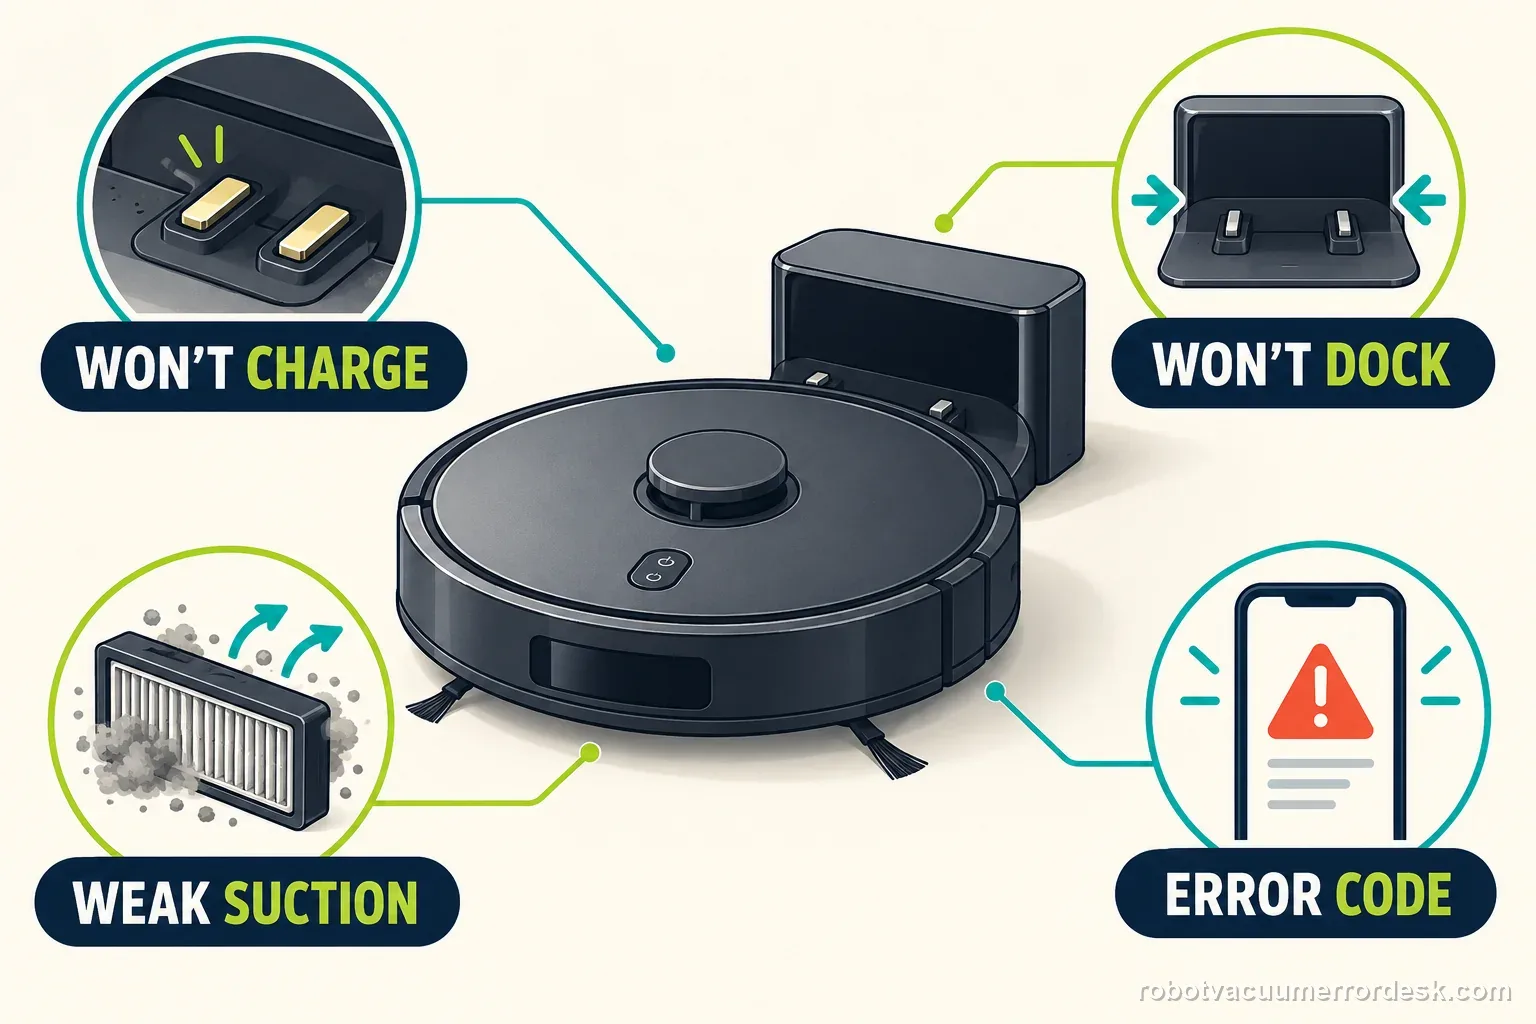
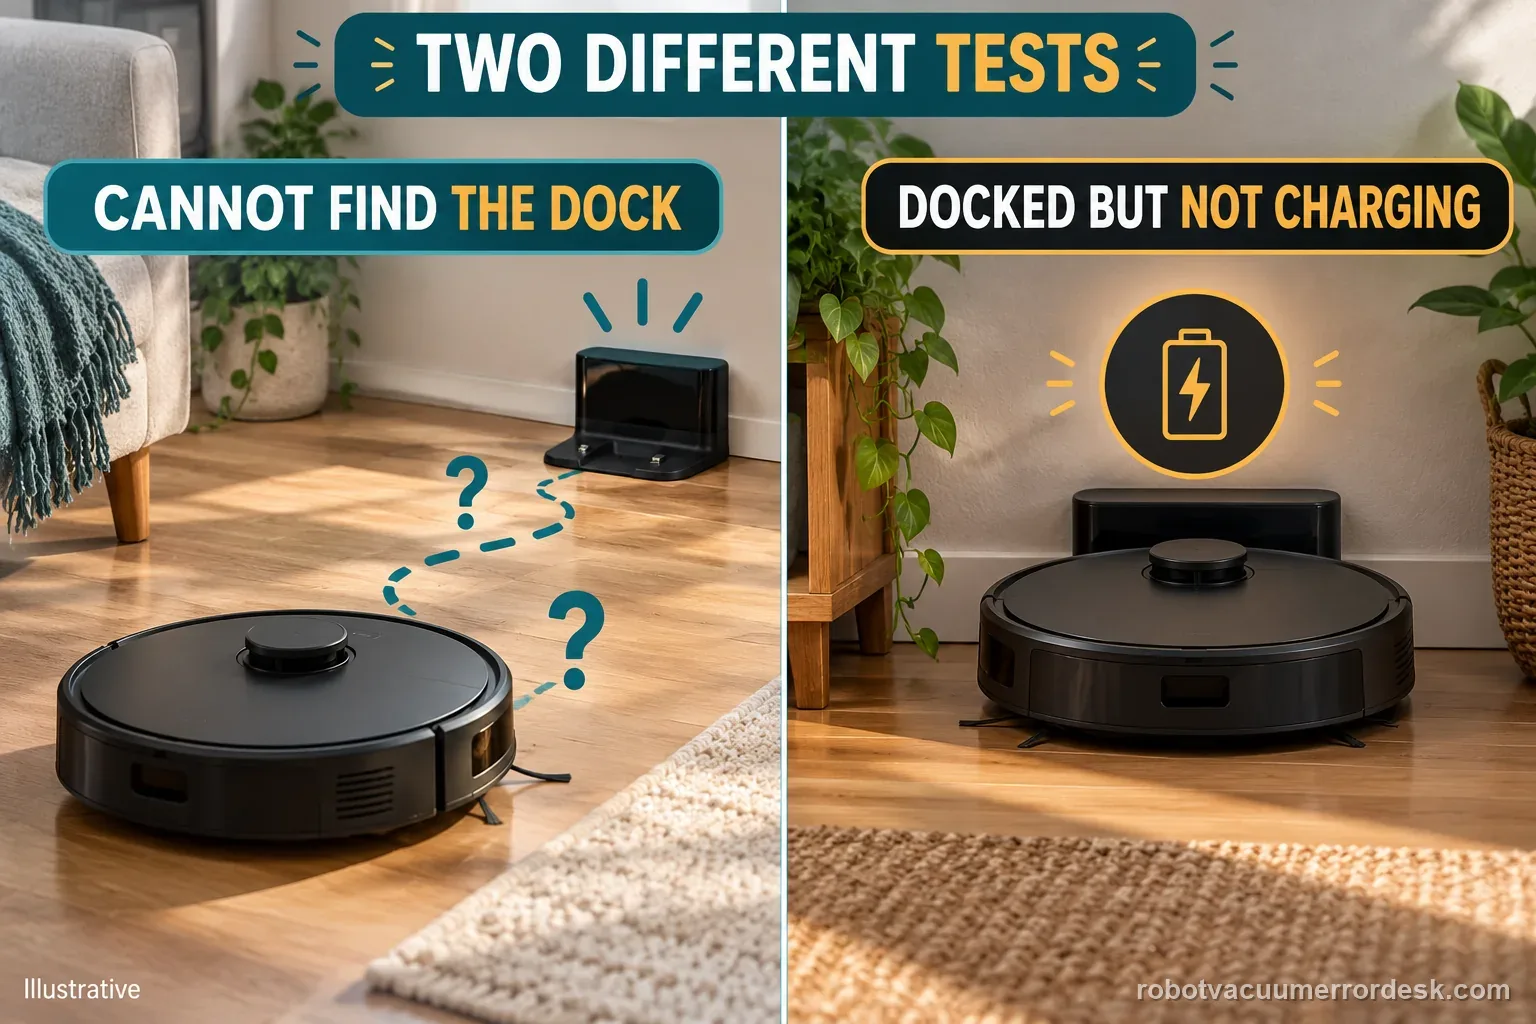
The library is issue-level rather than one long page per robot. That lets a charging failure stay separate from a return-to-dock failure, and a water-injection error stay separate from a dirty-water extraction problem. Filter by brand or model first, then choose the symptom that matches the stage where your robot actually fails. Nearby guides are linked so you can switch branches without treating every symptom as the same fault.
What the evidence labels mean
Each guide exposes the manufacturer source used to support its diagnostic path. Exact model support and exact manuals can justify model-specific thresholds, menu paths and error meanings. Broader manufacturer material is used more cautiously and should not be presented as proof that every model behaves identically. Review dates show when the source relationship was last checked; they are not a claim that the robot was physically tested in our lab.
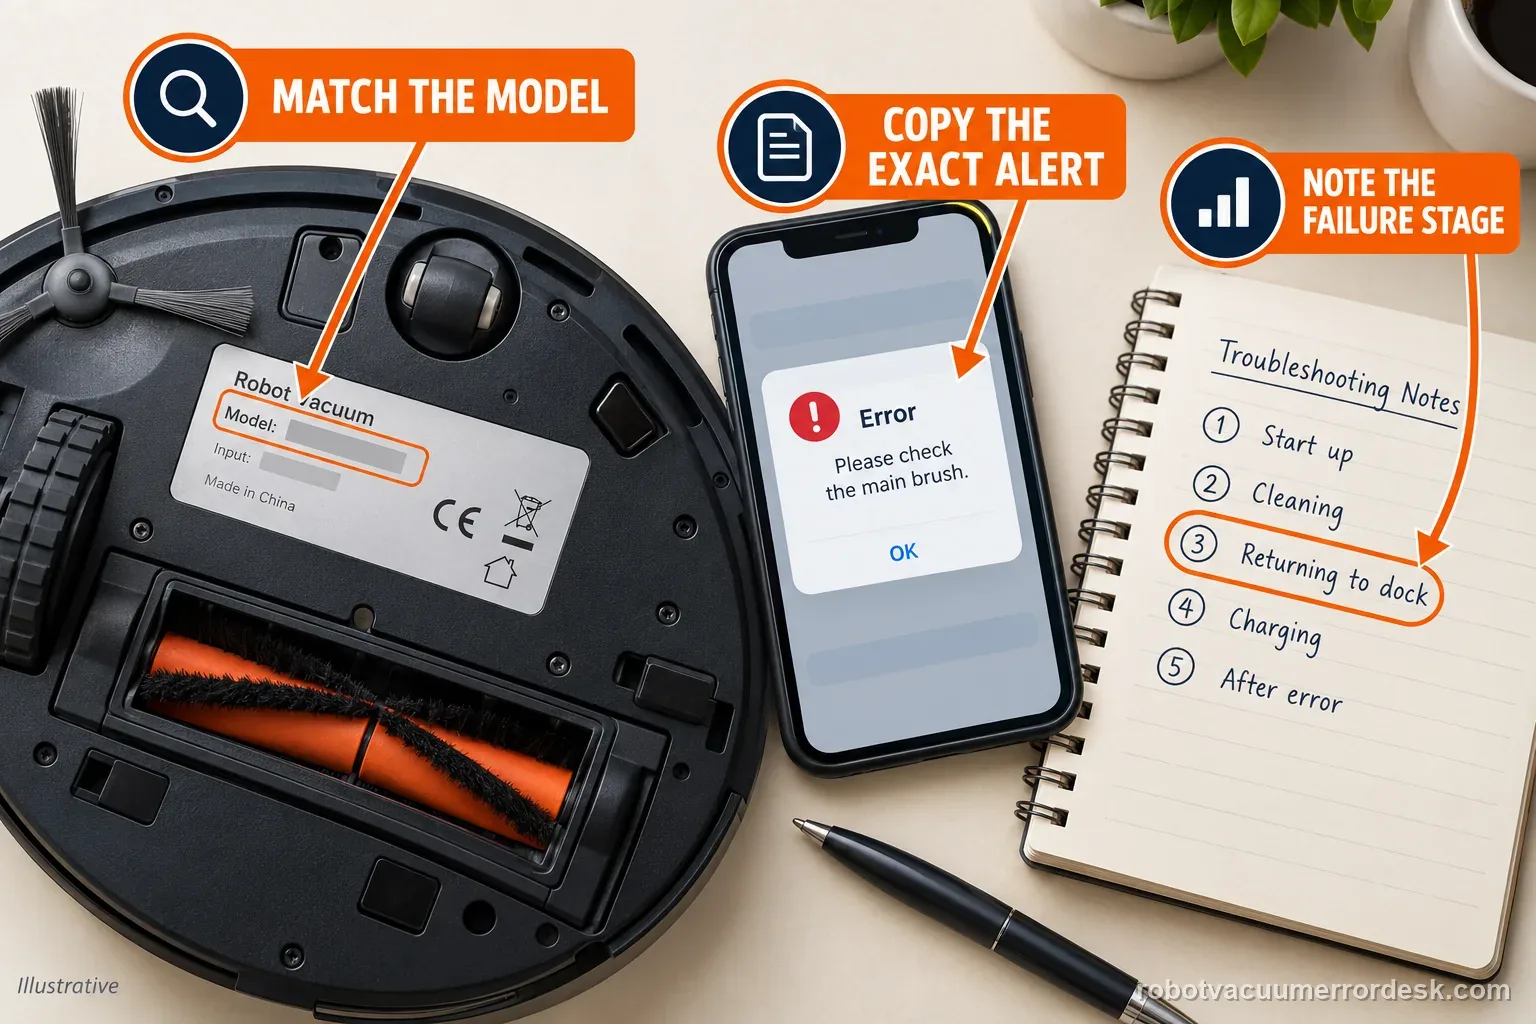
Ordered steps are written as tests with pass conditions. The goal is not to maximize the number of things you try. It is to learn something after each low-risk action: whether the dock has power, whether a sensor is blocked, whether a setting excludes a room, whether an alternate network works, or whether the fault persists after the official owner-level path. That result should determine the next step.
When to stop troubleshooting
Manufacturer warranty terms, electrical safety and regional service rules take priority over this library. Stop when the evidence points to sealed electronics, battery damage, unsafe heat, smoke, mains wiring or liquid around powered parts. For unresolved issues, the support handoff builder can preserve the exact tests and source links you completed so manufacturer support does not have to start from zero.
Error 26
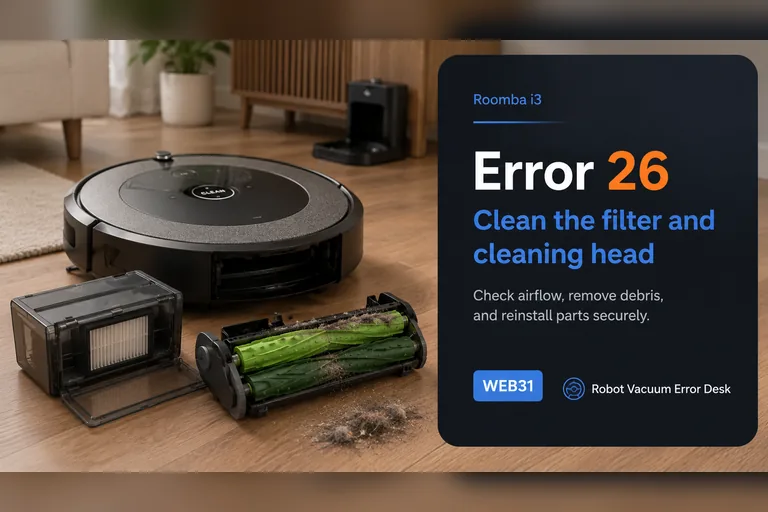
On the Roomba i3, Error 26 is an airflow/vacuum problem, not a generic internal error. iRobot says to clean or replace the bin filter first, keep that filter dry, rinse only the bin and let it dry completely, then reinstall everything before retesting. If the code persists, reboot an i-Series robot by holding CLEAN for 20 seconds. A repeat Error 26 after a known-good filter and reboot raises the cleaning-head module as the next suspect, but newer i1/i3/i5 variants may be non-modular. Check the serial-number or bottom-cover clues before ordering a module that cannot be replaced on your particular robot.
Error 26
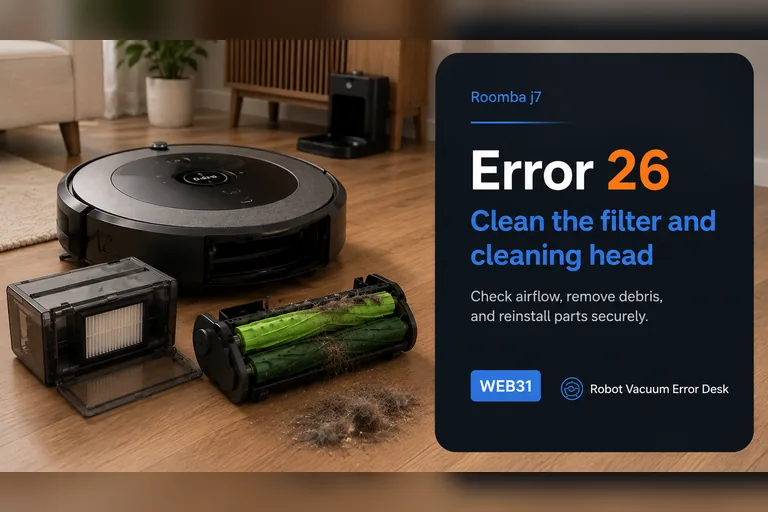
iRobot defines Error 26 on the Roomba j7/j7+ as insufficient airflow, so start with the air path rather than the battery, dock or map. Remove the bin, tap dust from the filter without washing it, rinse only the bin with warm water and let it dry completely, then clear the dual rollers and intake path. Reassemble the filter and bin, reboot a j-series robot by holding CLEAN for nine seconds, and run a short controlled vacuum test. If Error 26 returns after a clean or replaced filter, a dry unobstructed bin path and the documented reboot, iRobot says the cleaning-head module may need service or replacement; stop buying random parts and use the repeatable test result for support.
Won't dock
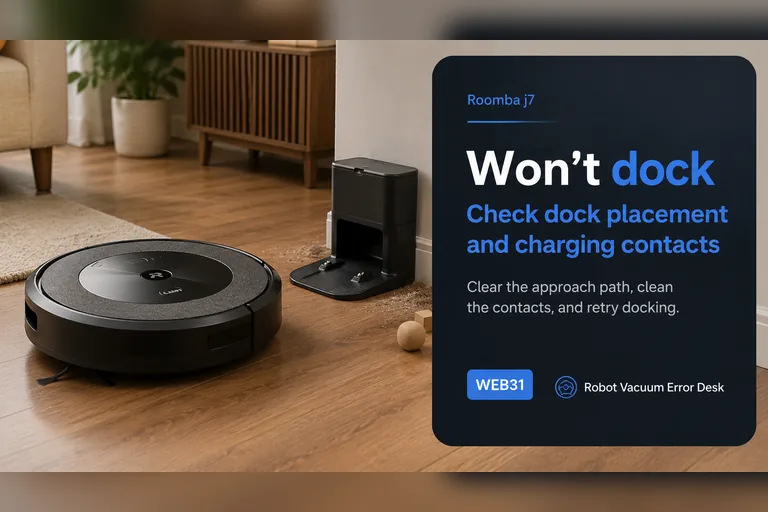
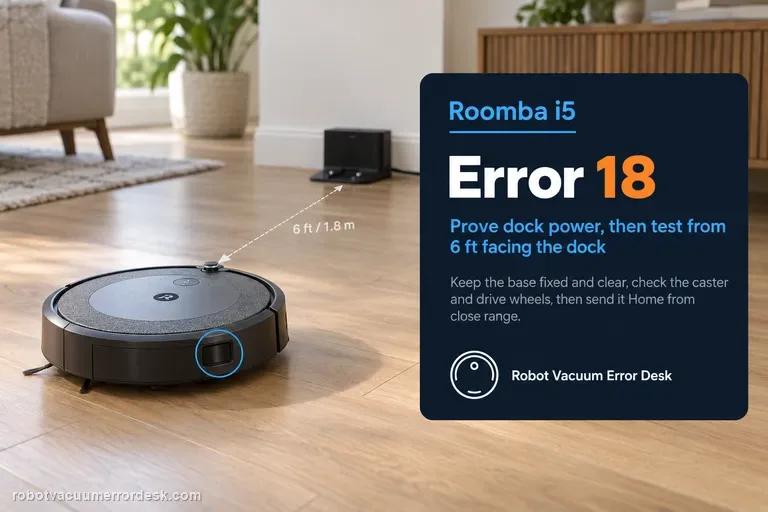
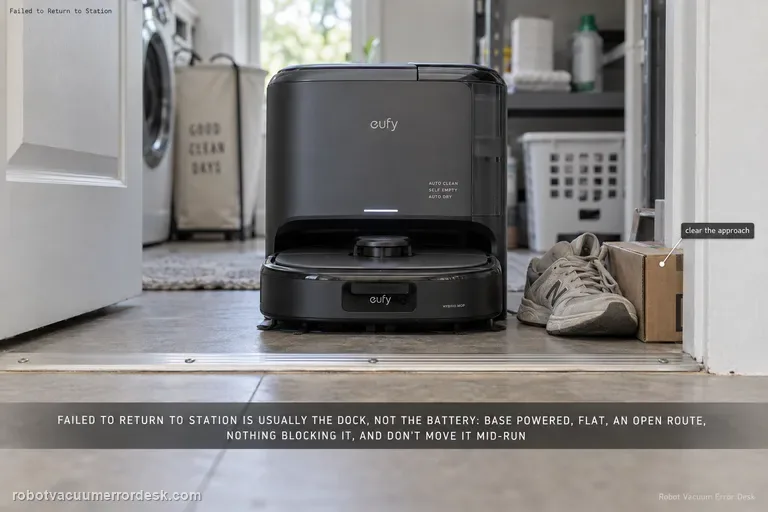
For a j7 that will not dock, start with a controlled close-range return rather than deleting the map. iRobot's Error 18 guidance says j-Series robots use the front-facing camera for the docking approach instead of the RCON used on many older Roombas. Confirm the dock has power, keep its approach clear, remove direct sunlight or visual obstruction, clean the robot/dock contact and bumper areas, then face the j7 toward the dock from about 6 ft (1.8 m) and command Home. A successful close test points to placement, mission context or range. A failed close test keeps camera visibility, final approach and dock/contact conditions at the center of the diagnosis.
Not charging
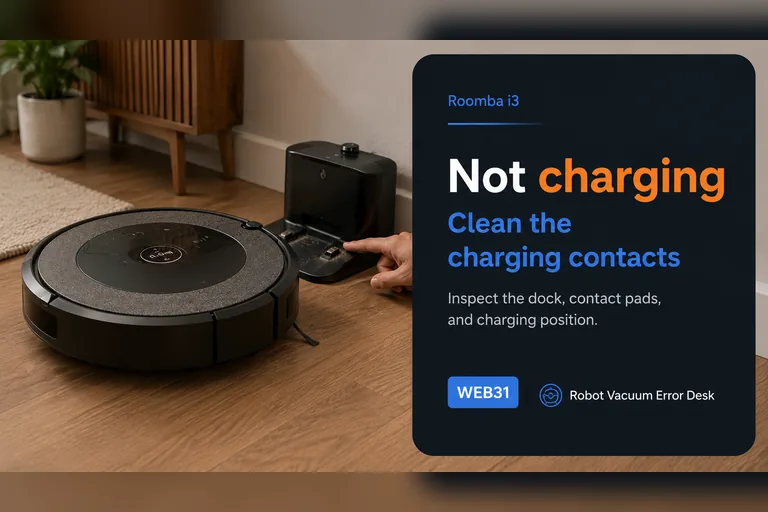
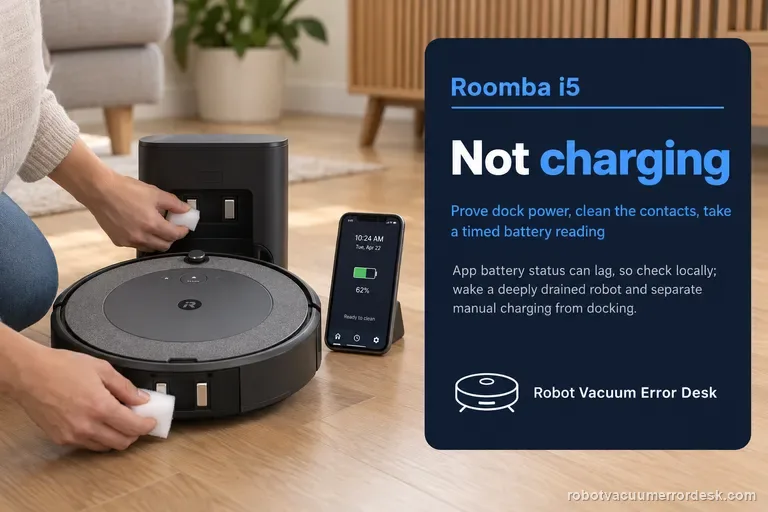
Treat a Roomba i3 charging complaint as three separate questions: does the Home Base have power, does the robot actually make electrical contact, and does the battery state rise after contact is established? iRobot's charging guidance starts with dock power and maintenance rather than a replacement battery. Manually seat the i3 on a confirmed powered base, clean both charging contacts, allow a deeply depleted robot time to wake, and compare the battery state before and after a controlled charging interval. If manual seating works but autonomous returns do not, the problem belongs in docking/navigation diagnosis. If the i3 never acknowledges charge even when directly aligned, use the supported reboot or battery re-seat path and then escalate with the exact symptom rather than buying parts by guesswork.
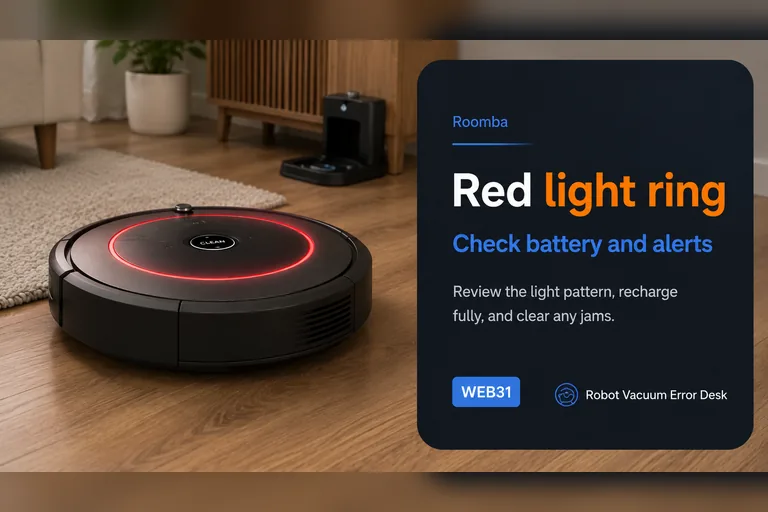
Red light
A red light on a Roomba j7 is a status language, not one universal fault. iRobot documents solid red for an active error, pulsing red when the battery is charging but still too low to start, and a red sweep toward the rear for a full-bin condition on i/j robots. Read the motion of the light and the app/voice message before resetting the robot. If it is solid red, make Roomba repeat the underlying error and troubleshoot that code. If it is pulsing red, prove charging time. If it sweeps rearward, empty the bin and clean all full-bin/port sensors. A dock light is a separate indicator and should not be interpreted as the robot's light ring.
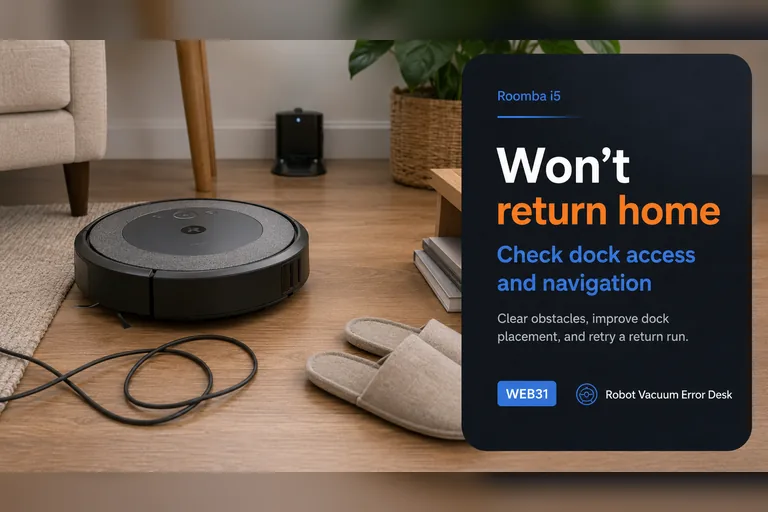
Won't return home
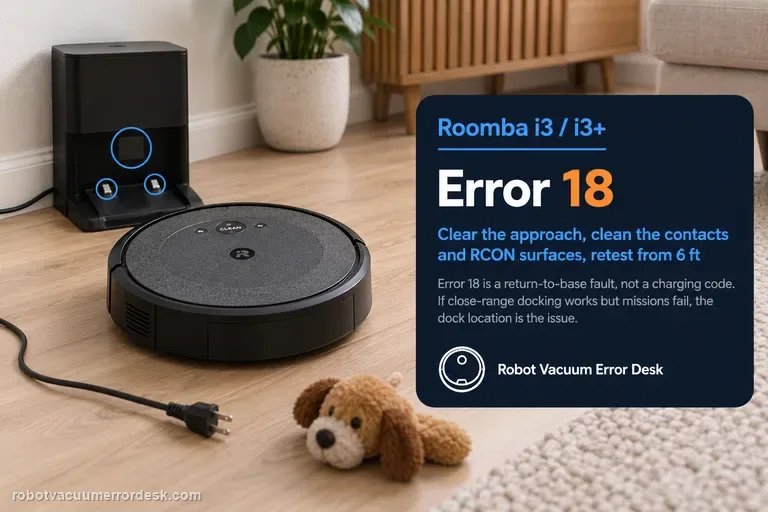
When a Roomba i5 simply 'won't return home' without a clear Error 18 message, first determine which stage fails. If it cannot dock from a short clear approach, troubleshoot the Home Base, RCON/bumper area, contacts and wheels. If it docks perfectly from about 6 ft but fails after a long cleaning mission, focus on whole-home context: whether the robot or base was moved, how far the return begins from the dock, remaining battery and environmental interference. iRobot notes that physically moving a Roomba during a mission can make Home Base recovery harder and publishes range guidance for the i3/i4/i5 family. This symptom-first page therefore starts with a close test before map deletion or battery replacement.
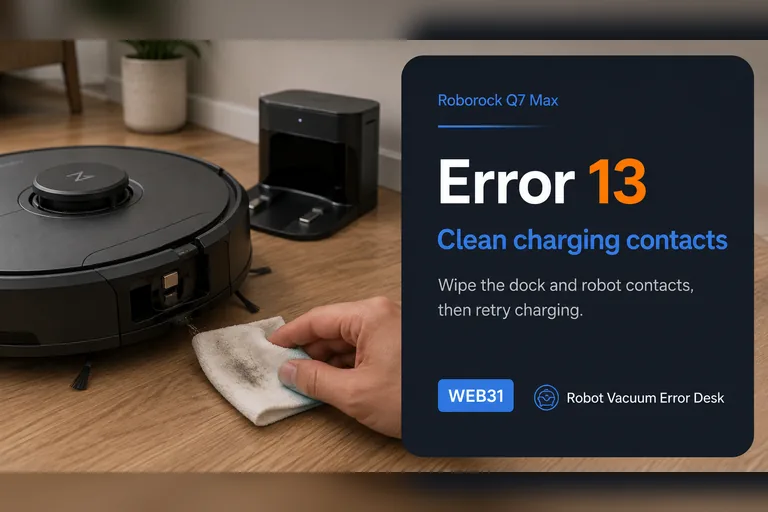
Error 13
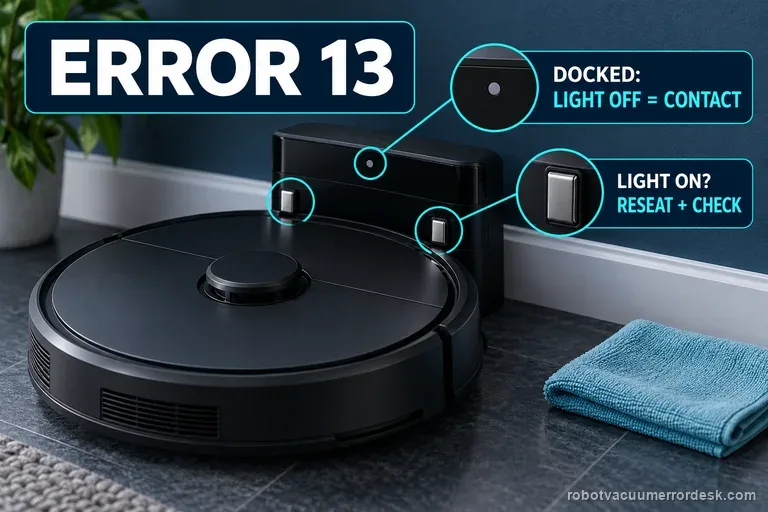
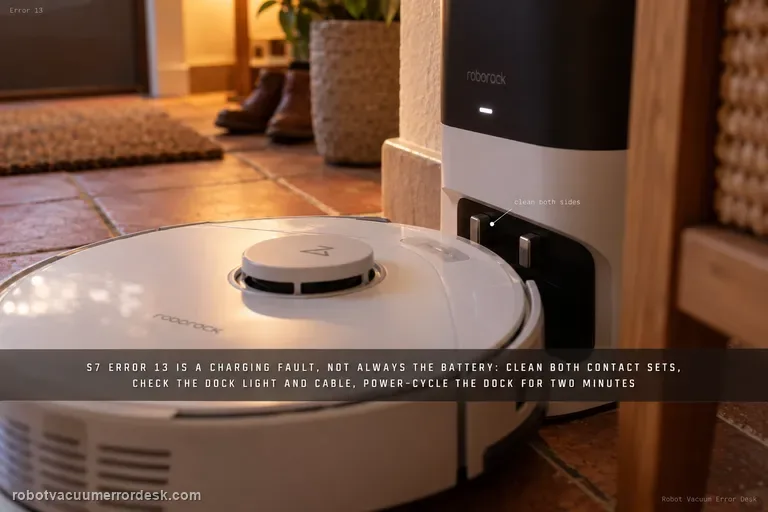
Roborock Q7 Max Error 13 is a charging fault. First prove the charging connection with the dock indicator, then clean both contact sets, fully seat the dock power cable, power-cycle the dock for about two minutes and compare a known-good outlet. Once the dock light confirms contact, use a timed battery-percentage test instead of repeatedly repositioning the robot.
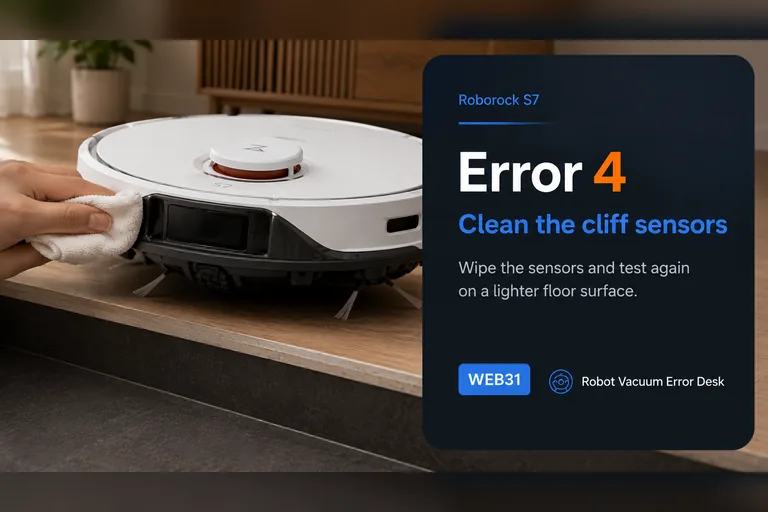
Error 4
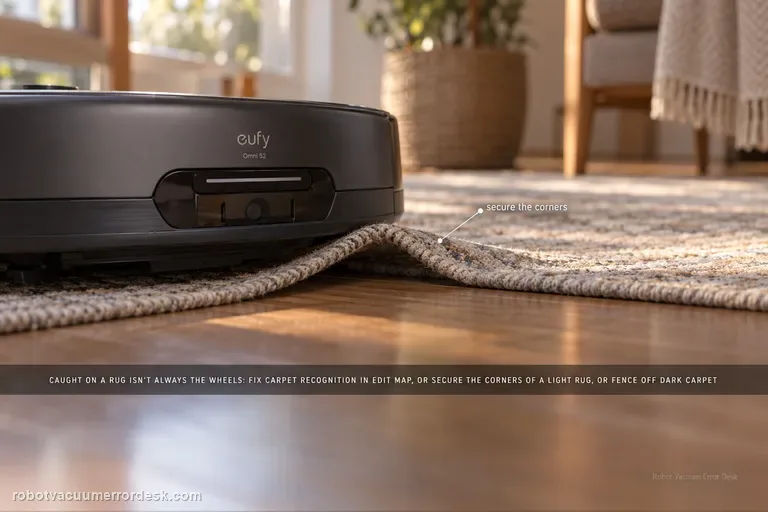
Roborock S7 Error 4 is the cliff-sensor path. The official S7 support sequence is short but diagnostic: wipe the underside cliff sensors and make sure the robot is not sitting on dark or shag carpet. Do that comparison on a bright, flat hard floor well away from stairs. If the error disappears there and returns only on one rug, treat the surface as the trigger and exclude it in the map. Never tape over cliff sensors to force the robot onto that surface.
Error 8
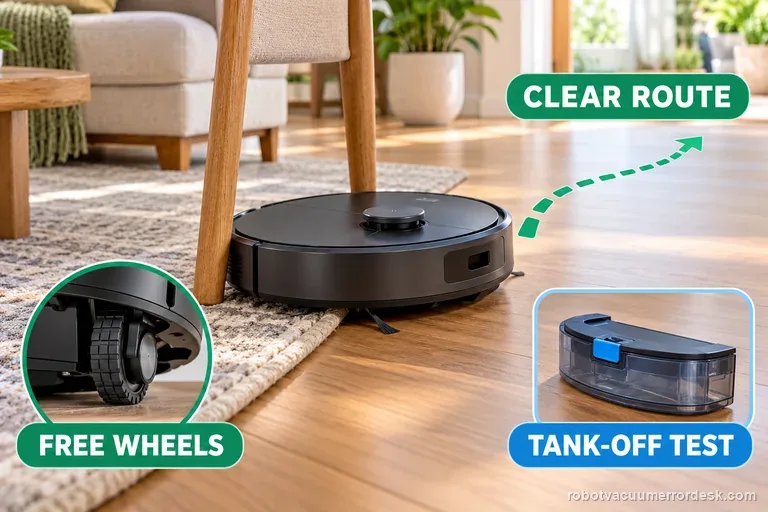
The Q7 Max manual defines Error 8 as “Robot trapped.” First clear obstacles around the robot and relocate it. If the problem repeats, manually compare the drive wheels and, when a water tank is installed, remove it for an isolation test before escalating.
Error 10
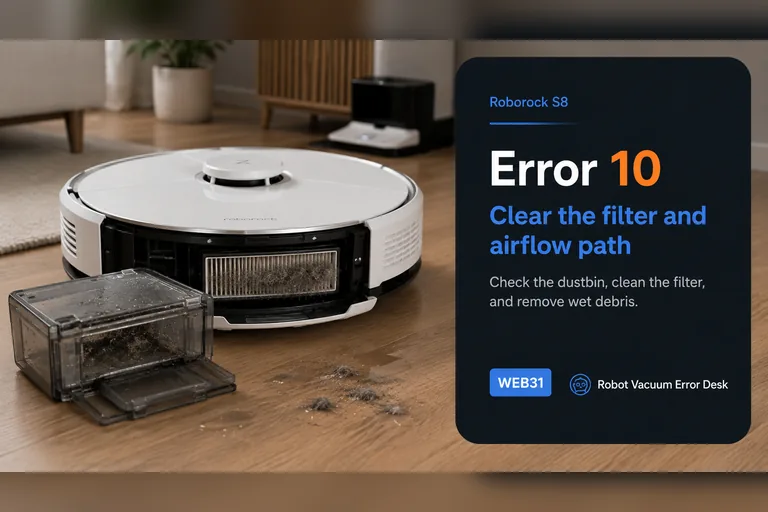
Roborock S8 Error 10 is the blocked-or-wet filter path, not the same fault as Error 18. Empty the dustbin, clean the filter, let it dry completely and reinstall it correctly before testing again. Inspect the accessible inlet for compacted debris while the bin is out. If a clean, genuinely dry, known-good filter still triggers Error 10, stop repeatedly washing the same filter and escalate; a persistent airflow or sensing fault needs a different branch.
Error 18
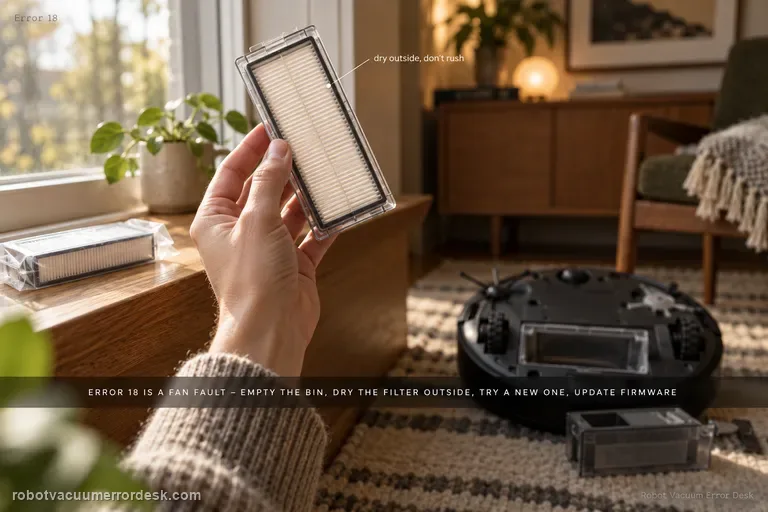
S8 Error 18 is Roborock’s fan-error path. The official S8/S8+ support sequence is to empty the dustbin, clean the filter and dry it outside, replace it with a brand-new filter if necessary, and update the robot to the latest firmware. That sequence deliberately rules out airflow load before you conclude the fan itself has failed. Run only a short proof test after those checks; if Error 18 promptly returns or the fan sounds stalled, stop cycling the robot and escalate.
Map tilted
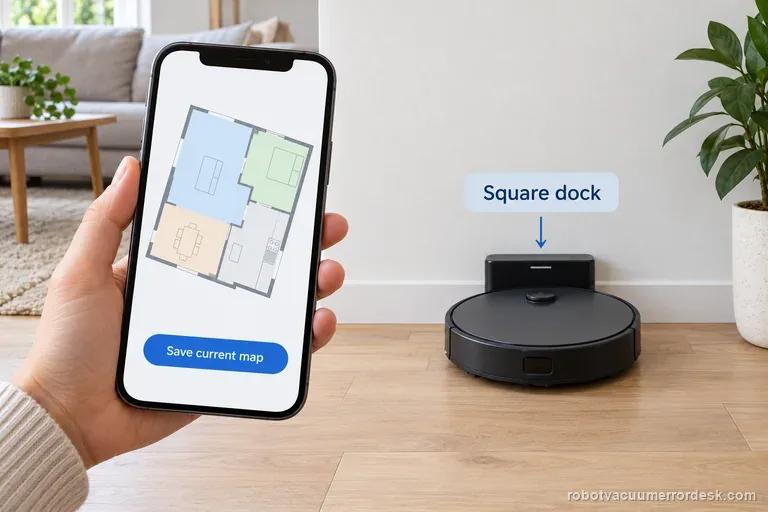
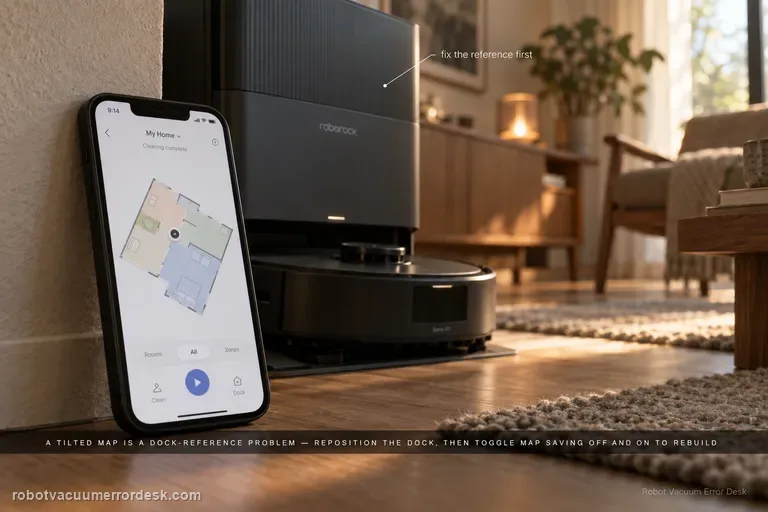
A tilted S7 map is usually a reference problem, not proof that the LiDAR is physically crooked. Roborock ties abnormal map orientation to dock placement and recommends correcting the dock environment before rebuilding Map Saving. Square the dock to a straight wall, keep it fixed, let the S7 localize and complete a normal run, and only then create a fresh map if the angle persists. Preserve a screenshot first so you can compare the old and new reference rather than deleting evidence.
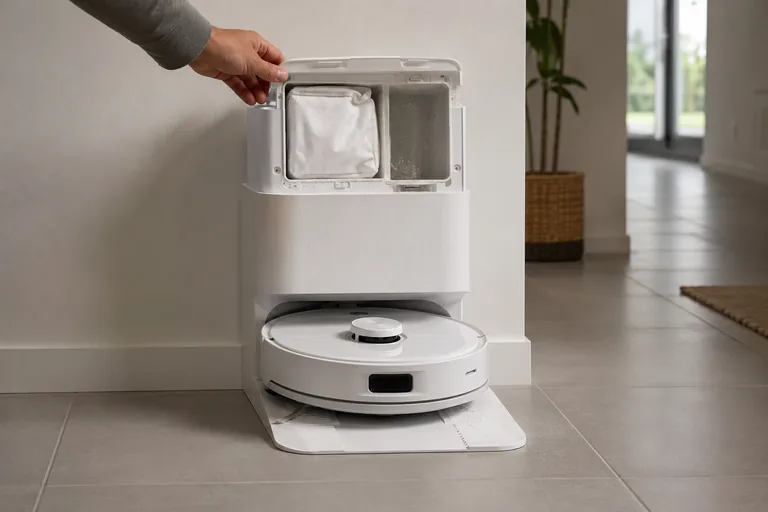
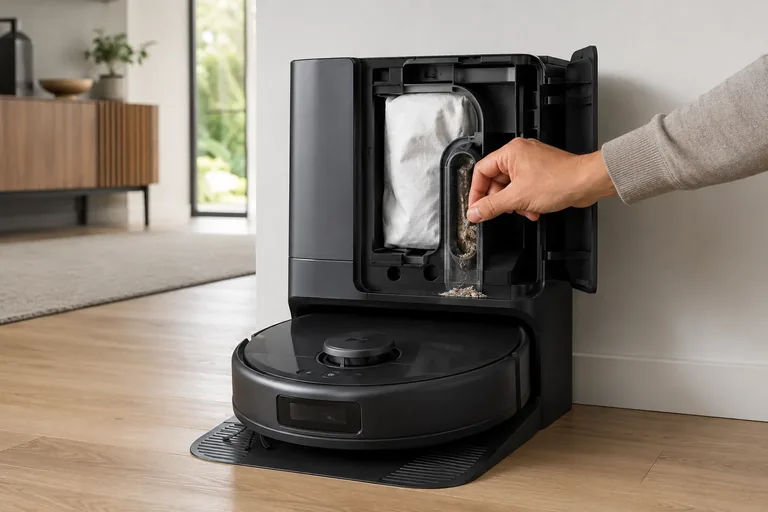
Auto-empty not working
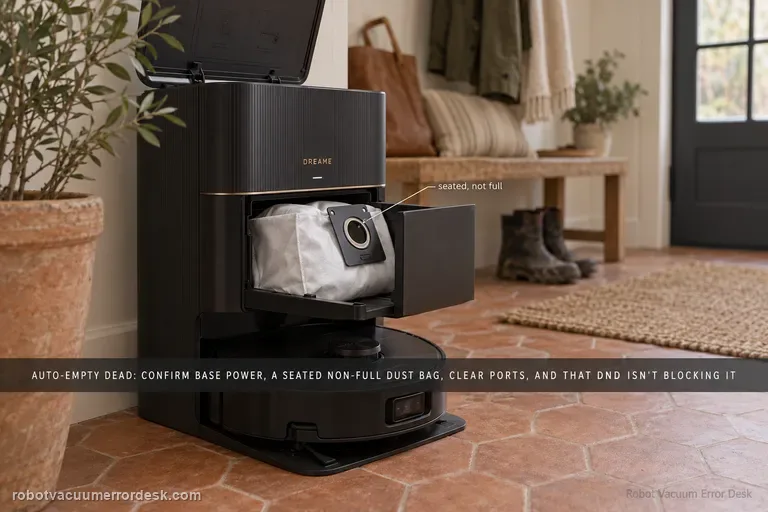
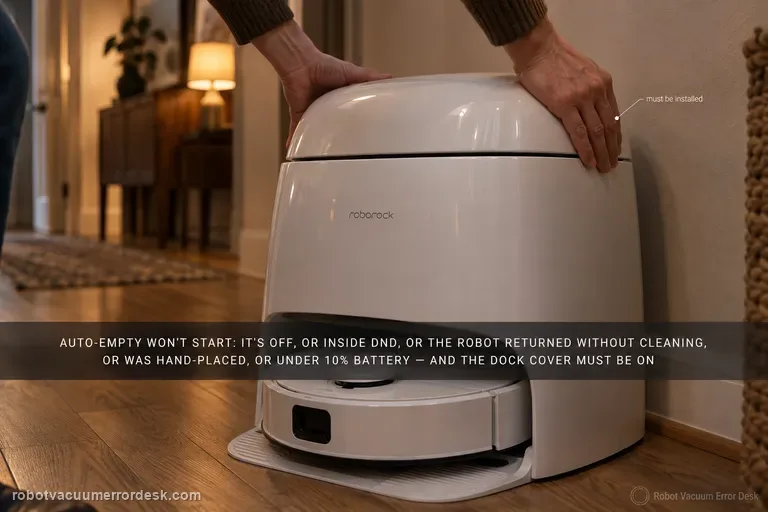
First decide whether Q Revo auto-emptying never starts or starts but leaves debris behind—Roborock documents different branches. If the cycle does not start, check that Auto-Emptying is enabled, the dock dust-container cover is installed, the robot actually returned after a cleaning task, and Do Not Disturb is not configured to disable auto-emptying. Roborock also says manually putting the robot on the dock does not trigger automatic emptying. If the cycle starts but emptying is ineffective, shift to the airflow/mechanical branch: confirm the main brush and brush cover are installed correctly, then clear the filter, air duct, suction inlet, air inlet and dustbin. This trigger-vs-airflow split prevents unnecessary dock disassembly.
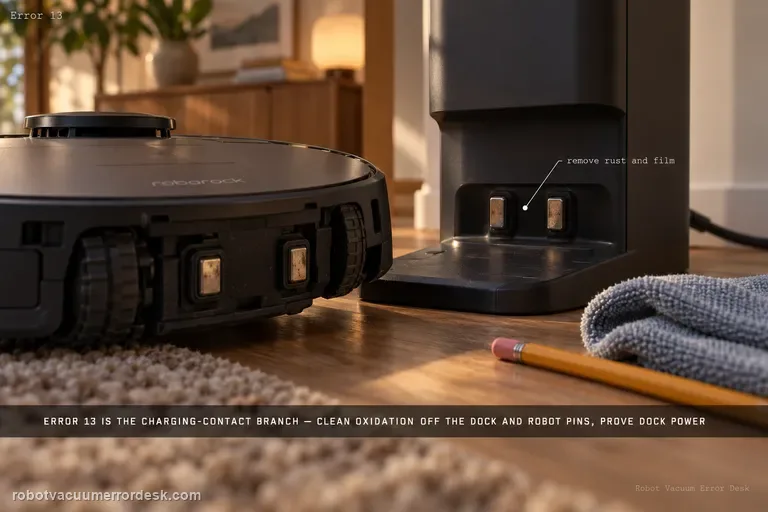
Error 13
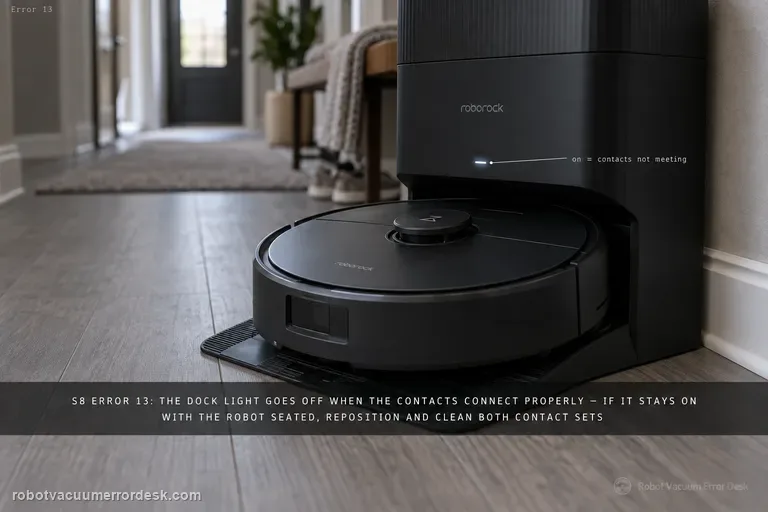
Qrevo Error 13 is the charging-contact branch. Roborock’s current Qrevo support says to remove stains or rust from the dock and rear robot contacts, verify the dock indicator changes from on without the robot to off when it is properly seated, push the station power cable fully into its socket, unplug the dock for about two minutes and try another outlet if needed. Prove sustained battery gain after those checks before suspecting the battery or internal charging hardware.
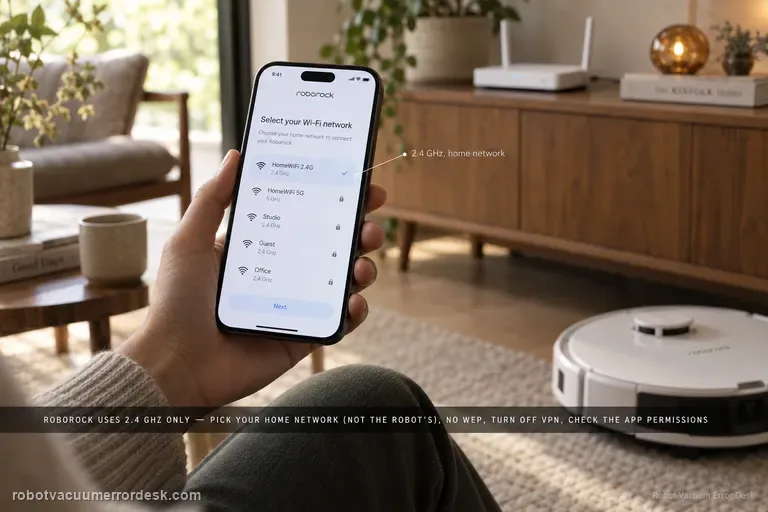
Wi-Fi won't connect / offline
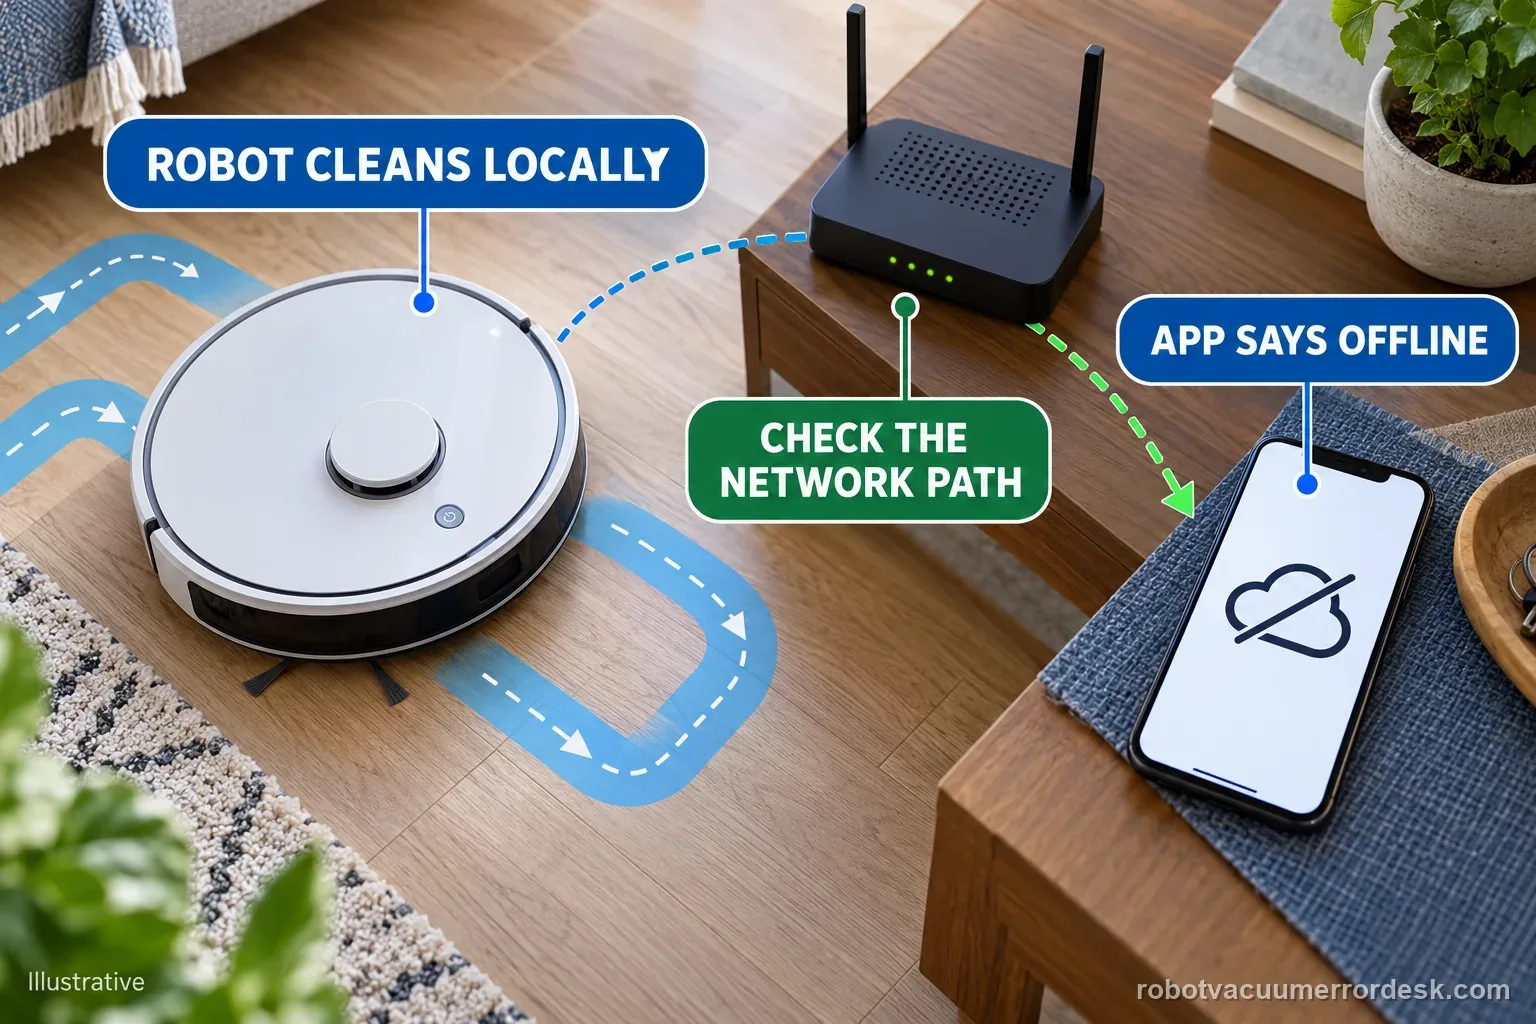
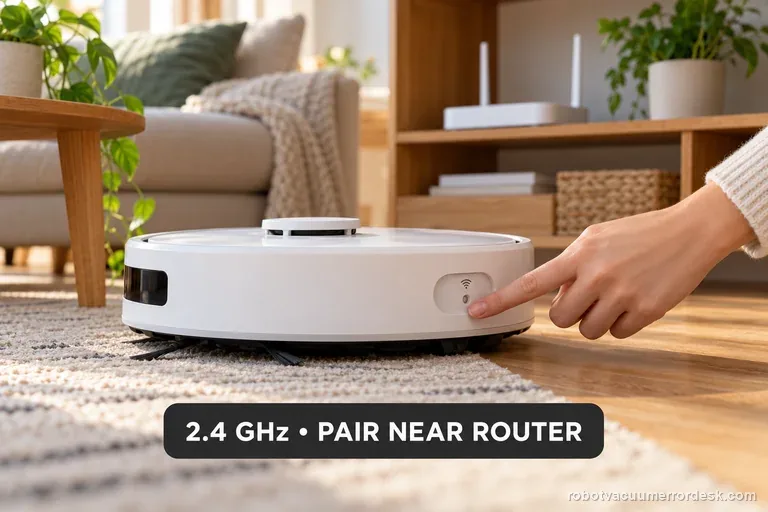
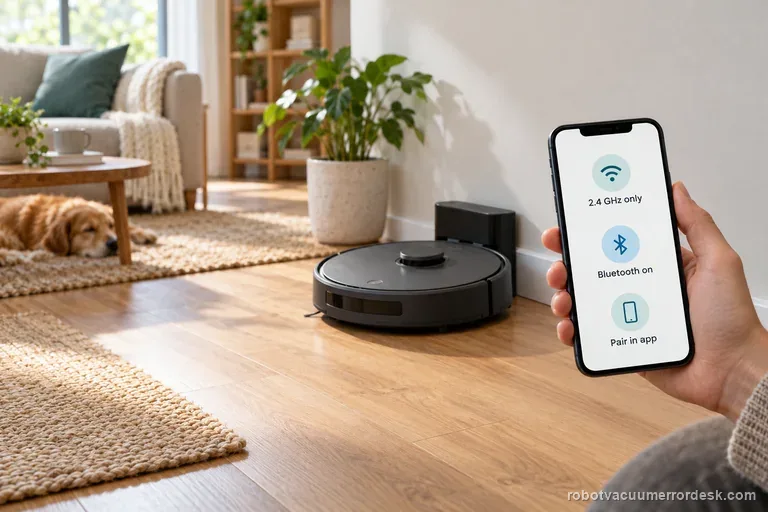
If a Roborock Qrevo will not connect to Wi-Fi, disappears from the Roborock app, or stalls during pairing, treat it as a network-stage problem before resetting the whole robot. Roborock’s Qrevo support says the robot uses 2.4 GHz Wi-Fi, the password must be correct, phone permissions can matter, the home Wi-Fi must be selected instead of the temporary robot network, WEP is not supported, and VPN or cellular routing can interfere. The Qrevo manual also gives a dedicated Wi-Fi reset: open the top cover, locate the Wi-Fi indicator, hold the documented button combination until the robot announces “Resetting WiFi,” then wait for the indicator to flash slowly before adding the robot again. A Wi-Fi reset is different from a factory reset and is the safer recovery step when the robot itself still cleans normally.
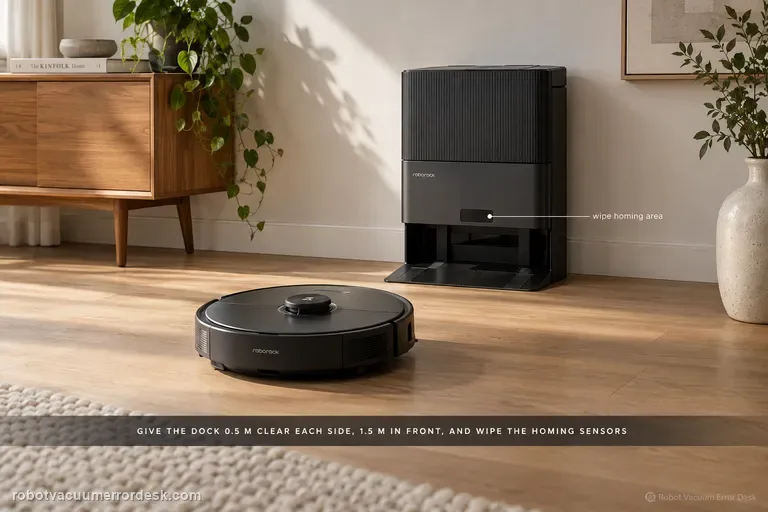
Can't find dock
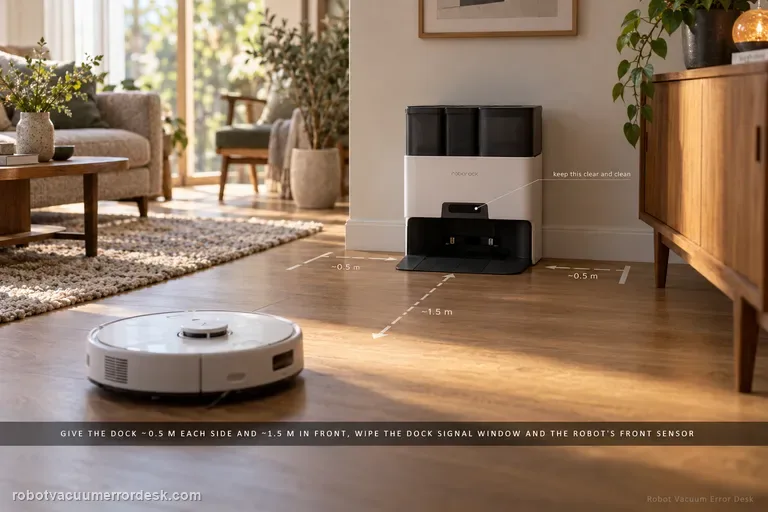
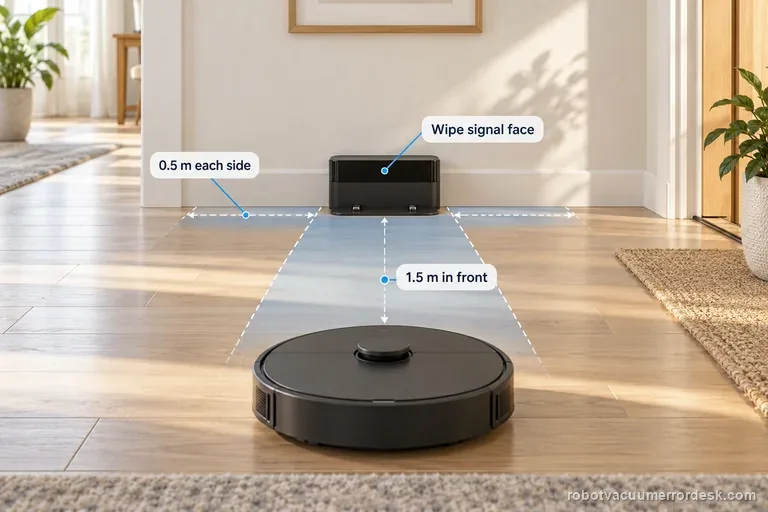
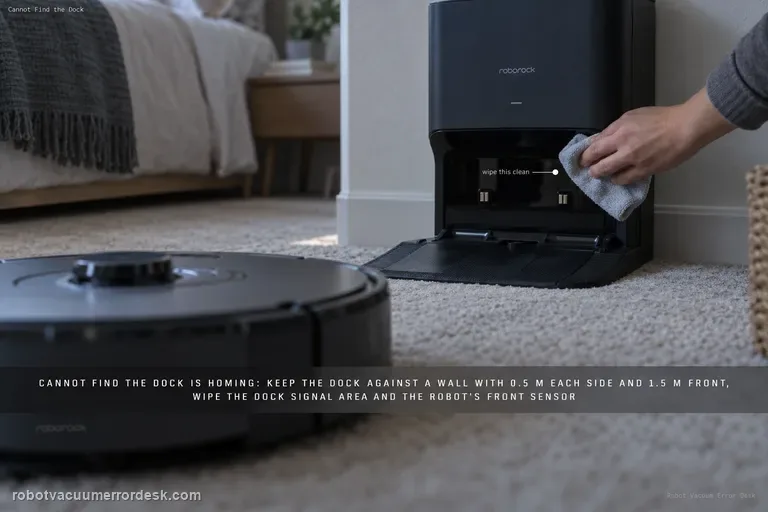
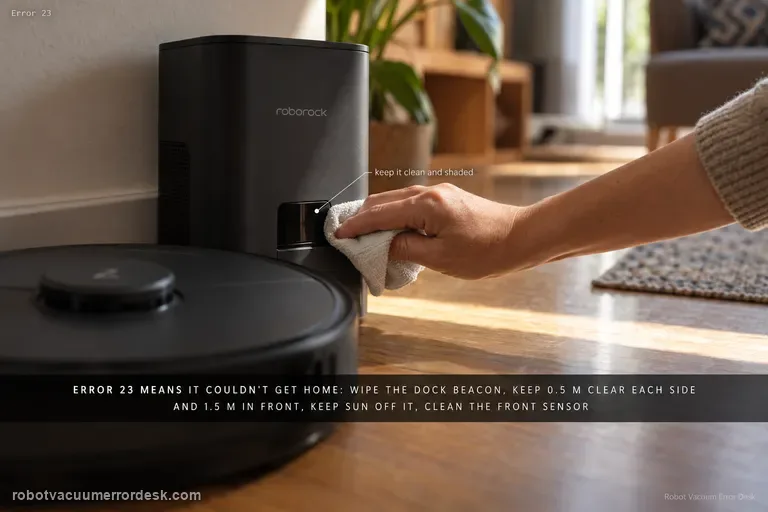
For a Qrevo that cannot find its RockDock, separate navigation from station functions. Roborock’s support says return can fail after manual relocation, a different start point, obstacles, poor dock clearance or dirty homing surfaces. Keep the station against a wall with about 0.5 m clear on each side and 1.5 m in front, clean the dock signal area and robot front sensor, then compare a near return with an automatic return after a real cleaning task. Do not treat a charging or mop-wash fault as the same problem once the robot has actually reached the dock.
Can't find dock
For an S7 that cannot find its dock, separate final homing from whole-home localization. Roborock says return can fail if the robot started elsewhere, was moved manually, meets an obstacle, or cannot see a correctly placed dock. Give the dock about 0.5 m of side clearance and 1.5 m in front, clean the dock signal area and robot front sensor, then run a nearby return. If nearby docking works but a normal mission fails, focus on the map/dock reference rather than charging hardware.
Error 7
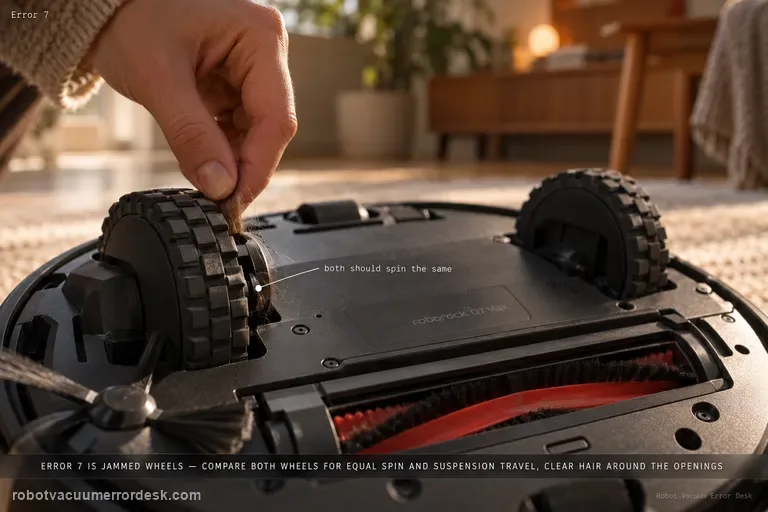
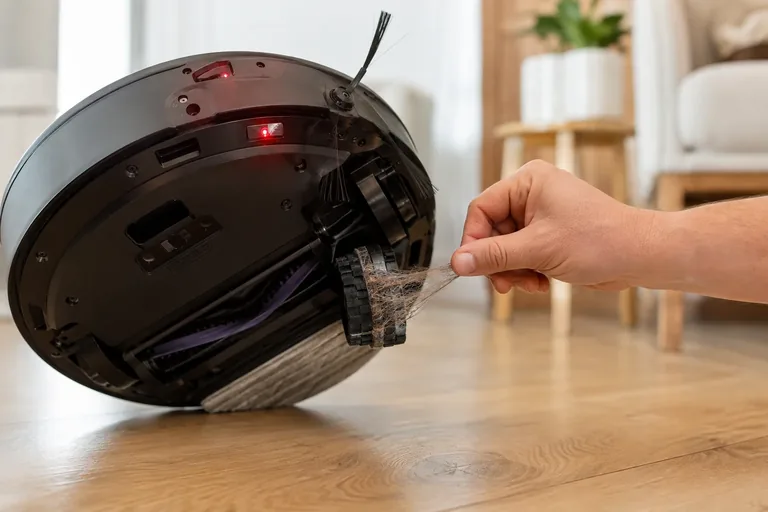
The Q7 Max manual defines Error 7 as “Wheels jammed. Move the robot and restart.” Before restarting, compare the two drive wheels for normal rotation and suspension travel and remove accessible hair or debris around the wheel openings.
CLEAN red + DOCK red + ! red
On the Shark Matrix 2-in-1, CLEAN red + DOCK red + ! red flashing means a drive wheel is stuck. Shark's owner manual tells you to clean the wheels and remove debris wrapped around the axles so they can move freely. Power the robot off, compare both drive wheels, remove accessible hair or thread, check that each wheel can compress and return through its normal suspension travel, then move the robot away from thresholds or objects that may have loaded one side. Restart on flat hard flooring. If the code clears, the original stop was consistent with a jam or external load. If one wheel still binds with no visible debris, or the same red/red/red pattern immediately returns on open flooring, stop forcing the mechanism and contact Shark.
DOCK red + ! red
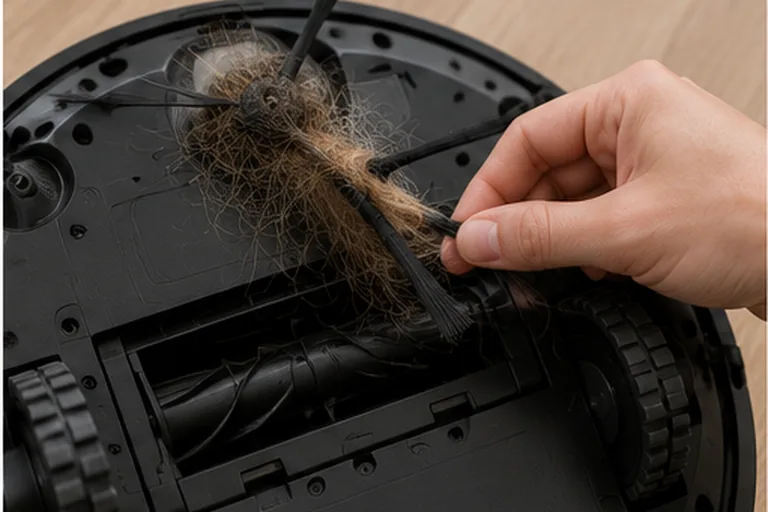
On the Shark Matrix Plus/2-in-1 error chart, flashing DOCK red plus ! red is the side-brush-stuck path. Turn the robot off, remove hair, thread and debris from around and underneath the side-brush hub, wipe the brush with a dry cloth, reinstall it on the correct peg and spin it by hand to confirm proper seating. Shark’s maintenance guidance says to replace a side brush that is bent, damaged or visibly worn rather than trying to run with the brush removed. Restart on open hard flooring away from rug fringe and cords. If the same light code returns immediately while the brush is clean, correctly seated and mechanically free, stop repeatedly driving the motor and contact Shark for the side-brush drive/electronics path.
CLEAN white + ! red
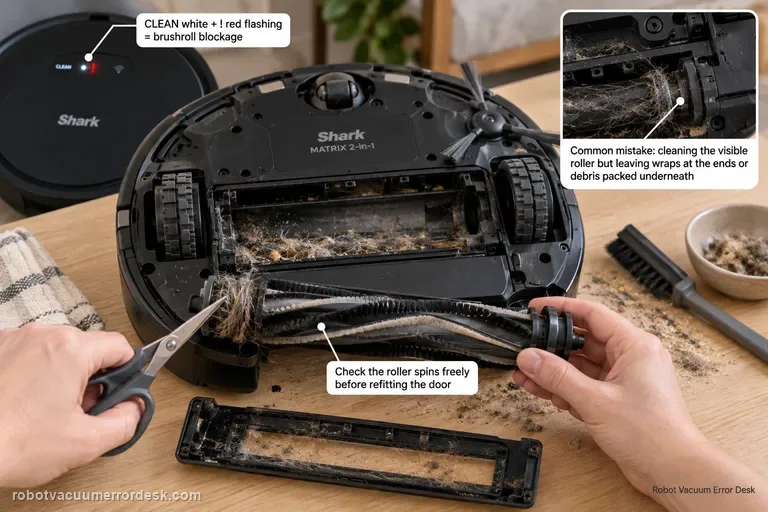
On the Shark Matrix 2-in-1, CLEAN white + ! red flashing is the brushroll-blockage pattern. Power the robot off, remove the owner-serviceable brushroll and door, cut or pull away hair and thread from the roller and end areas, clear debris from the chamber, then make sure the brushroll can move normally before reinstalling the door. A common diagnostic mistake is to clean the visible roller surface but leave wrapped material at an end or packed debris under the roller. After reassembly, test on open hard flooring. If the roller is mechanically free, the door is fully latched and the same white/red pattern returns immediately, stop forcing the brushroll and contact Shark for the drive/service path.
CLEAN green + DOCK green + ! red
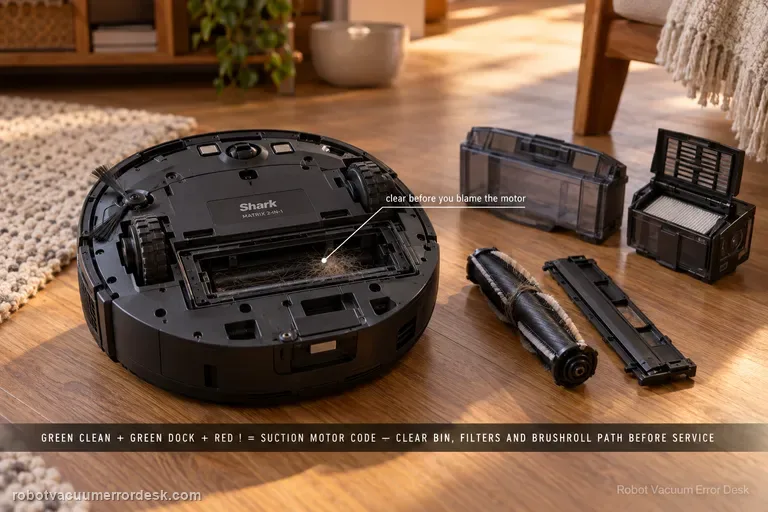
The Shark Matrix 2-in-1 manual maps CLEAN green + DOCK green + ! red flashing together to suction motor failure, but Shark's first remedy is an airflow-path cleanup: empty the dust bin, clean the filters, remove the brushroll and brushroll door, and clear blockages. Follow that order before concluding the motor itself is defective. A loaded filter or packed inlet can make the suction system work abnormally even though the LED chart uses a motor-oriented label. After maintenance, reinstall every airflow component correctly and run a short hard-floor test. If the same green/green/red pattern returns with a clean bin, serviced filters and clear brushroll chamber, stop opening more parts and contact Shark.
Won't dock
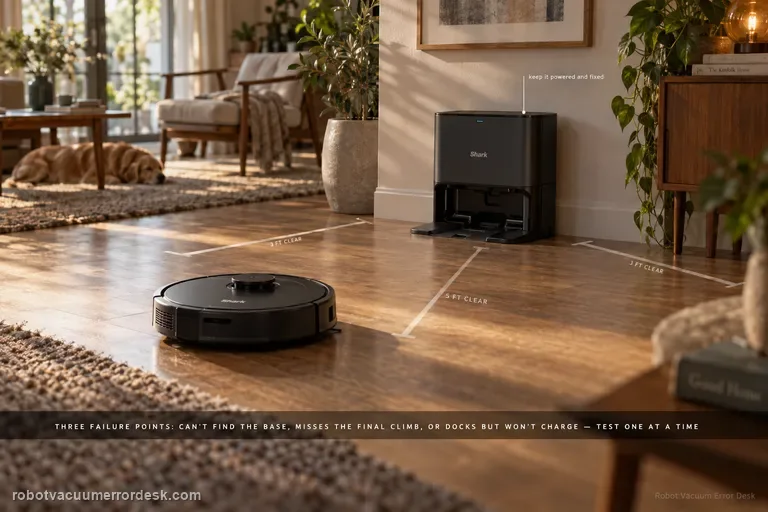
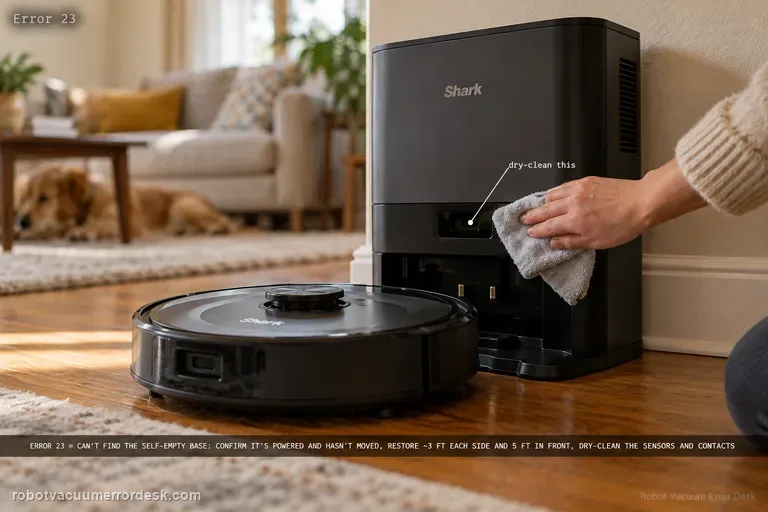
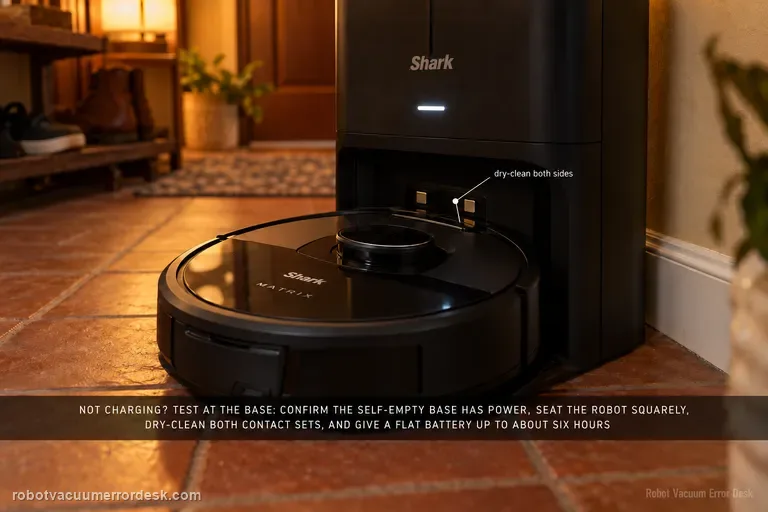
A Shark Matrix that 'won't dock' can fail at three different stages: it may not find the Self-Empty Base at all, it may find the base but miss the final climb/alignment, or it may park correctly and still fail to charge. The RV2300-series manual gives Error 23 for the first case. Start by proving base power and restoring about 3 ft of side clearance and 5 ft in front, keep the base fixed, then run a short Dock test. If the robot reaches the base, inspect wheel movement and dry-clean contacts before blaming navigation. If it docks squarely but does not charge, use the charging guide. This staged approach prevents remapping a robot whose actual problem is contact alignment or battery charging.
CLEAN white + DOCK red + ! red
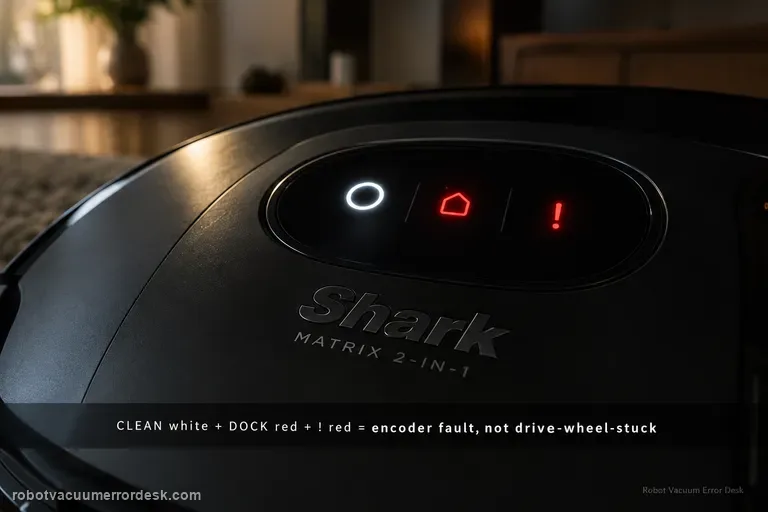
On the Shark Matrix 2-in-1, CLEAN white + DOCK red + ! red flashing is the wheel motor encoder failure pattern. That is deliberately different from the drive-wheel-stuck pattern, which uses CLEAN red + DOCK red + ! red. Use that distinction before cleaning anything. With power off, compare the two drive wheels for obvious external hair, trapped debris, unequal spring travel or one wheel that will not turn normally. If the wheels are externally clear and move similarly yet the encoder pattern returns on a level open-floor restart, the owner manual does not give an internal encoder repair; it directs you to Shark Customer Service. Treat the external wheel check as a way to rule out a simple bind, not as permission to open the drive module.
Laser sensor error
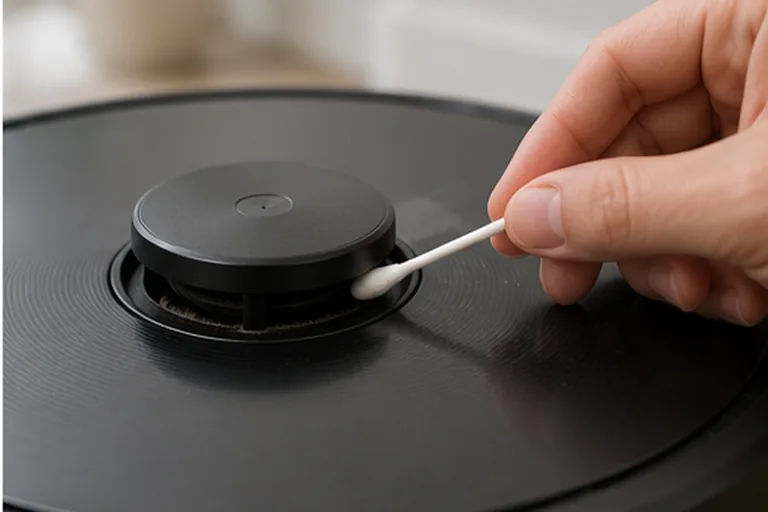
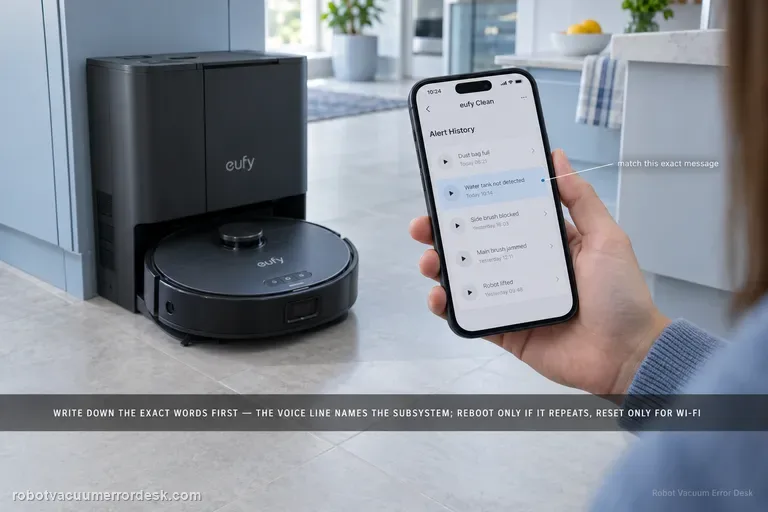
Start by writing down the exact X10 Pro Omni voice prompt, because eufy distinguishes four useful states: laser sensor stuck, laser sensor blocked, laser sensor error, and laser sensor cover stuck. Then power the robot on and watch the radar/LiDAR. If it rotates, clean the emission and reception apertures. If it does not rotate, remove the dustbin, gently invert/shake the robot as eufy instructs and verify the radar is not externally obstructed. If the cover-stuck prompt remains, press the cover only enough to confirm its normal click. A persistent hardware 'laser sensor error' after these external checks is a support case, not a reason to open the LiDAR module.
Roller brush stuck
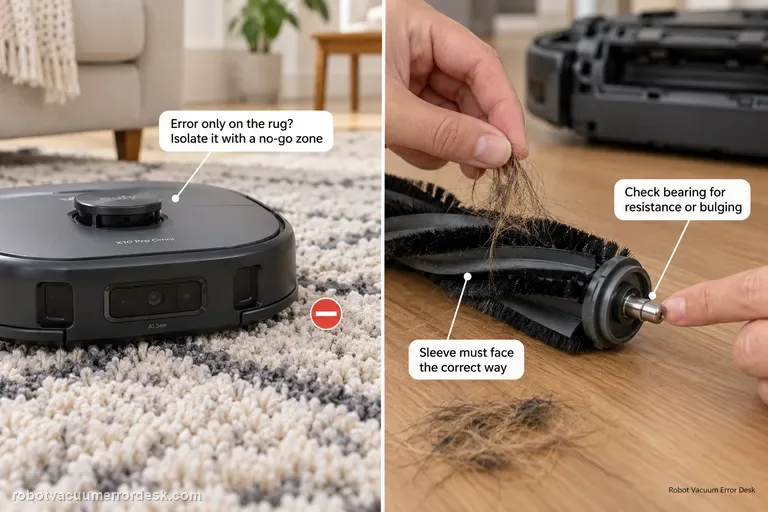
Separate surface overload from a real roller fault. First run the X10 Pro Omni on hard floor: if the error happens only on a high-pile rug, eufy recommends isolating that rug with a no-go zone. If it happens on hard floor too, remove the roller, clear hair from the middle and both ends, inspect the silver shaft/bearing for resistance or bulging, verify the sleeve is installed in the correct orientation, then retest.
Suction fan error
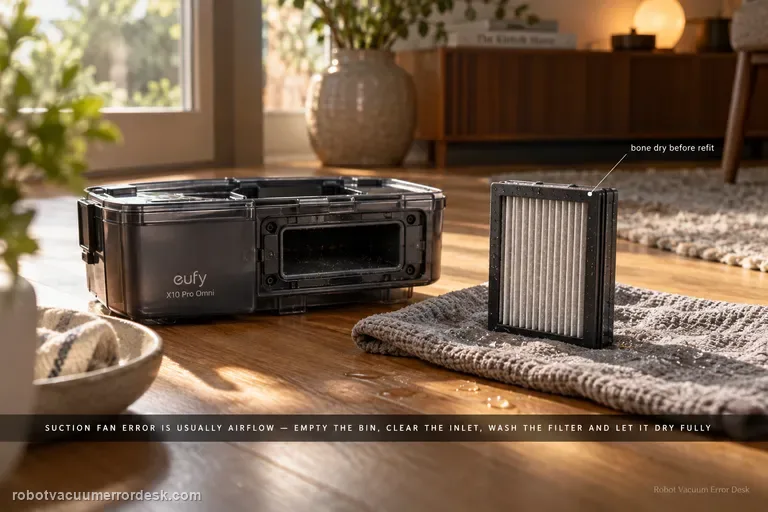
For an X10 Pro Omni suction fan error, prove the airflow path is open before assuming the fan motor has failed. Empty the dustbin, clear the bin inlet, clean the filter, and if the filter is washed with cold water let it dry completely before reinstalling it. Then run one short suction test; an immediate repeat with a clean, dry airflow path is the point to escalate.
Insufficient water
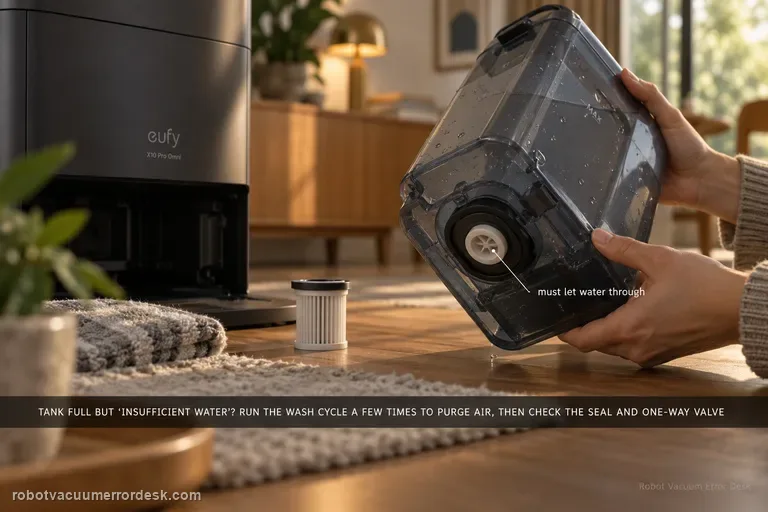
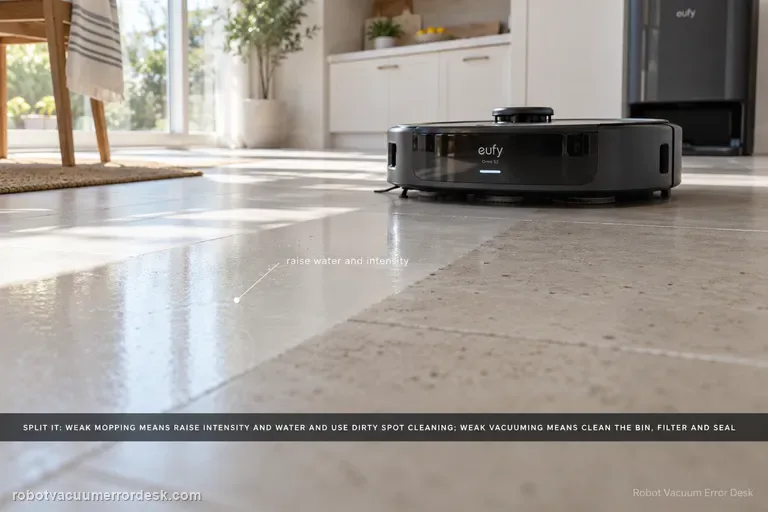
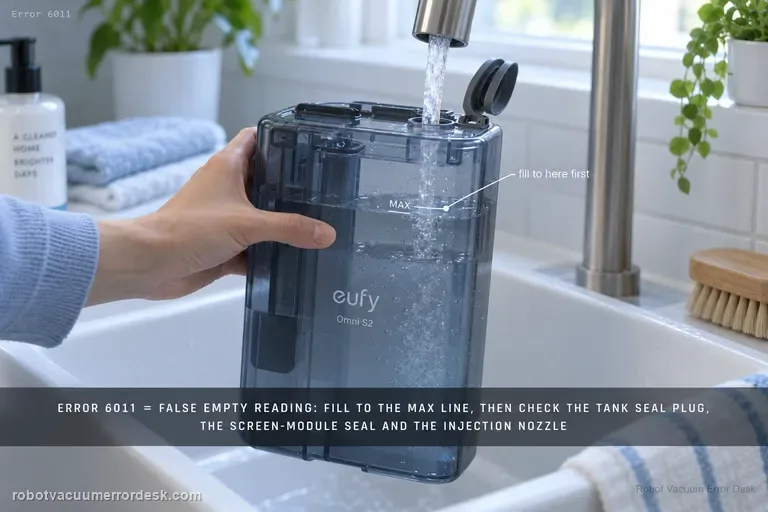
If the clean tank is filled but the station says water is insufficient, run the mop-washing task several times first; eufy notes trapped air can affect pumping. Then inspect the clean-water tank sealing ring and one-way valve behavior. Also inspect the clean-water filter and the tank-to-station water pipe; a full tank does not prove the supply path is open.
Wi-Fi won't connect
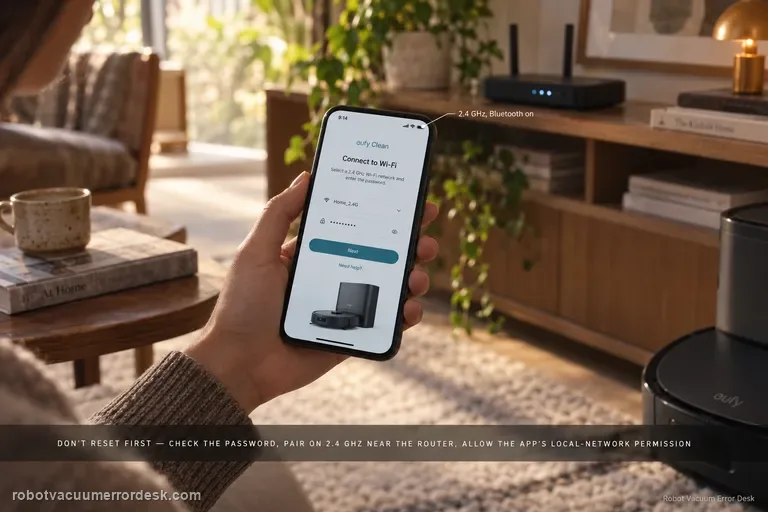
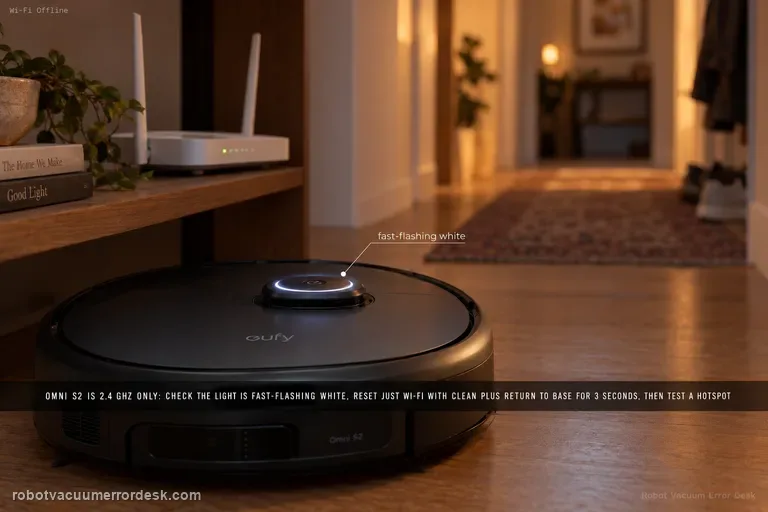
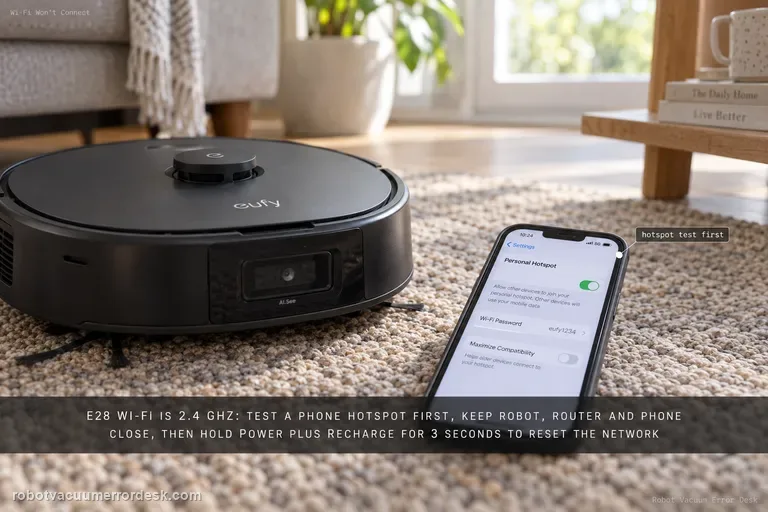
For X10 Pro Omni Wi-Fi setup, do not jump straight to factory reset. Confirm the network name/password, move the phone and robot closer to the router, allow eufy Clean location/precise-location and local-network permissions, pair on 2.4 GHz with Bluetooth enabled, then reset only the robot’s Wi-Fi by holding Home + Spot Cleaning for three seconds. If setup still fails, a phone-hotspot test can separate router configuration from robot/app problems.
Voice alerts
Treat the exact X10 Pro Omni voice prompt as the diagnostic key. Record the wording first, apply the matching quick solution in eufy’s alert table, then reboot the robot if the alert remains. Use the three-second Home + Spot Wi-Fi reset only for Wi-Fi faults; eufy’s separate Reset-button forced recovery is a power-off recovery and is not the same as a factory reset.
Not charging
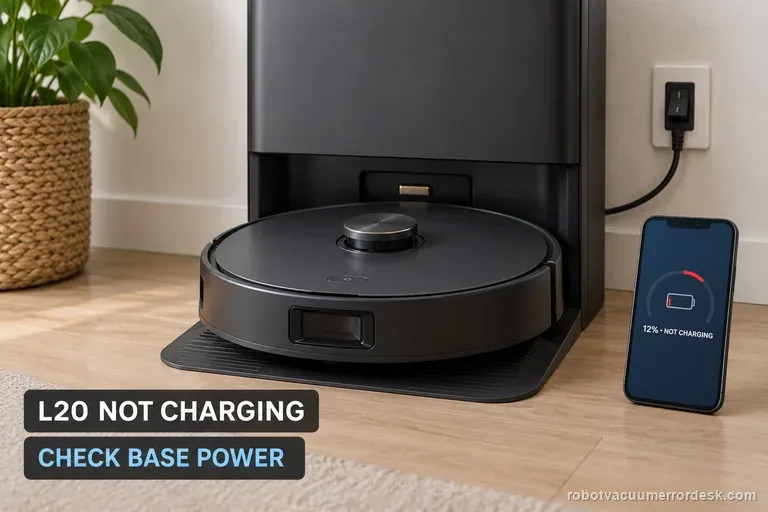
For an L20 Ultra that is already seated at the base but is not charging, prove station power before blaming the battery. Dreame’s charging guidance says to verify both ends of the base power cord and the rear power switch, then disconnect power and clean/realign the charging contacts. The exact L20 Ultra manual adds one more owner-safe check: remove any visible foreign object at the robot connector. Manually seat the robot and watch for a real battery-percentage increase; a return-to-base failure is a different navigation branch.
No wash water
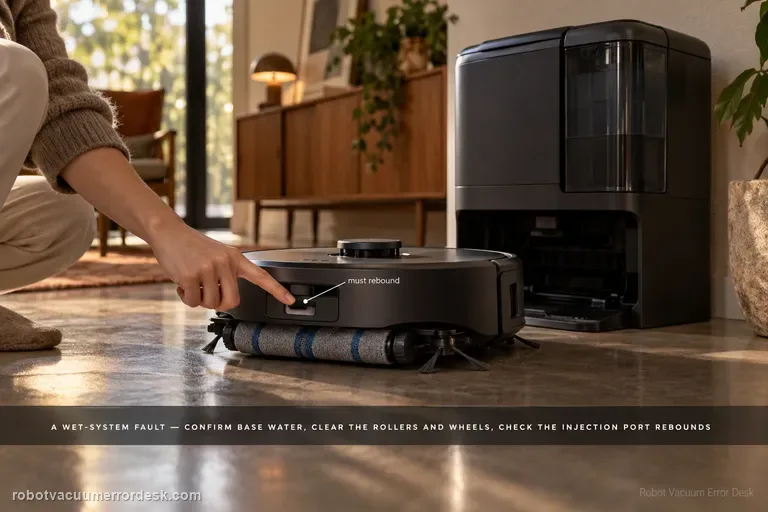
This page is specifically for an L20 Ultra base that does not put water into the washboard while washing the mop pads. Dreame’s exact base-station procedure says to rule out incompatible cleaner, inspect the clean-water tank seal/piping interface, remove the robot and hold the base dock button for about 3 seconds to test water output. If the base can wash the pads but the robot later mops with no water, that is a different onboard-water path: Dreame now uses a holder-only five-minute flow test and checks the robot’s bottom water outlets.
Misses areas
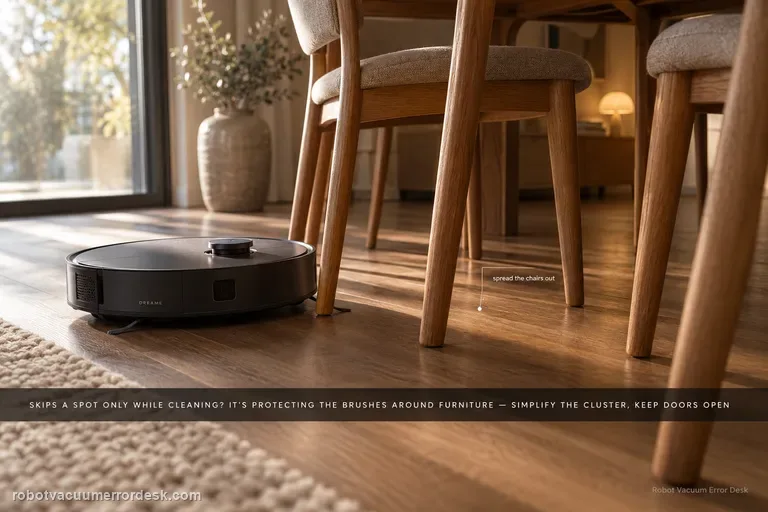
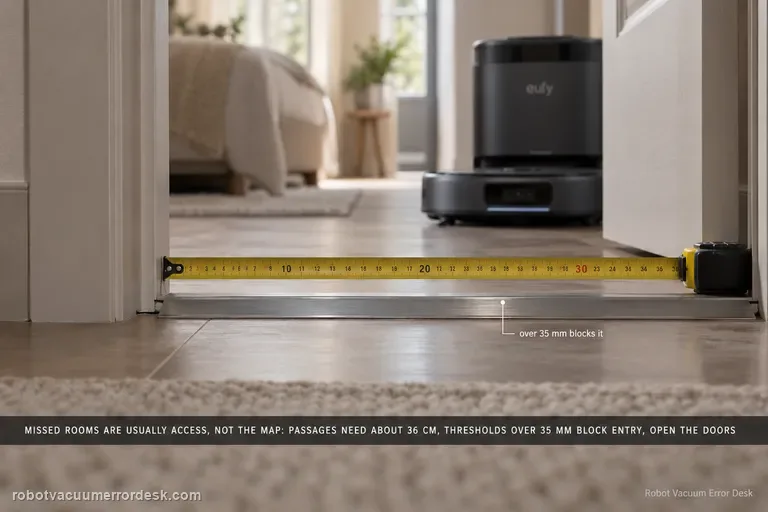
When an L20 Ultra can reach a spot in Whole-House Cruise but skips it during cleaning, Dreame says cleaning can deliberately treat chair legs or multi-wheel furniture as wall/obstacle geometry to protect the brushes and mop pads. First simplify that local furniture cluster and rerun the same room without deleting a good map. For whole rooms that are missed, the exact manual adds a different access check: keep the door open, look for a threshold above about 2 cm, and dry any wet or slippery approach before calling it a navigation fault.
MopExtend not working
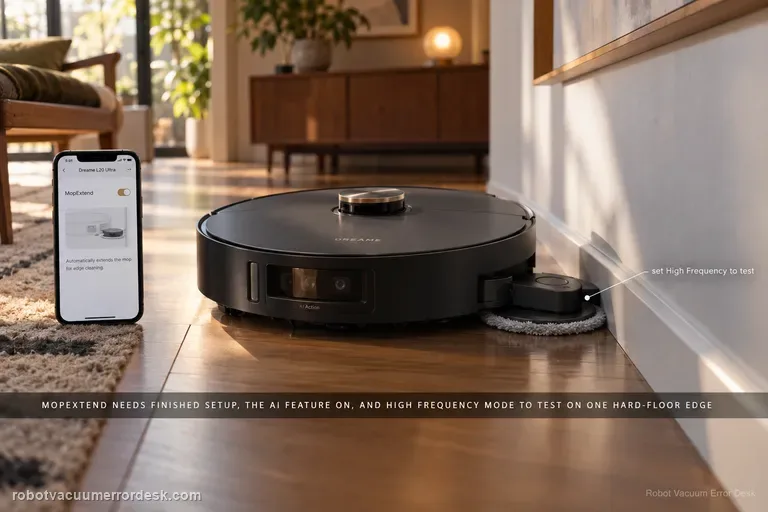
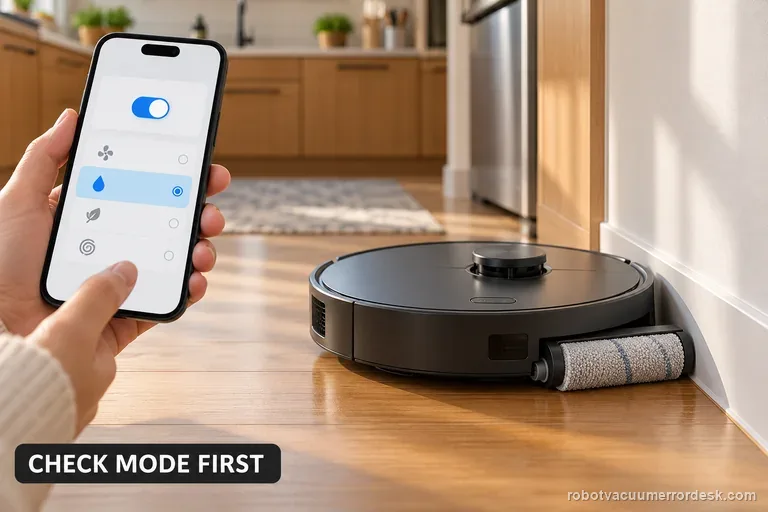
A non-extending L20 Ultra mop is often a settings/expectation problem before it is a failed actuator. Dreame’s current MopExtend article says the robot must finish network setup, AI-driven MopExtend must be enabled, and the selected mode matters: Standard runs the feature about once a week in Global Cleaning, Intelligence adjusts it by scenario, and High Frequency attempts extension during every cleaning. Use High Frequency on one clear hard-floor edge as the clean mechanism test.
Base station repair
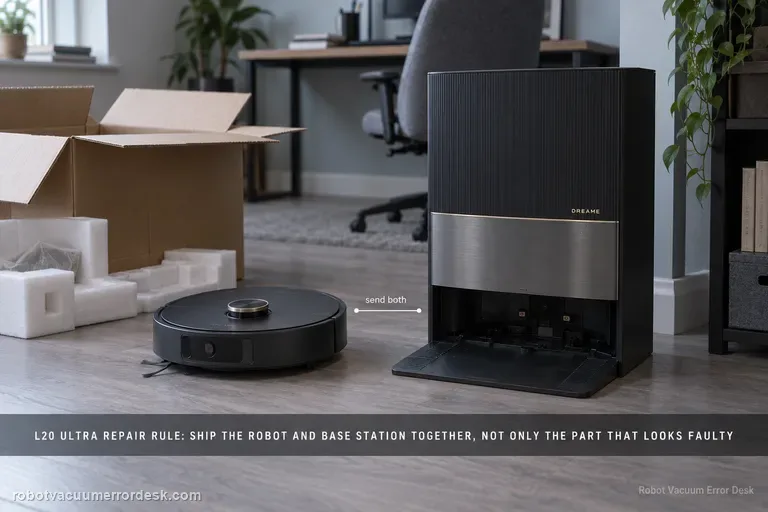
Dreame’s current send-in matrix gives the L20 Ultra a model-level rule before the general symptom table: send the robot and base station together. That means you should not self-select only the component that appears faulty for charging, no-water, dock-finding or other paired-system failures. The matrix answers the major-hardware scope; the active support ticket still controls liquids, tanks, dust bags, mop pads and other accessories, so document the symptom and follow the case-specific packing list.
Not charging
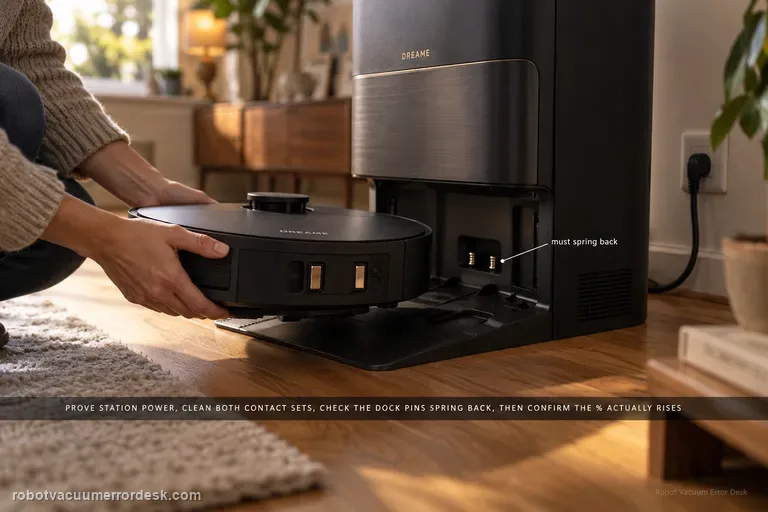
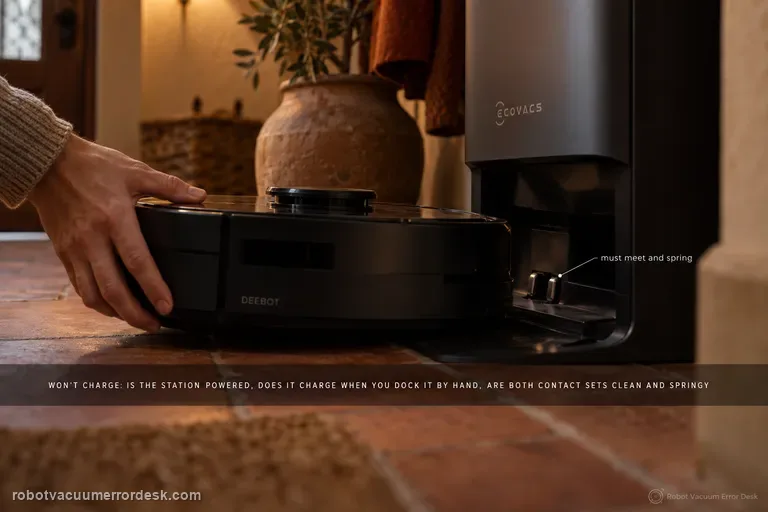
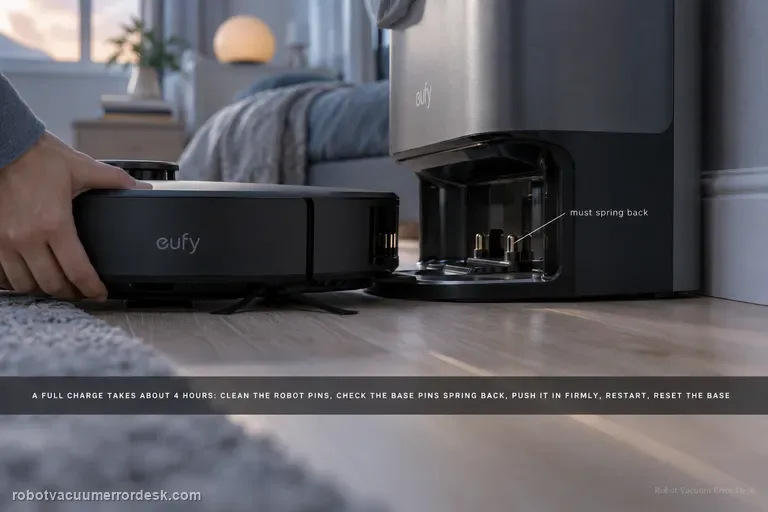
Use the X40 Ultra’s current charging and docking pages before blaming the battery. First prove the station has power and both ends of its cable are fully seated. Clean the robot and station charging contacts, then check that the station’s exposed charging pins are not stuck and spring back normally. Put the X40 directly into the dock and listen for the “Start charging” prompt; then confirm the battery percentage actually rises. If manual docking charges but an autonomous return does not, move to the separate docking/return path. If a correctly seated X40 still will not acknowledge charge, Dreame’s current X40 support allows a robot restart; a factory reset is a later step and erases maps, so preserve evidence before using it.
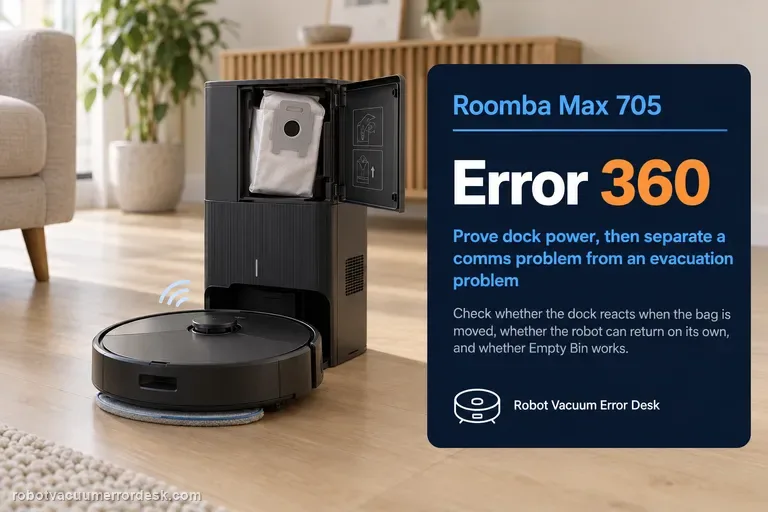
Error 360
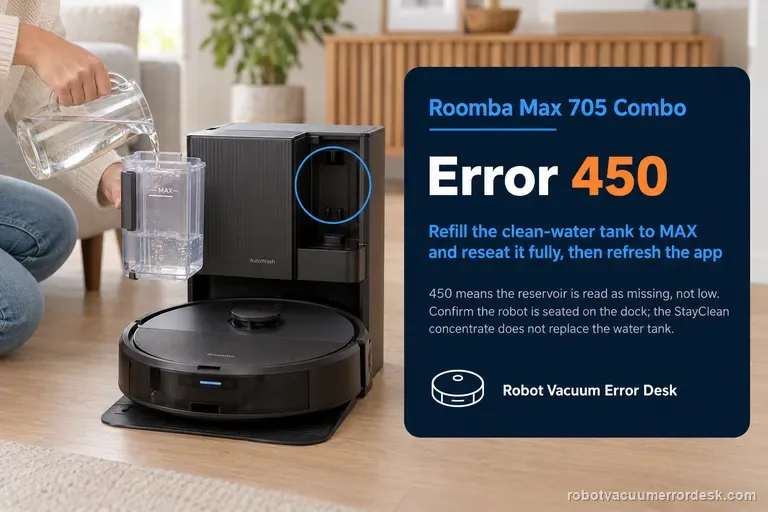
Error 360 on the Roomba Max 705 belongs to the robot-to-dock communication and debris-evacuation path. Do not treat it as a generic charging warning. iRobot’s current Max 700 procedure first proves that the AutoEmpty/AutoWash dock has power, then separates a communication problem from an evacuation problem. A useful check is whether the dock reacts when the bag is partially removed, whether the robot can return to the dock by itself, and whether an Empty Bin command appears and works. If manual evacuation works but the app control is missing, clean the dock sensor window and robot bumper with the approved dry method. If the robot was simply placed on the dock by hand, send it away and press HOME so it self-docks; iRobot notes that automatic emptying is tied to a normal self-docking event. Finish with a reboot only after power, sensors, contacts and docking behavior have been classified.
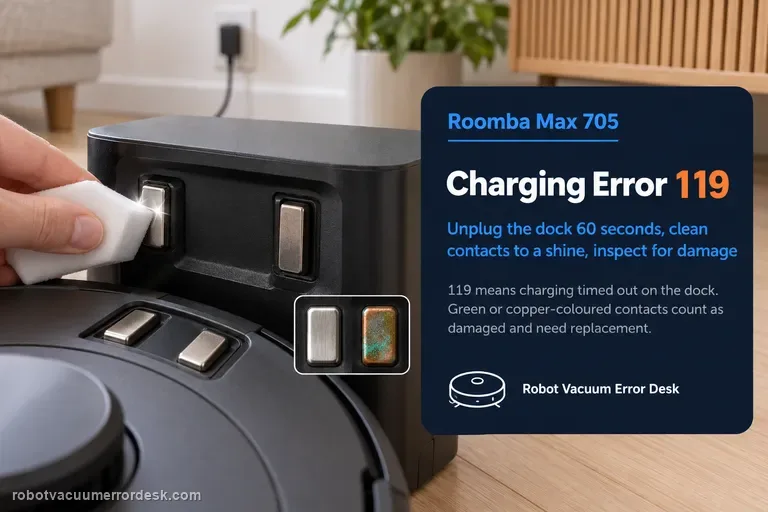
Charging Error 119
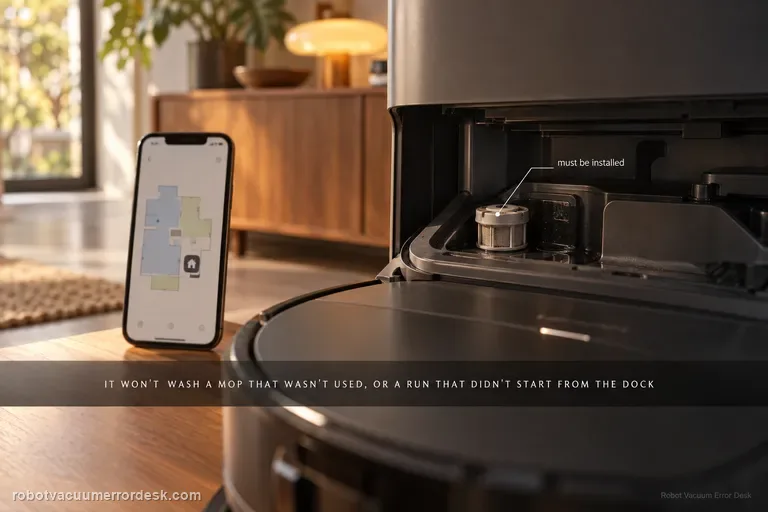
Charging Error 119 means the Roomba is on the dock but charging timed out. iRobot says the most common cause is charging contacts that need maintenance or are damaged. Start by unplugging the dock for 60 seconds, then clean the metal contacts on both robot and dock with a lightly dampened melamine foam or cloth until they have a visible shine. Inspect the contact color: green or copper-colored contacts are considered damaged and the affected robot/dock may need replacement. Confirm the dock has power, then use iRobot’s ship/sleep-mode reactivation path or remove and reinstall the battery to clear the error. The Max 705 Combo is specifically pictured in the manufacturer article, so this is not a generic older-Roomba guess.
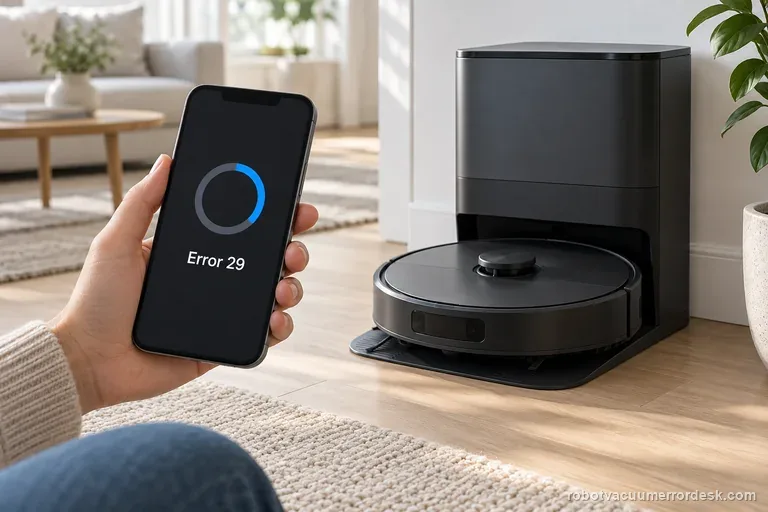
Error 29 / update interruption
Error 29 on the Roomba Max 705 is a software-update interruption, not a motor, brush or dock-mechanism code. iRobot’s Max 700 release notes explicitly say version 7.5.2 included further improvements for update interruptions reported as Error 29. Recovery should therefore preserve the conditions needed for a clean software delivery: keep the robot on reliable dock power, confirm the Roomba Home App can reach it, keep Wi-Fi stable, and check the installed software version before attempting destructive resets. New Max 700 robots are especially dependent on successful provisioning: iRobot says units shipping with factory version 7.2.3 or later must connect to the cloud before their first cleaning mission, although they can later be used offline after setup. Because iRobot rolls releases out over several weeks, an update not appearing immediately is not proof that the robot is stuck. The useful question is whether the same Error 29 repeats while the robot is powered, provisioned and online.
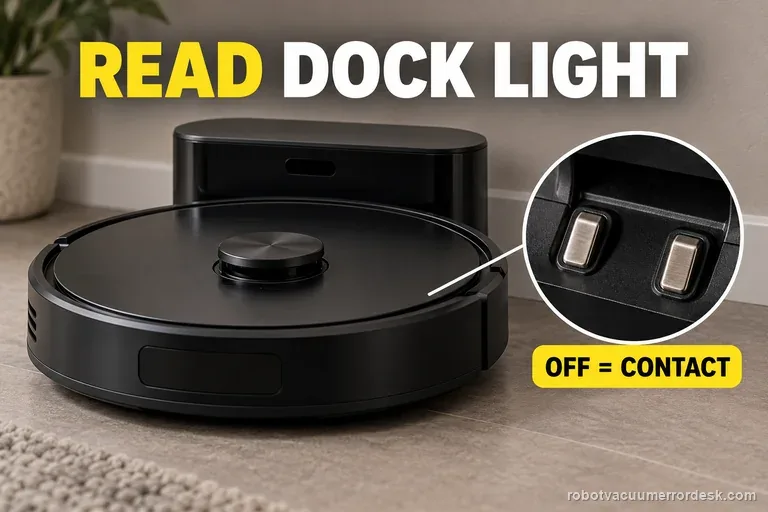
Unable to charge
Start with the dock indicator while the Qrevo Curv is seated. Roborock’s current model support says the dock light should turn OFF when the robot and dock charging contacts are properly connected and charging is working; if the light stays ON, the contacts are not making the expected connection. Reposition the robot until the light turns off, then clean both contact sets if needed. Roborock allows a dry cloth, a cloth lightly moistened with alcohol, or an eraser for stains/oxidation. If contact alignment still fails, prove the dock power cable and wall outlet. This sequence is more useful than replacing the battery first because it tells you whether the electrical interface has even been established.
Won't return to dock
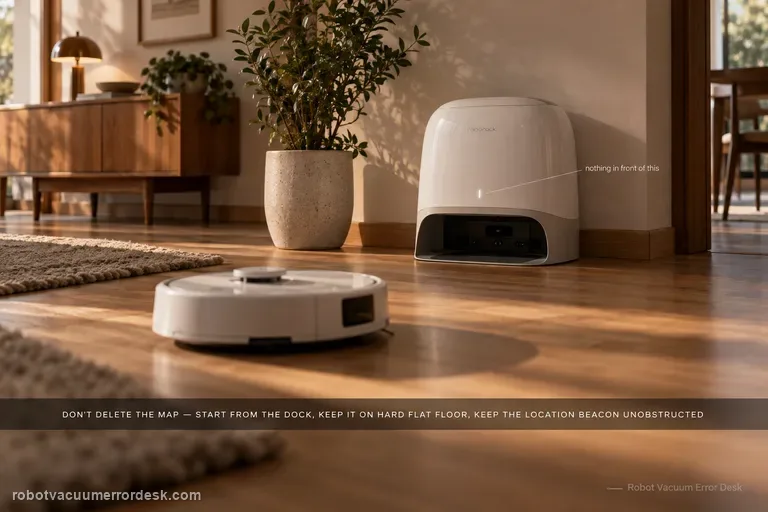
Do not delete the map first. For Qrevo Curv / CurvX, Roborock’s manual says reliable automatic return depends on starting from the dock, leaving the dock in place during the task, keeping the dock on a hard and flat surface, and keeping the dock-location beacon unobstructed. Its troubleshooting table then narrows a failed return to obstacles near the dock, excessive distance, or dirty wall/cliff/carpet sensors. A close-range return test is useful because success from nearby proves the robot can still see and physically seat on the dock, shifting the investigation toward route context or long-range localization rather than a dead dock.
Won't connect to Wi-Fi
Qrevo Curv does not need a map or system reset just because app connectivity fails. Roborock documents a dedicated Wi-Fi reset, and its current Qrevo Curv support page says the robot connects on 2.4 GHz rather than 5 GHz. Prove that a usable 2.4 GHz network exists, reset only the robot's Wi-Fi, pair near strong coverage, and only then work on router band settings. A successful Wi-Fi reset followed by repeated failure on one router points away from the map and toward network configuration.
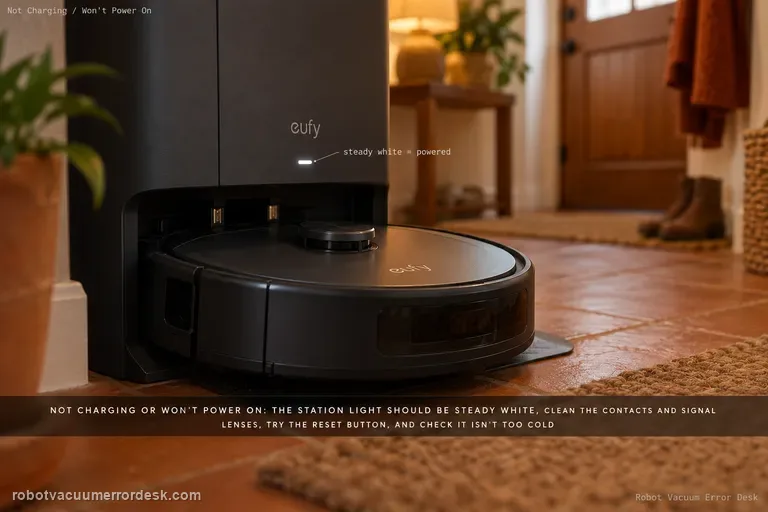
Won't power on
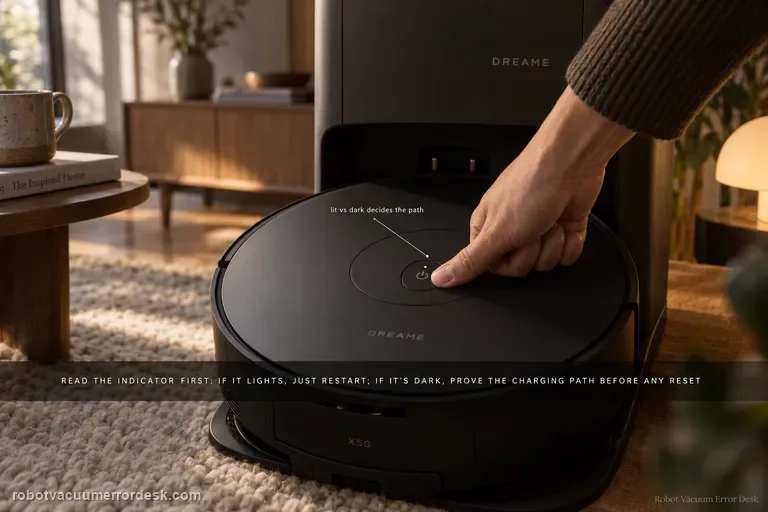
Do not jump straight to factory reset. Dreame’s exact X50 article first splits the diagnosis by the Power/Clean indicator. If the indicator lights, the robot has enough life to try a restart; reset is a later branch. If the indicator does not light, prove the charging path: base power, both ends of the power cord, clean robot/base contacts and a manual alignment on the dock. Dreame also says to hold Power/Clean for 3 seconds while docked if it does not start automatically. Only after those checks does the article return to reset, and it warns that factory reset clears all data including saved maps.
Docking failed
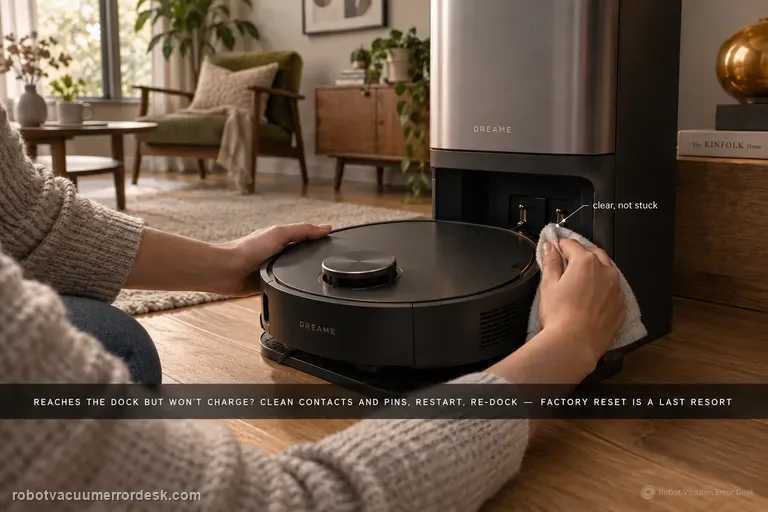
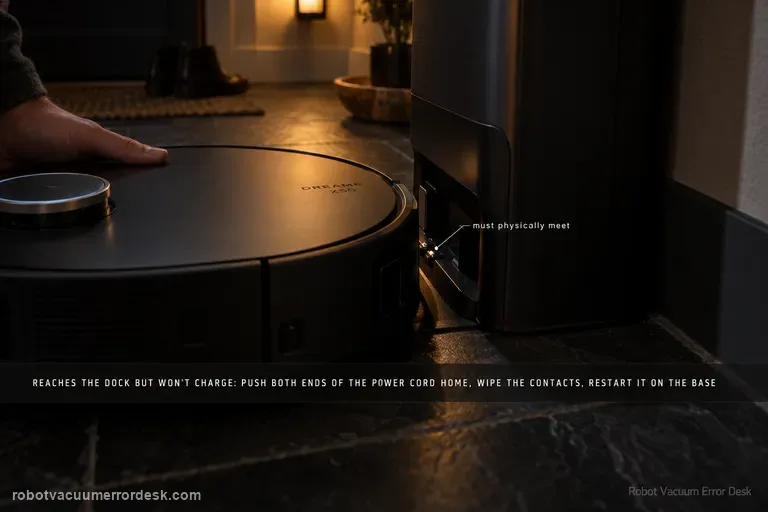
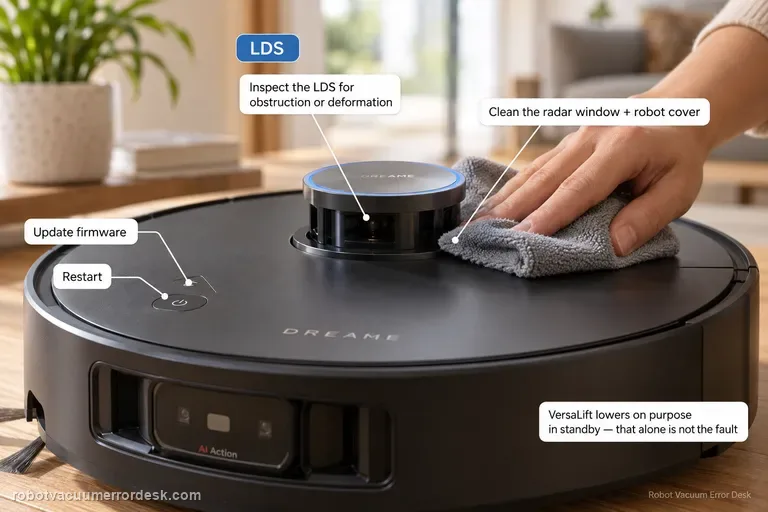
Use this guide only when the X50 reaches the dock area but repeatedly seats, backs out or fails to establish charging. Dreame’s exact Docking Failed article starts with the robot charging contacts and the dock’s metal pins: remove dust/foreign matter and confirm the pins are not stuck and can rebound. Then remove the robot, restart it, place it back on the dock and listen for the 'Start charging' voice prompt. Factory reset is third, not first, and Dreame warns that it erases saved maps. If the robot cannot find the base from 1–2 meters away, that belongs to the separate return-to-base path with power, placement, LDS and wheel checks.
Can't find base
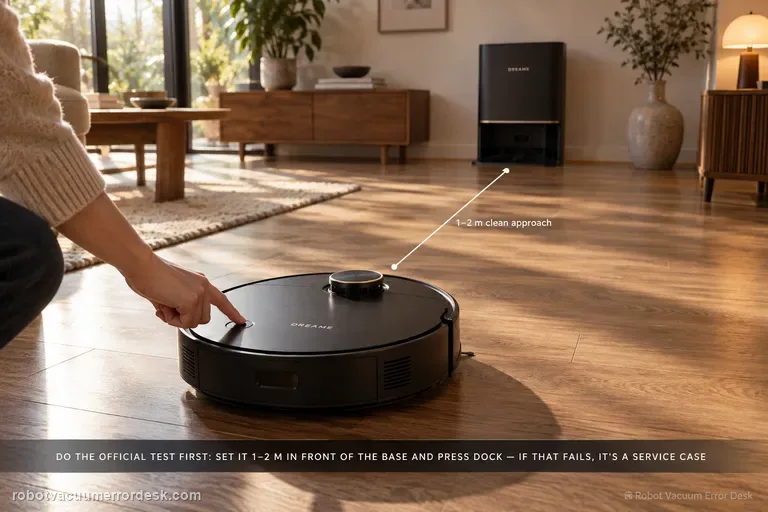
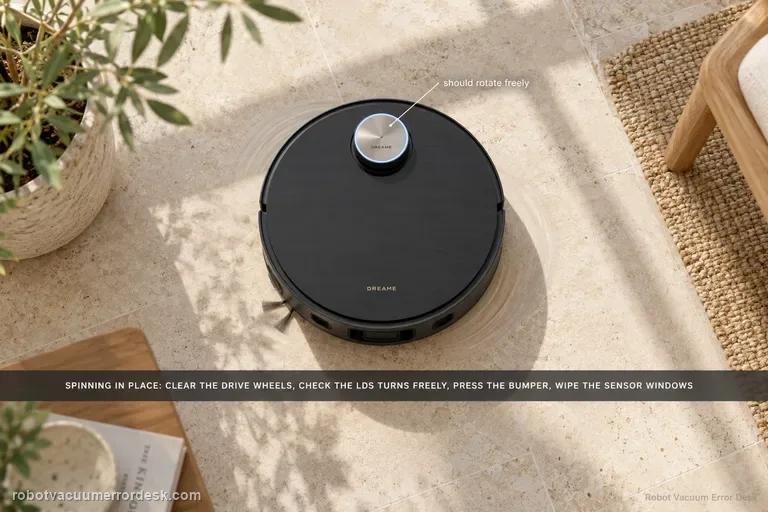
Start with Dreame’s short-range proof test, not a map reset. Confirm the base is powered, place the X50 about 1–2 meters in front of it, then press Dock. If the robot cannot return from that short clean approach, Dreame says to contact after-sales rather than treating the problem as a normal room-layout issue. If the short-range return works, move to placement: keep the station against a wall with about 1.5 m clear in front and 0.5 m on each side, away from routers/TVs and mirror-like surfaces. Then confirm the robot normally starts from the base, the top LDS rotates, drive wheels move freely, and the ramp extension is clean. Restart/reset is a late branch because Dreame warns that reset clears saved data including maps.
Map not saving
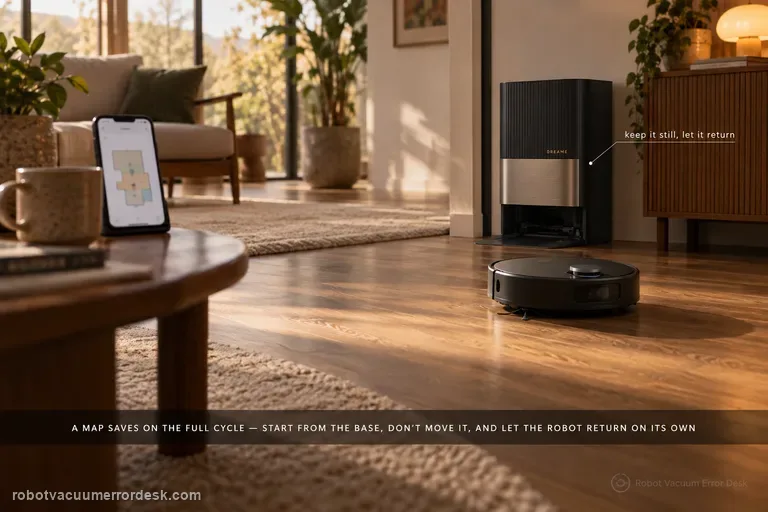
For the X50, a map is not just a drawing created at startup; Dreame ties reliable saving to the full mapping/cleaning cycle. Update firmware first, place the base where it can stay fixed with clear surroundings and good Wi-Fi, then rebuild the map only after that setup is stable. Start the robot from the station and do not move the base during the task. Most importantly, let the robot finish and return automatically: Dreame warns that manually sending it to charge or physically placing it on the base because the battery is low can prevent the map from saving successfully. If an alarm occurs while the robot is building the map, resolve it promptly and resume from a cleaned area rather than judging the final map while the task is still faulted.
Not charging
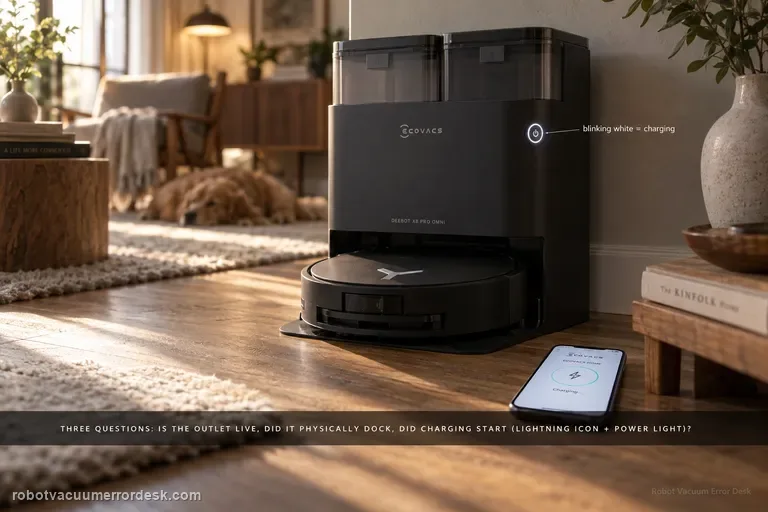
Treat X8 Pro Omni charging as three separate questions: does the station have power, can the robot make a correct physical dock, and does electrical charging actually begin once the contacts touch? ECOVACS’ exact X8 support says to confirm a live outlet and the station cord, switch the robot to I, try an automatic return, then manually dock if the robot will not power on. A blinking white power-button light and the lightning icon in ECOVACS HOME are the evidence that charging has started. If neither automatic nor manual docking charges, clean both contact pairs and confirm the station contacts press down and spring back normally. If a powered station and a manually seated robot still show no charging indication after those checks, stop treating the symptom as navigation and escalate it as a charging-hardware case.
Won't return to station
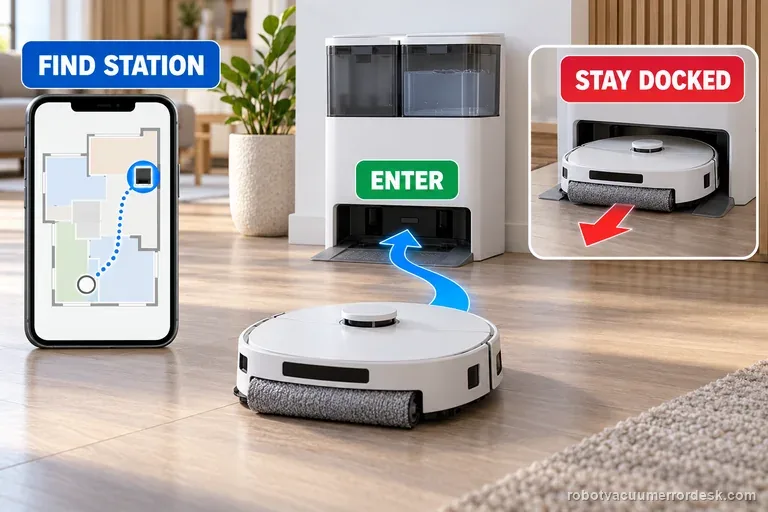
Do not treat every X8 return failure as the same problem. ECOVACS’ current station-return guide explicitly splits two cases: the robot cannot locate the station, or it locates the station but cannot enter/remain docked. For the first branch, prove station power and original placement, clear the return route, use a level floor, resolve any alarm and check whether the station icon still exists on the map; a missing icon can force low-success exploratory charging and may require manually charging the robot before rebuilding the map. For the second branch, dry the station tray and surrounding floor, verify the roller mop plus removable base/washing tray are installed correctly, clean charging contacts and confirm spring rebound. A short return test from in front of an unchanged station then tells you whether navigation or the final docking interface is still failing.
Won't connect to Wi-Fi
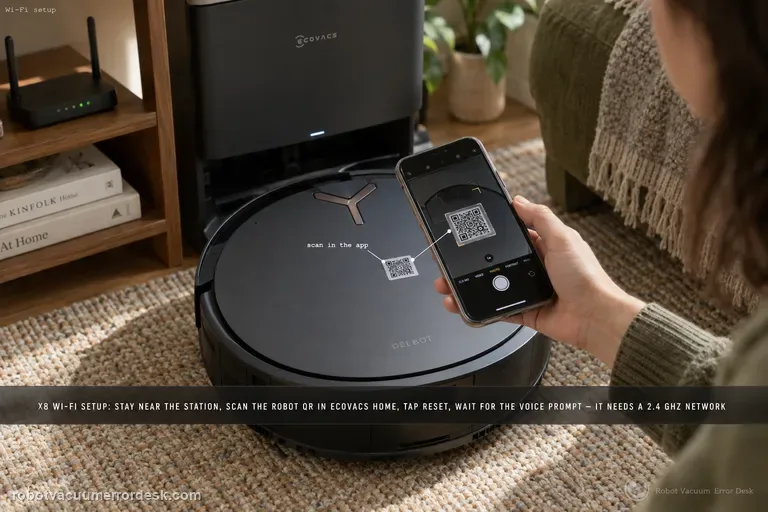
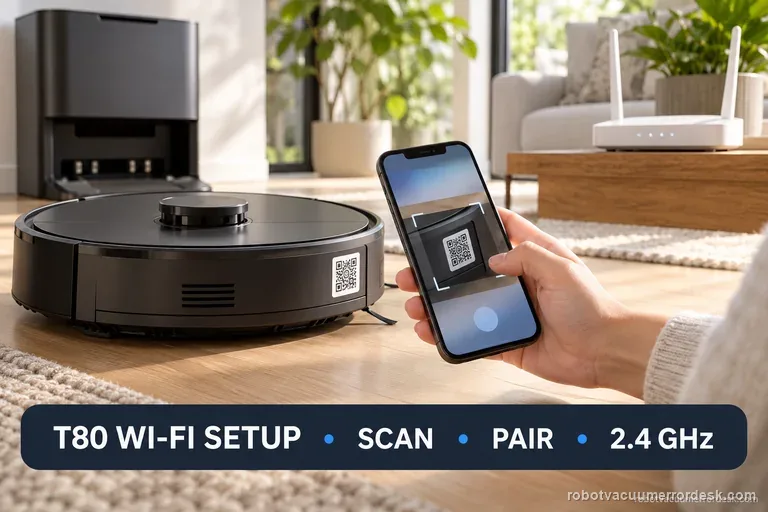
Follow the X8’s connection sequence before changing router settings: keep the robot near the station, sign in to ECOVACS HOME, scan the robot QR code, power the robot on, briefly press Reset and wait for the network-setup/Bluetooth-hotspot voice prompt, then let the app complete the join in strong Wi-Fi coverage. The X8 manual adds the useful compatibility boundaries: a 2.4 GHz or mixed 2.4/5 GHz network, 802.11b/g/n with IPv4, no VPN/proxy or hidden SSID, WPA/WPA2 rather than enterprise authentication, and matching SSID/password on an extender. If pairing fails, first identify whether discovery fails before credentials are sent or whether the robot is discovered but cannot join the home network. Those are different failures and should not be “fixed” by deleting maps or factory-resetting the robot.
Error 1011
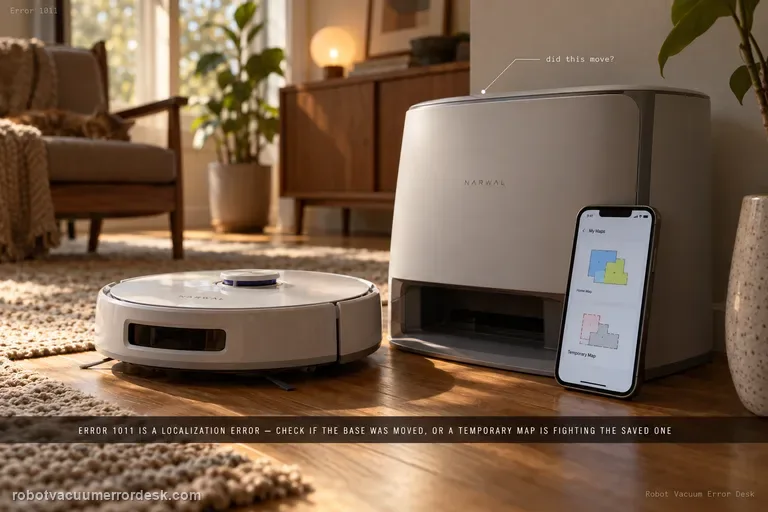
Narwal defines Error 1011 as a localization error. Check whether the base station was moved; if it was, remapping may be required. Also check whether the robot is operating on a temporary map that no longer matches its physical location.
Error 1012
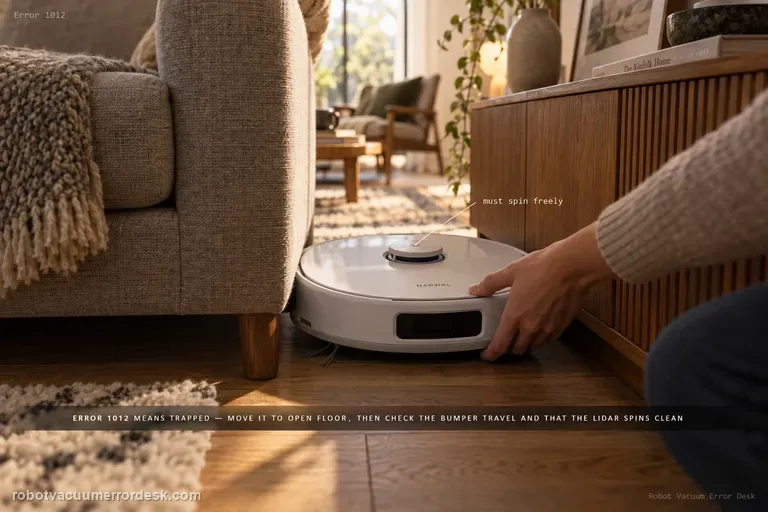
Error 1012 means the robot is trapped. Move the Freo Z Ultra into an open area and remove surrounding obstacles, then check the bumper, whether it can return to base, and whether the LiDAR rotates normally without a red warning.
Error 1013
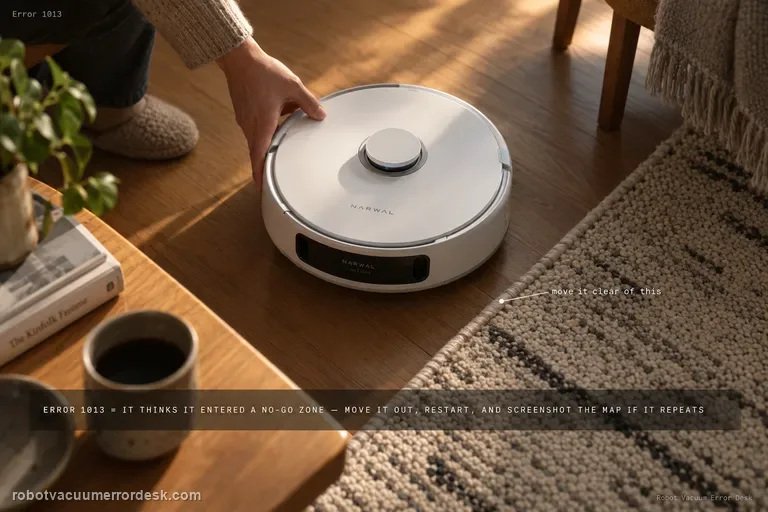
Error 1013 means the robot believes it entered a No-Go Zone. Move it out of the restricted area and restart. If the error repeats, save a screenshot of the map and restricted zones, the robot location, and the exact error message before changing boundaries.
Error 2003
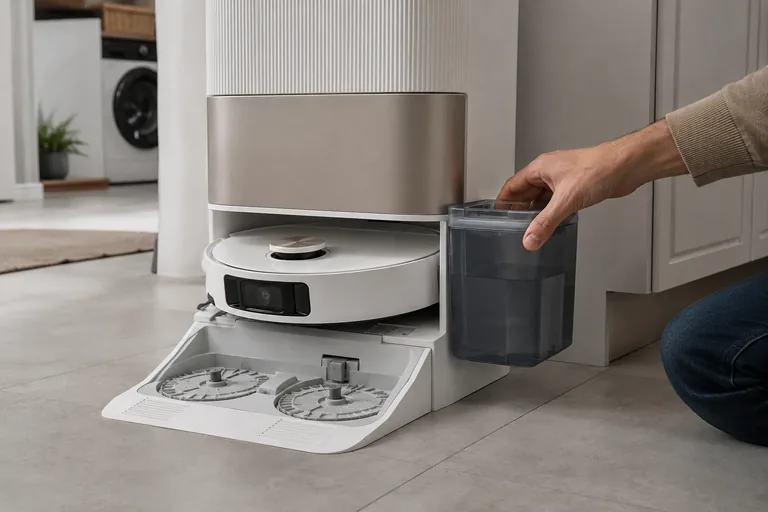
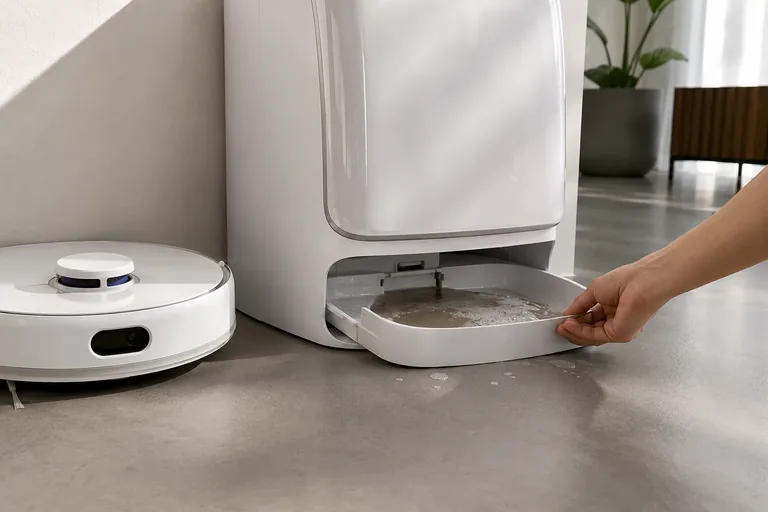
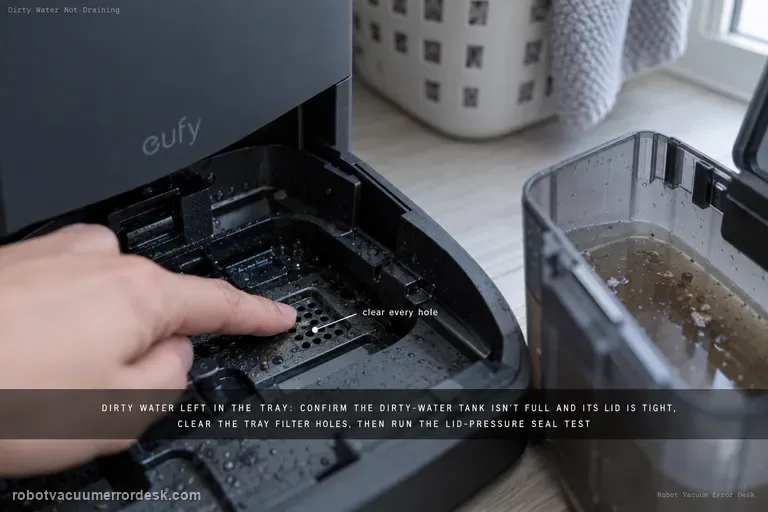
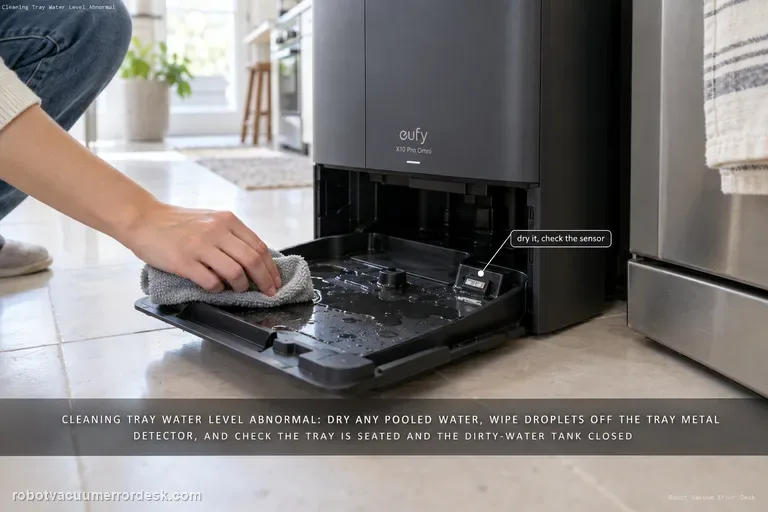
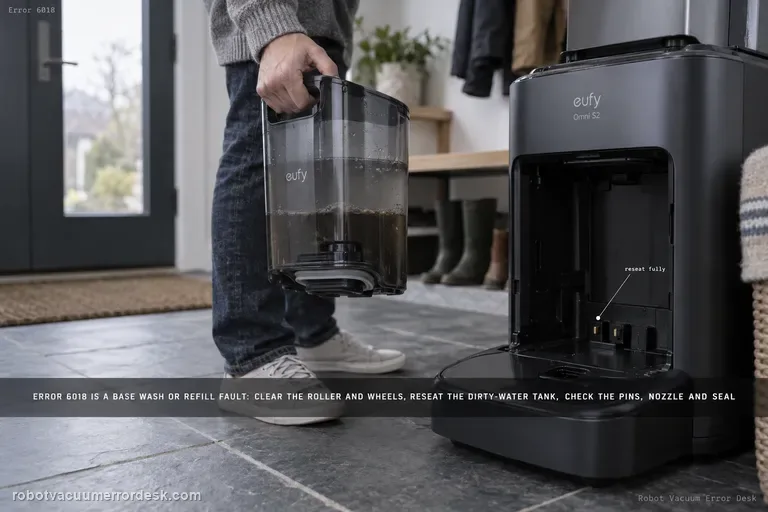
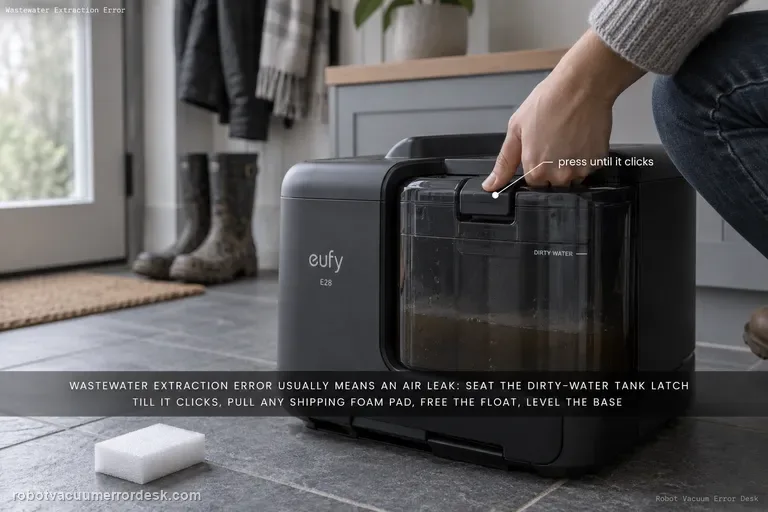
Narwal’s published Error 2003 article is manufacturer-wide and uses other Freo models as examples rather than being a Freo Z Ultra-specific bulletin, so keep the scope explicit. Error 2003 is the base-station water-overflow path. Treat it as a seal/drainage diagnosis, not a robot navigation error. First remove the cleaning tray and base slope pad, dry residual water in the station and clean the tray. Then pull the dirty-water tank and prove the lid locking tabs fully engage—the manufacturer says a distinct click should be heard and felt. Inspect sealing strips on both clean- and dirty-water tanks and press any loose strip back into its groove. Lift both tanks and check the silicone seals beneath them. Finally, confirm that no other-brand fragrance or cleaning detergent was added to the clean-water tank. If the station still overflows after those visible owner-level checks, stop repeated wash cycles and escalate rather than opening the powered base.
Error 13
Roborock Error 13 on the Saros 20 Sonic is a charging-contact diagnosis. The model support page says the dock indicator should be OFF when the robot is docked and charging correctly; if it stays ON, reposition the robot, clean the contacts on robot and dock, then prove dock power and the wall outlet. Use the light state as the key pass/fail signal instead of replacing a battery before contact alignment and power are proven.
Can't find dock
When a Saros 20 Sonic cannot find its dock, first separate localization from charging. Roborock says return can fail if the robot was started somewhere else, hit an obstacle, or was moved manually. Place the dock against a wall with about 0.5 m clearance on each side and 1.5 m in front, then clean the dock’s front signal-transmission area and the robot’s front sensor. A direct return test from the same mapped floor is the clean proof.
Map wrong angle
A Saros 20 Sonic map that appears rotated or at the wrong angle is usually handled as a dock-placement/map-orientation issue. Roborock says the map should display horizontally or vertically. Move the dock to a clearer location with roughly 0.5 m at each side and 1.5 m in front; if orientation stays wrong, switch Map Saving off and back on so the next cleanup creates a new map. Preserve a good map before rebuilding.
Abnormal noise
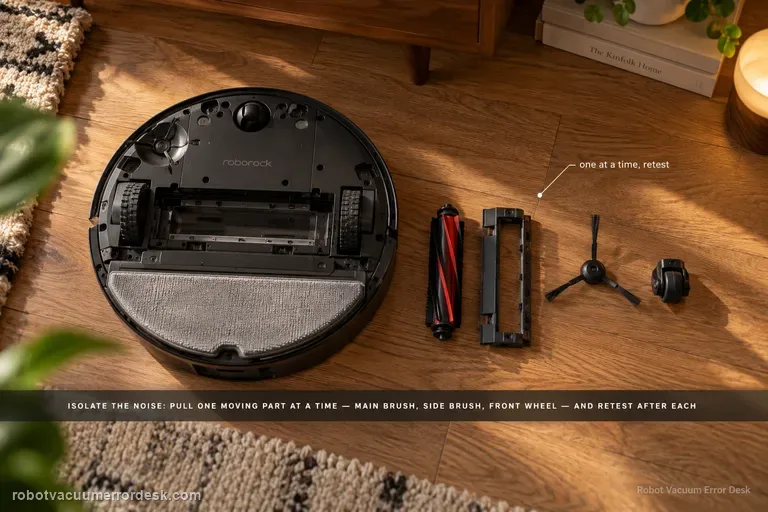
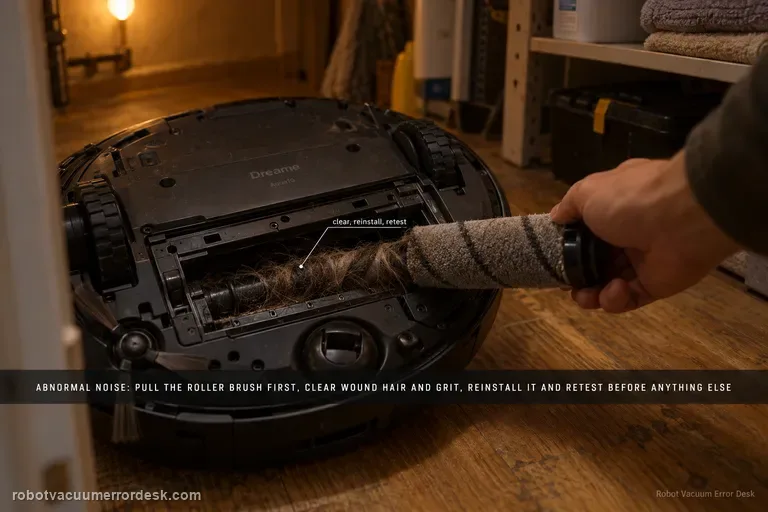
Roborock’s Saros 20 Sonic noise test is a component-isolation sequence, not “clean everything and hope.” Test briefly after each change: remove the main brush and cover, then the side brush, then the front wheel; press/rotate the drive wheels by hand; clean the dustbin/filter or use lowest suction; finally remove the mop mount or use Vacuum Only. When the noise disappears after one change, reinstall that component correctly and retest.
Cleaning in circles
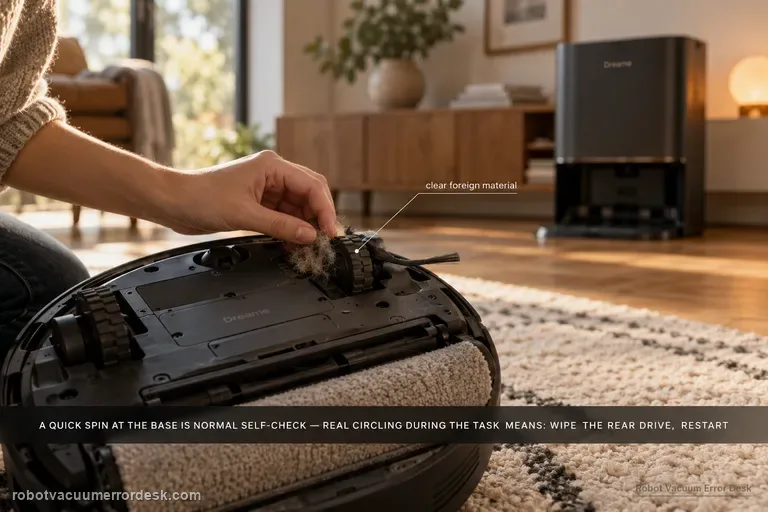
The Aqua10 can rotate around the base station briefly and still be behaving normally: Dreame says the robot locates itself and performs a self-check before leaving the base. The fault pattern is continued circling during the cleaning task. For that case, Dreame directs owners to inspect and wipe the rear drive for foreign material, power the robot off, restart the task, and escalate if the behavior persists.
Base not collecting dust
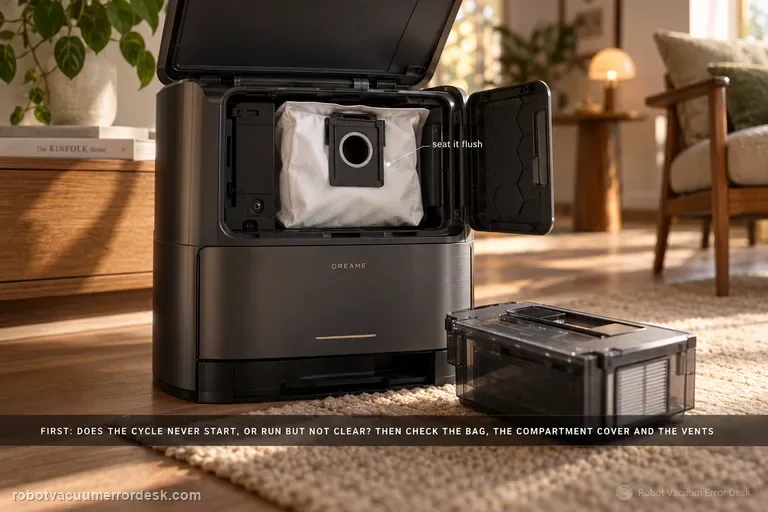
First determine whether the station never starts an emptying cycle or whether it runs but leaves debris in the robot. Dreame’s exact Aqua10 support article checks the dust bag, dust-compartment cover and robot dustbin for obstruction. The exact-model manual adds two important discriminators: auto-empty can be disabled or scheduled differently in the app, and blocked auto-empty vents on the robot, base or dust box can stop evacuation. Prove the trigger state first, then the seal/air path, using one light controlled debris load.
Mop cover / roller guard error
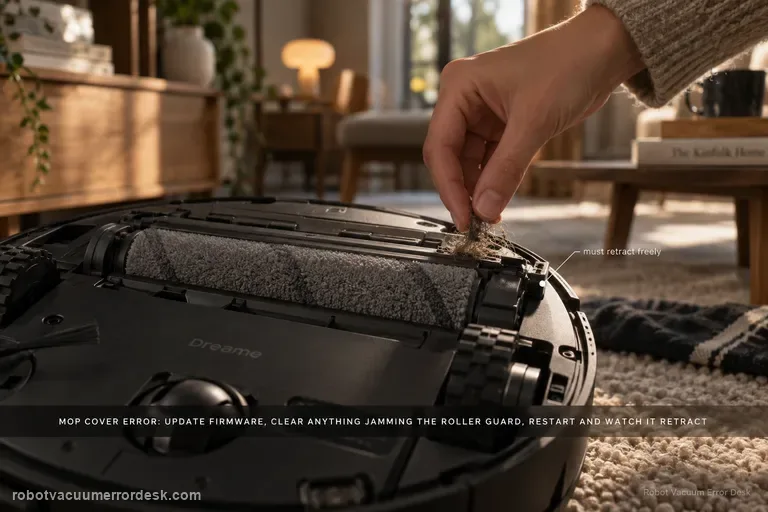
Dreame treats the Aqua 10 “mop cover error” as a firmware-and-obstruction check first. Confirm the robot is on current firmware, inspect the roller guard/cover area for foreign objects, clean it, then restart and see whether the guard retracts normally.
Washboard water level abnormal
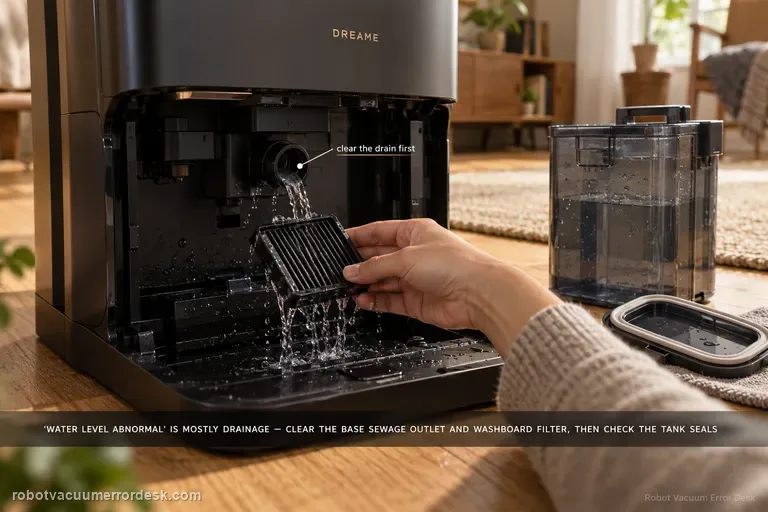
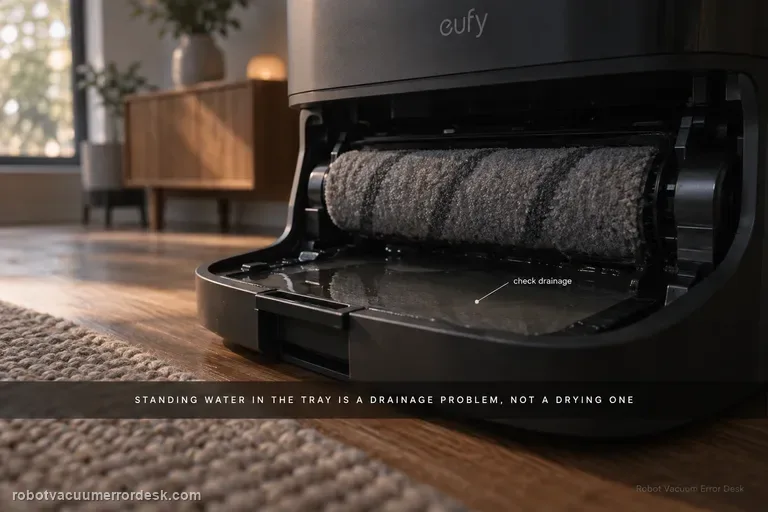
Aqua10 'washboard water level abnormal' is primarily a drainage-and-sealing diagnosis in Dreame’s exact support article. First clear the base-station sewage outlet and rinse the washboard filter. Then inspect the used-water tank cover sealing ring for looseness or deformation, clean and close the sewage cover/buckle, inspect the sealing plug where the tank meets the station, and reseat the used-water tank firmly. The order matters: standing water with a blocked outlet points to drainage, while a clean drain plus a loose/deformed tank seal points to lost suction/sealing in the dirty-water path. Do not treat this as a clean-water refill problem unless the evidence actually points there.
Not charging
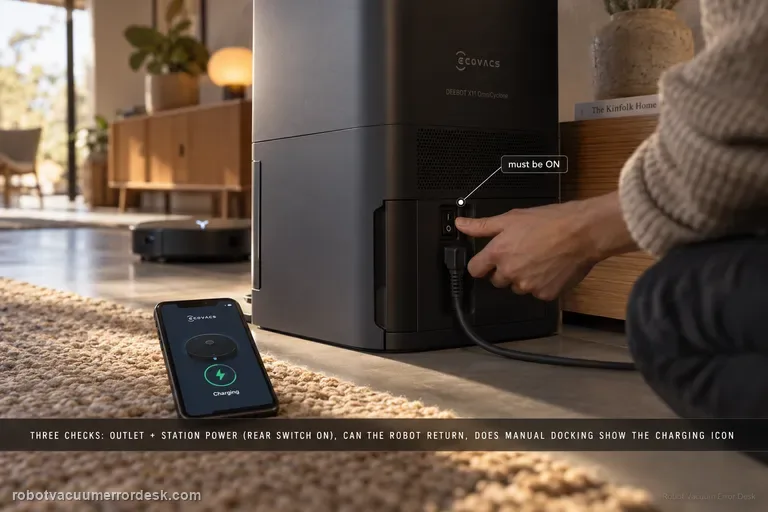
Ecovacs’ X11 charging flow separates three things owners often mix together: whether the station has power, whether the robot can power/return, and whether manual contact charging works. First prove the wall outlet and station connection; on U.S. units, confirm the rear station switch is ON. Power the robot on and ask it to return. If it cannot power on, manually dock it and look for the charging indication—the Auto button blinking or the lightning icon in the app. If manual contact charging also fails, clean the station and rear robot contacts and make sure the station contacts rebound normally. This sequence prevents a navigation failure from being misdiagnosed as a bad battery or dock.
Map skewed / overlapping
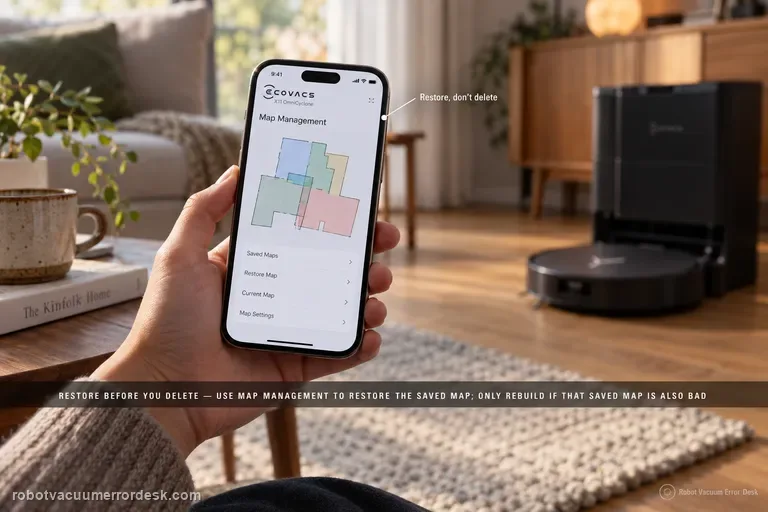
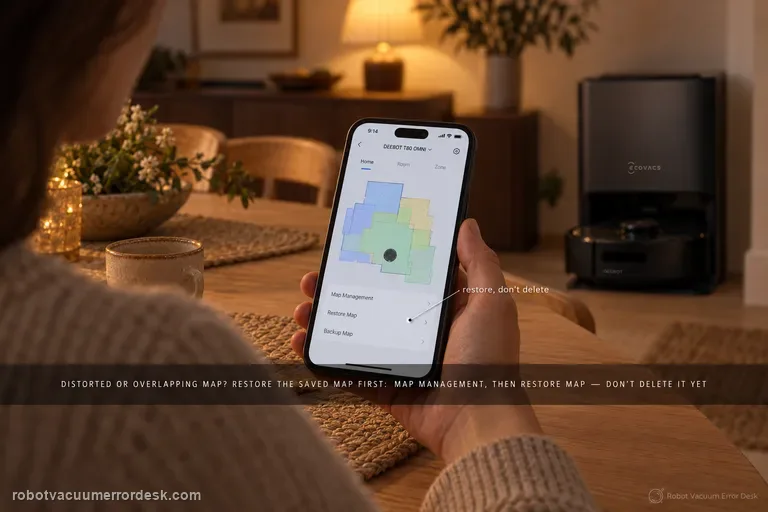
Restore before you delete. ECOVACS’ X11 support tells owners to use Map Management and restore the initially saved map when the floor plan becomes skewed or overlapping. ECOVACS’ broader map guidance explains why that order matters: restore returns to a saved/backup state, while deleting and Quick Mapping destroys the current map and starts over. If restore works, stop. If the saved map is also bad, prepare the home, start from the station and rebuild once under stable conditions.
Slips returning to station
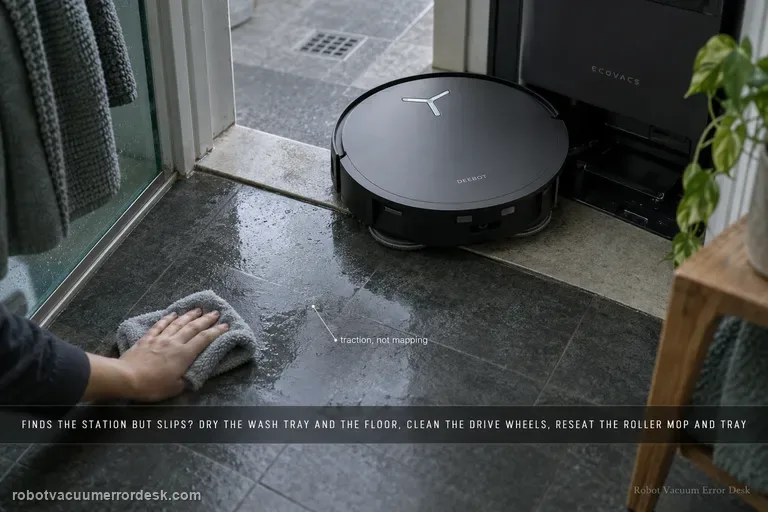
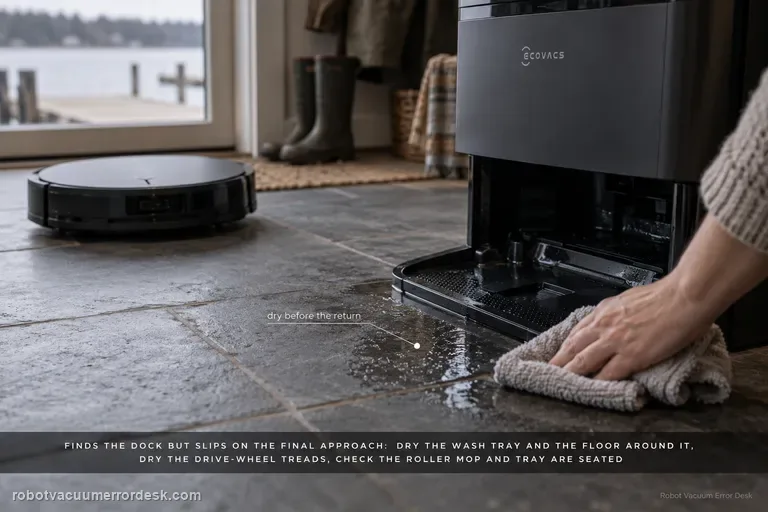
Treat “finds the station but slips” as a different fault from “cannot find the station.” ECOVACS’ X11 procedure starts at the last meter: remove excess water from the mop-washing tray and nearby floor, clean and dry the drive wheels, confirm the roller mop is seated, confirm the mop-washing tray is fully installed, then place the robot directly in front of the station and request Auto return. That sequence isolates traction and station-entry geometry before you blame mapping, charging electronics or the battery.
Auto Resume not working
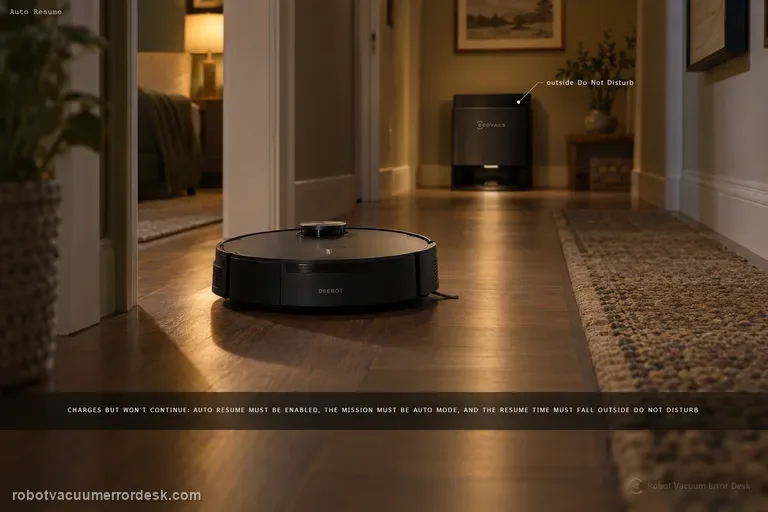
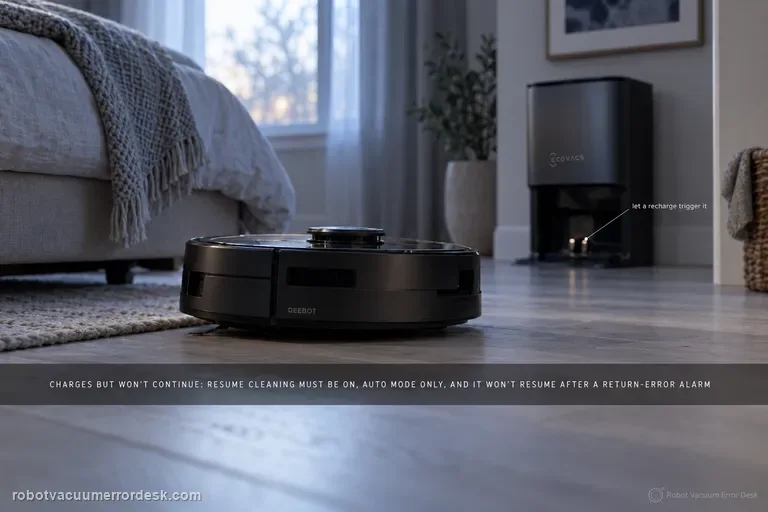
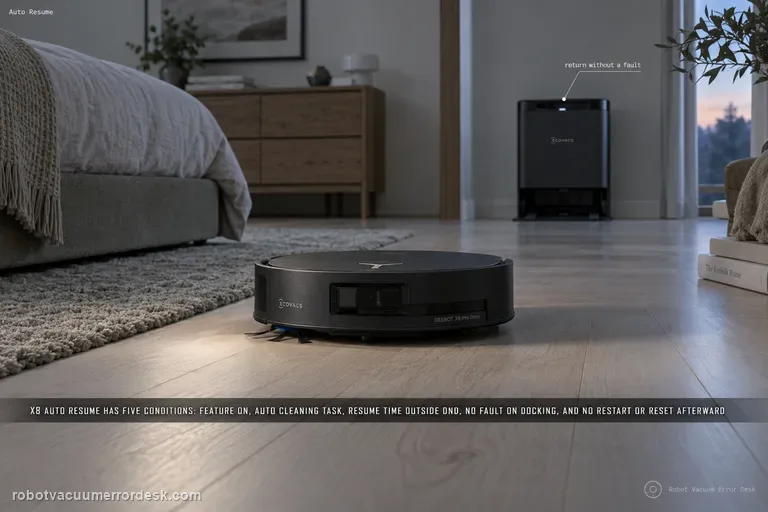
For X11 Auto Resume, prove the three prerequisites ECOVACS documents before touching charging hardware: Auto Resume must be enabled, the recharge/resume point must not fall inside Do Not Disturb, and the cleaning mission must be Auto mode. A robot can charge normally and still not resume if any one of those conditions is false. The best test is a controlled Auto-mode mission outside DND, with the setting visibly enabled and no manual mode change while the robot recharges.
Wi-Fi / app connection failure
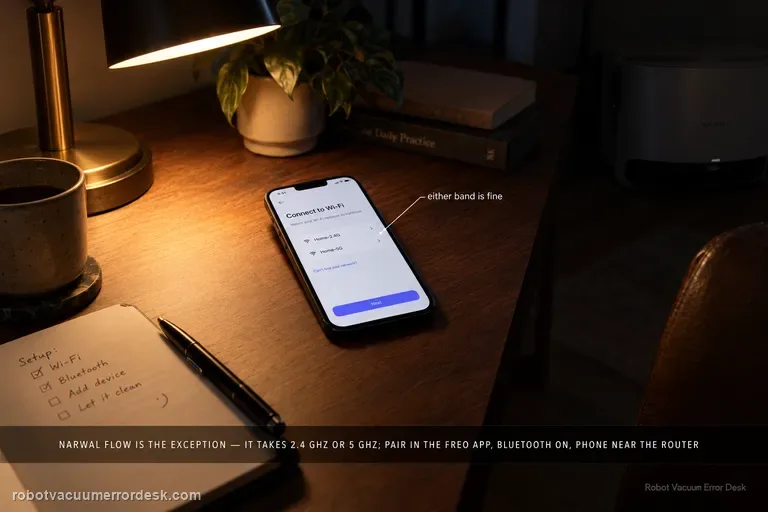
Narwal Flow is an exception to the older Narwal “2.4 GHz only” rule: Narwal’s Flow-specific FAQ says this model supports both 2.4 GHz and 5 GHz Wi-Fi. Start with the Flow pairing path in the Freo App, confirm the robot and base are powered, enable Bluetooth and the phone permissions Narwal requires, and keep the robot near a strong signal. If setup fails, compare the two supported bands or a simple phone hotspot without changing several variables at once. Narwal’s general network guide is still useful for permissions, hotspot and router isolation, but its 2.4-GHz-only sentence is not the correct compatibility rule for Flow. If the failure persists, send Narwal the robot SN, App ID and a screen recording or clear record of the failed setup stage.
Won't return to base
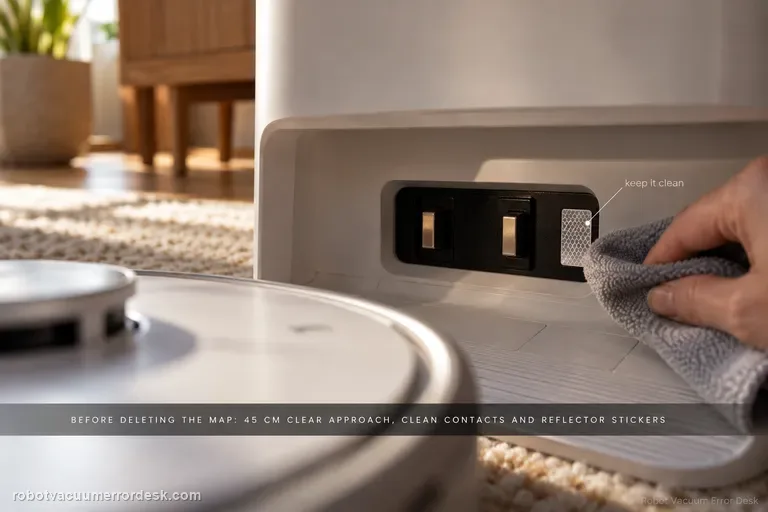
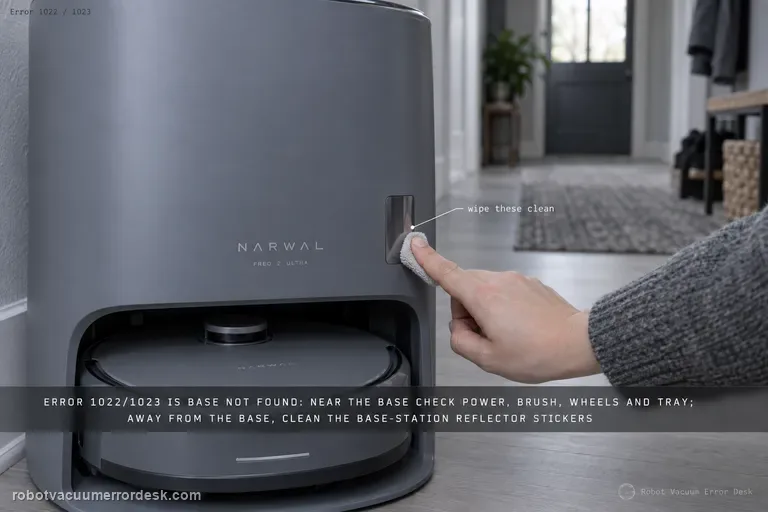
Do not start by deleting the map. First give Narwal Flow a compliant base area: hard and level, away from direct sunlight, with about 45 cm / 1.5 ft of clear approach space. Narwal’s current return-to-base troubleshooting then calls for cleaning the robot/base charging contacts and reflector stickers, checking the drive and caster wheels for oil or debris, confirming the cleaning tray and roller-brush cover are seated correctly, and remapping only if the base station was moved. A short return from near the dock can then separate final-entry trouble from whole-home localization. If Flow still cannot return, record the final approach for support instead of repeatedly remapping.
Recharge / return fails
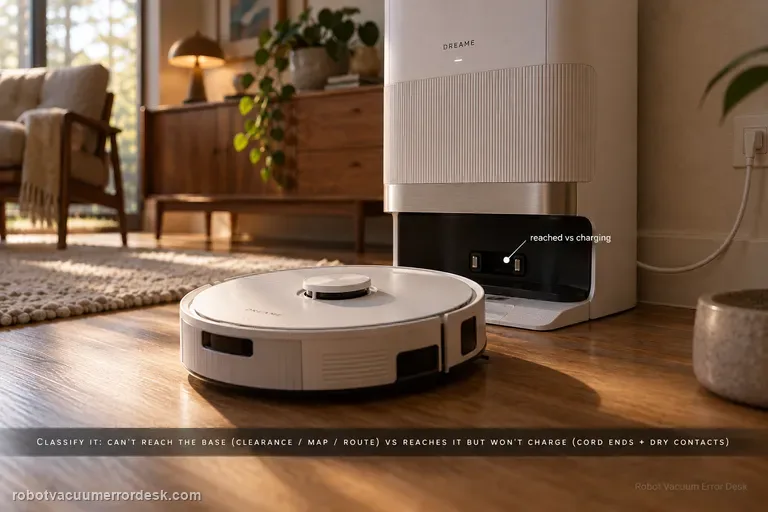
First classify where the L50 Ultra AE fails. If it cannot find or approach the base, Dreame’s exact recharge article points to dock clearance, distance, starting from the base and an abnormal saved map; the exact manual adds blocked return routes, a moved or unpowered station and a dirty signaling area. If the robot reaches the base correctly but charging never begins, stop remapping: the manual moves the diagnosis to both ends of the station power cord, dry charging contacts and foreign objects at the robot connectors.
Resume cleaning not working
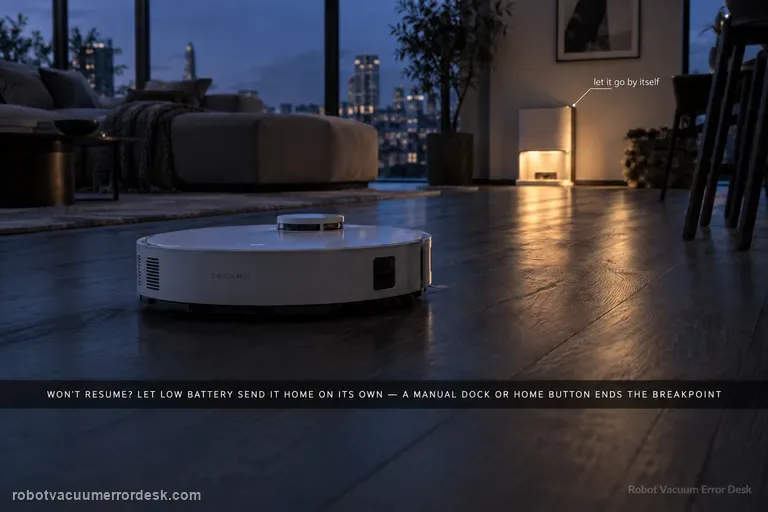
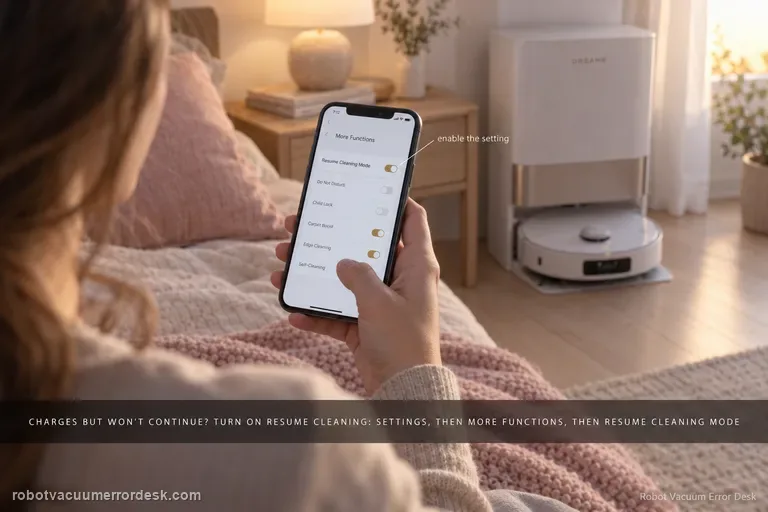
A valid L50 Ultra AE resume test must create a real low-battery breakpoint. Dreame says Resume Cleaning must be enabled, the job must use Automatic Working Mode, DND must not suppress the departure, charging must remain fault-free, and restart/reset can disrupt the breakpoint. The exact manual adds a critical discriminator: the robot will not resume an unfinished job if you manually place it on the base or send it home with the app or Dock button. Let low battery trigger the return automatically.
Error 1
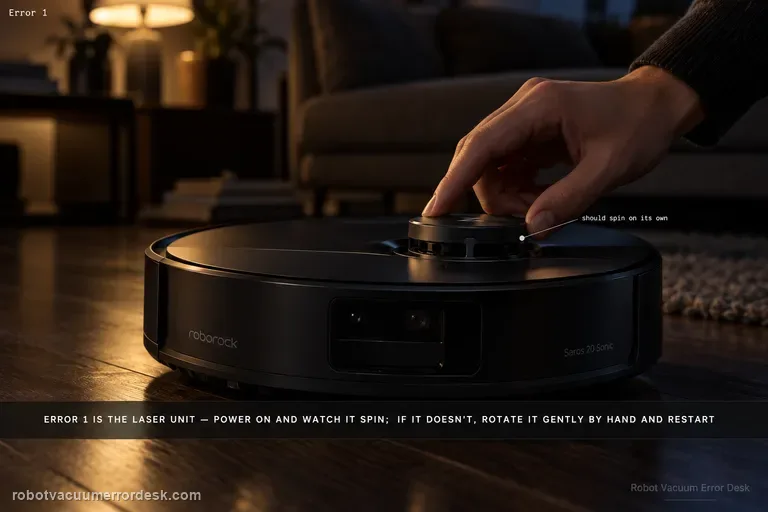
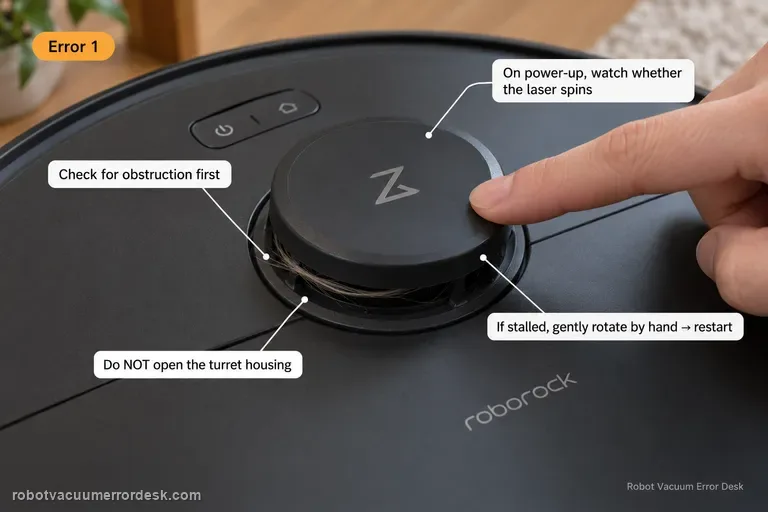
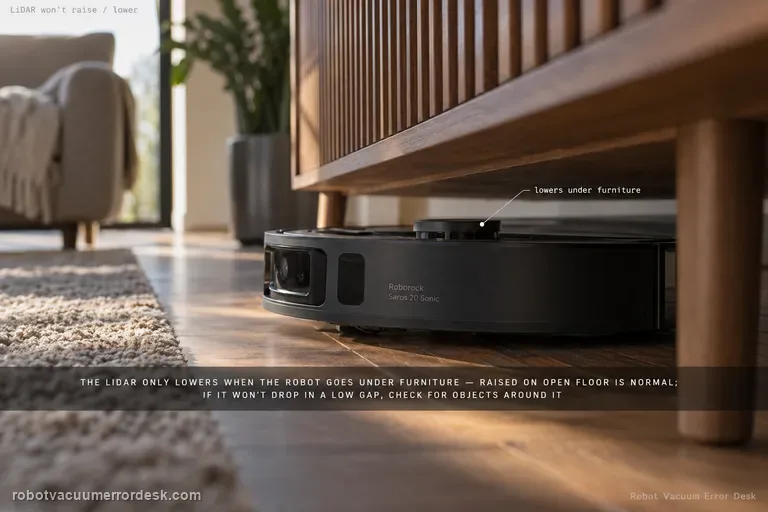
Error 1 is a laser-unit fault path, not a reason to delete the map first. Roborock’s exact Saros 20 Sonic support says to power the robot on and verify that the laser unit is spinning. If it is not spinning, gently rotate it manually and restart. The key is the physical pass/fail observation: spins normally, does not spin but frees gently, or remains bound/fails again. Preserve the map while you prove that hardware state.
Error 4
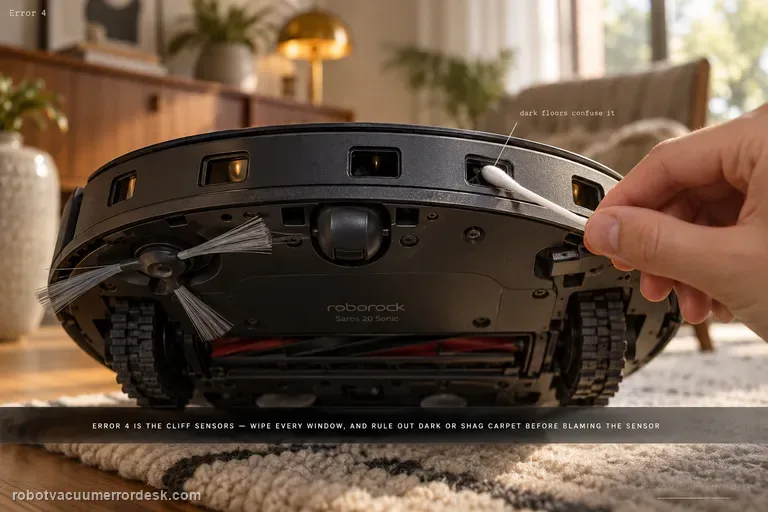
Saros 20 Sonic Error 4 points to the cliff/anti-drop sensing path. Roborock says to wipe the cliff sensors and make sure the robot is not operating on dark or shag carpet, which can confuse the downward-facing sensing. Clean every accessible cliff-sensor window, move the robot to a normal light hard floor, restart and test there. A repeatable Error 4 on a safe ordinary floor after cleaning is the point to escalate.
Error 5
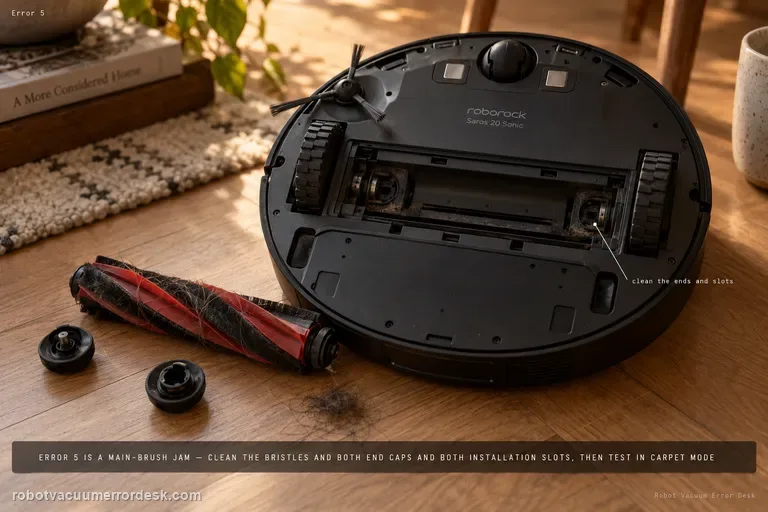
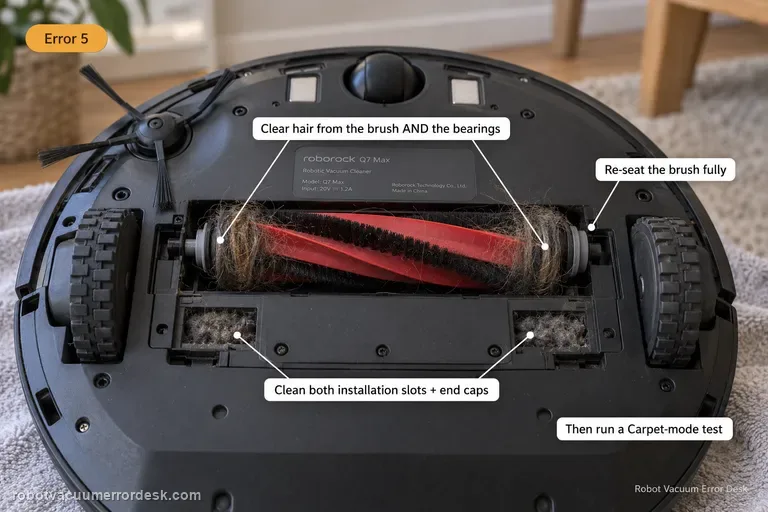
Roborock Error 5 on the Saros 20 Sonic is the main-brush jam path. Remove hair and debris not only from the visible bristles but from both brush-installation slots and both ends of the brush. Reinstall it correctly, then run a short test with Carpet mode enabled as Roborock specifies. If the brush rotates freely by hand but Error 5 returns immediately in a clear test area, stop buying brushes at random and escalate with the cleaned end/slot condition.
Error 7
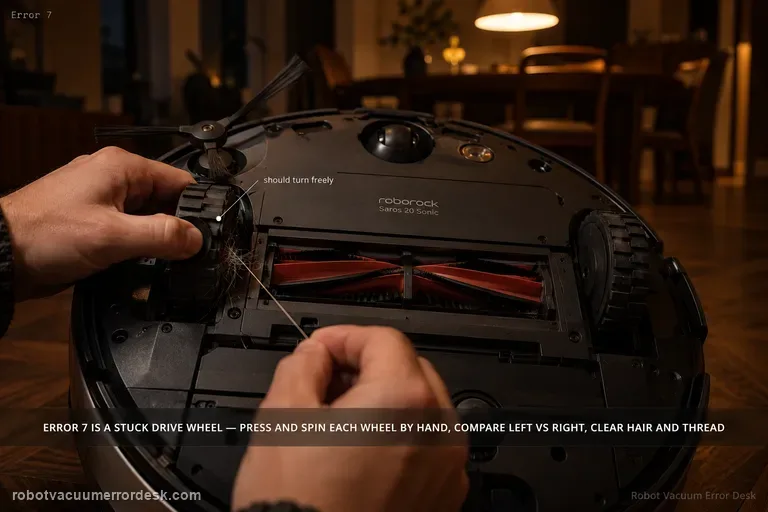
Saros 20 Sonic Error 7 is a wheel-stuck diagnosis. With the robot stopped and safe to handle, press and spin each drive wheel manually and compare left versus right movement. Remove hair, thread or debris that prevents free travel. Then run a short test on clear hard floor before adding rugs or thresholds back. If one wheel still binds or Error 7 returns without environmental obstacles, document that side for Roborock support.
Error 8
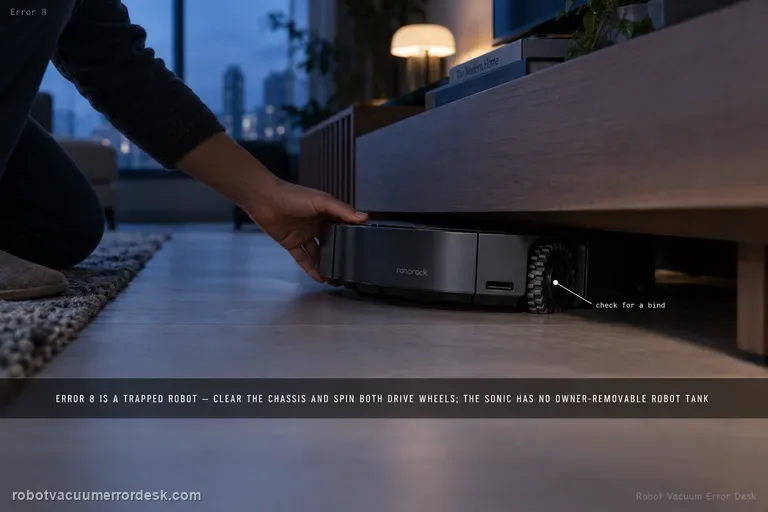
Roborock’s Saros 20 Sonic support lists Error 8 as a trapped-robot check: clear obstacles and press/spin the drive wheels to find a bind. That support entry also includes a generic “remove the water tank if installed” step. The current Saros 20 Sonic manual does not show an owner-removable robot water tank; it shows a self-filling port on the robot and removable clean/dirty tanks in the dock. Do not open the robot or try to remove an internal tank. Clear the chassis, compare both drive wheels on safe hard flooring, and run one short control test. If Error 8 returns with free wheels and no obstruction, escalate with the exact code and a short video.
Error 10
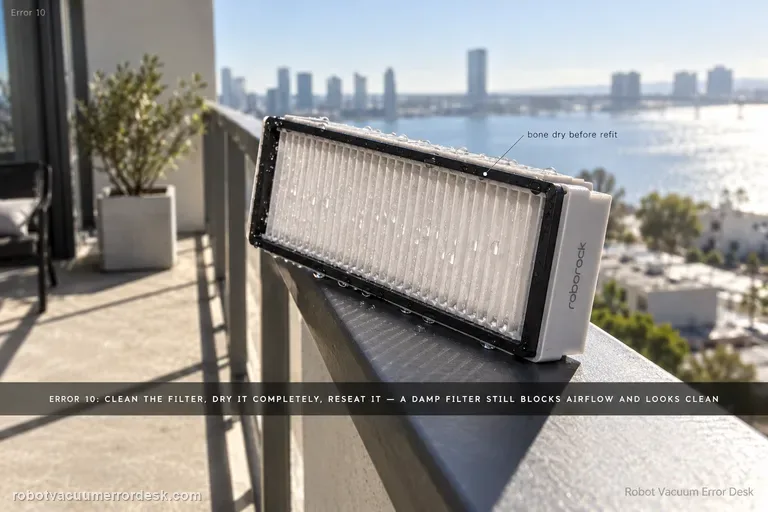
Roborock’s exact Saros 20 Sonic Error 10 instruction is deliberately simple: clean the filter, dry it thoroughly, reinstall it and try again. The important diagnostic work is proving those words rather than doing them approximately. A damp filter can look clean while still restricting airflow; a dusty bin/filter seal or poorly seated assembly can produce the same practical symptom. Use a known-dry filter and a short controlled suction test before treating Error 10 as a fan failure.
Error 18
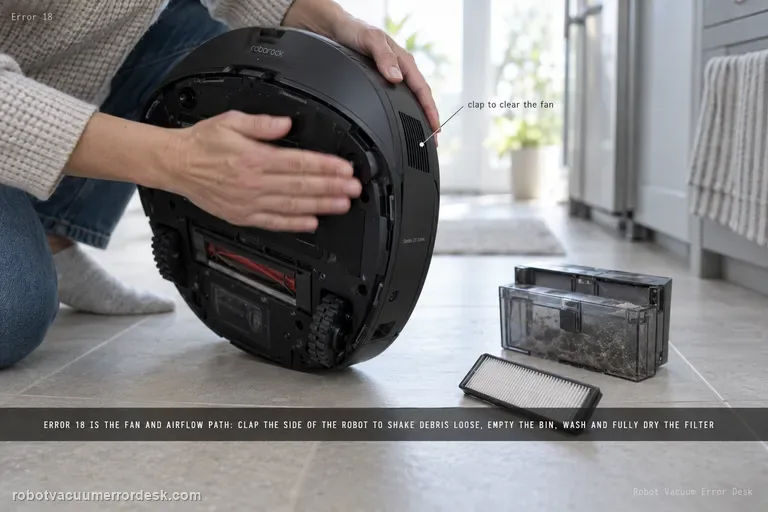
Saros 20 Sonic Error 18 points to the fan/airflow path. The exact model page tells owners to clap the side of the robot several times to try to clear debris from the fan. Roborock’s broader Error 18 support also advises emptying the dustbin, cleaning and fully drying the filter, trying a new filter, and updating firmware. Use those owner-safe airflow checks before assuming the suction motor itself has failed.
Fluffing Roller Error
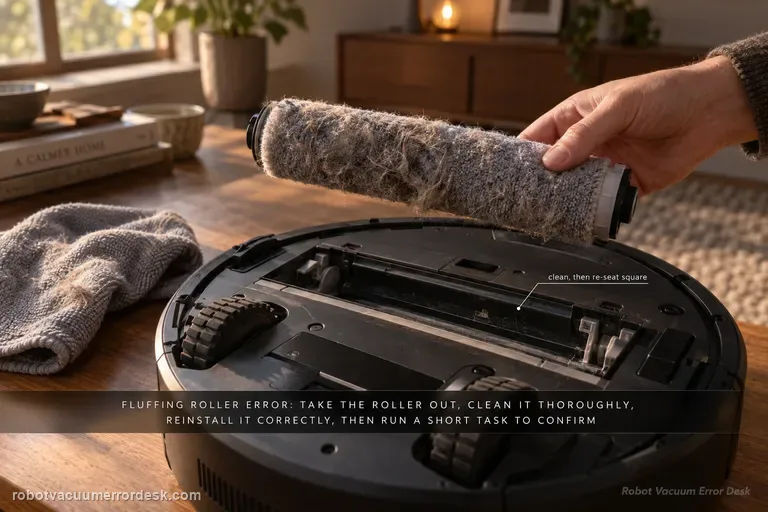
Dreame’s model-specific path is straightforward: remove the robot from the base, detach and thoroughly clean the fluffing roller, reinstall it correctly, return the robot to the station and run a short cleaning task. The proof is whether the error stays gone after the roller is re-seated.
Water leaking inside base
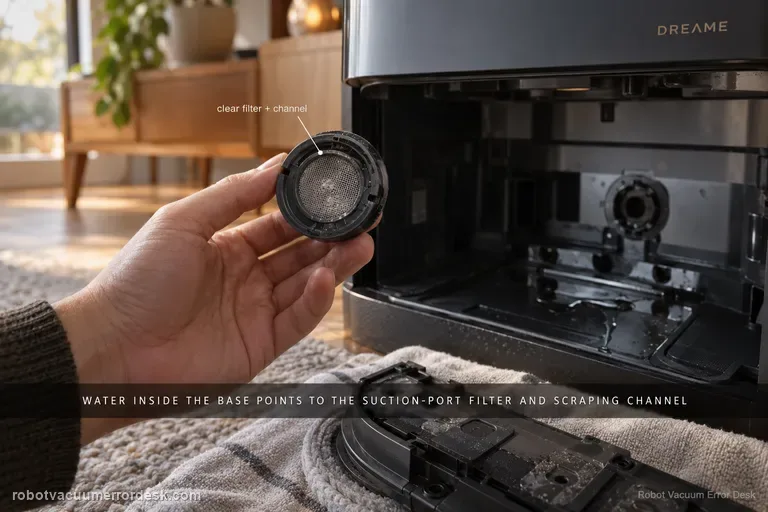
For water that appears inside the Aqua 10 Ultra Roller Complete base station, Dreame points first to the robot-side suction-port filter and the scraping channel around it. Treat this as a controlled leak-location test, not a reason to open the station. Stop repeated wet cycles, confirm the water is actually appearing inside the base rather than dripping outside it, remove the mop assembly, clear the filter and nearby channel, reinstall everything, then run one short task. If the base stays dry after that test, the blocked pickup path was the useful discriminator; if fresh water or sewage still accumulates inside the station, stop wet operation and escalate rather than disassembling powered wet-station parts.
Side brush not rotating
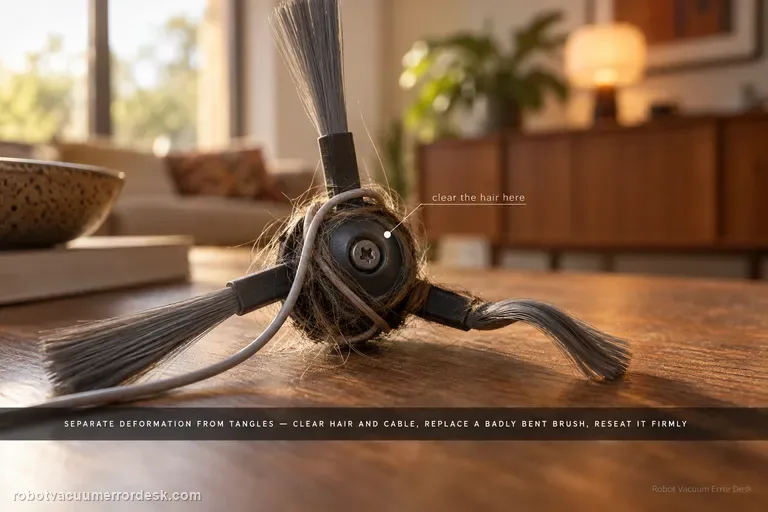
For a side brush that will not rotate, makes abnormal noise or falls off, Dreame first separates deformation from entanglement. Remove hair, thread or cable debris, replace a badly deformed brush for the rotation test, reinstall it securely and continue cleaning near the same area. The Aqua10 also has a separate exact-model article for curled nylon bristles; use that shape-only path when the motor still rotates and the problem is simply deformation. If a clean, correctly shaped and securely mounted brush still will not rotate, stop at support rather than opening the brush drive.
Mop does not extend
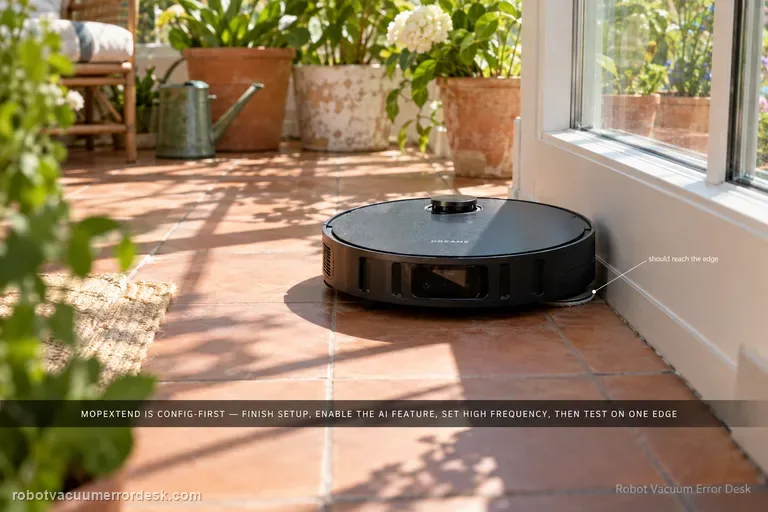
Dreame’s MopExtend troubleshooting is configuration-first, not a motor-disassembly path. Complete network setup, enable AI-driven MopExtend and read the selected mode correctly: Standard performs extension only once a week in Global Cleaning, Intelligence adapts automatically, and High Frequency is the proof mode because it extends during every cleaning. If the Aqua10 is online, MopExtend is enabled and High Frequency is selected but the mop still never extends during a normal edge-cleaning opportunity, record video and move to after-sales support.
Cleaning solution not installed
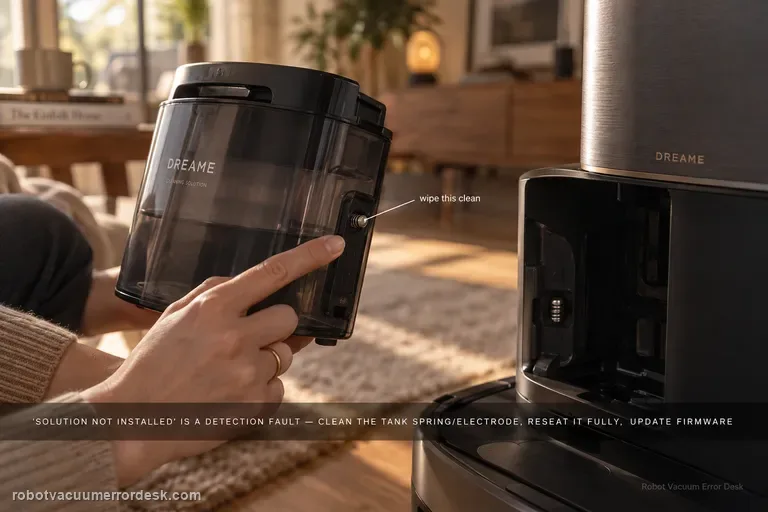
Treat “cleaning solution not installed” as a detection problem, not as proof that detergent is empty or not being consumed. Dreame's exact Aqua10 flow starts at the tank spring/electrode, then requires full seating, current firmware, a robot/base restart, and one global-cleaning observation when the robot returns to mop. That sequence separates a dirty contact or poor seating issue from a persistent detection fault before service.
Brush guard rubs floor
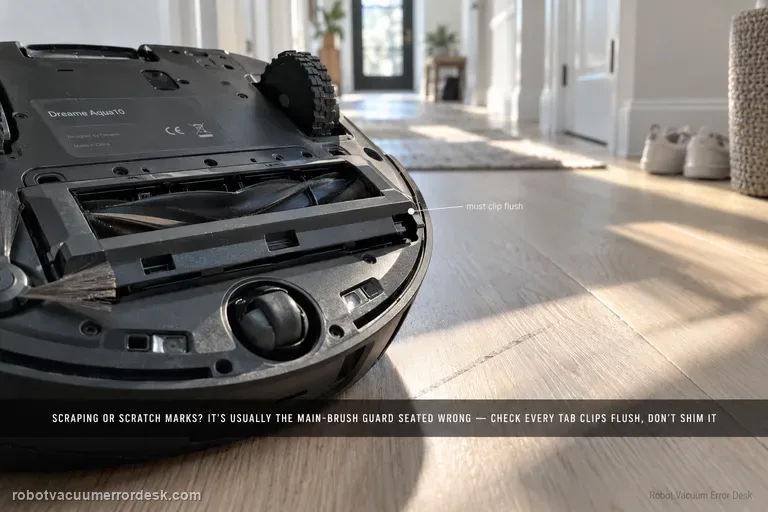
Dreame says brush-guard scraping, scratches on the guard and related abnormal noise can come from incorrect main-brush-guard installation. Before blaming wheel height or suspension, prove that every guard tab is seated correctly and the cover is not protruding. The key check is correct guard installation; repeated scraping is not a normal break-in condition. The useful proof is visual: the guard should sit flush at its normal clips before one brief hard-floor test. Do not sand, bend or shim the part to create clearance.
Abnormal noise
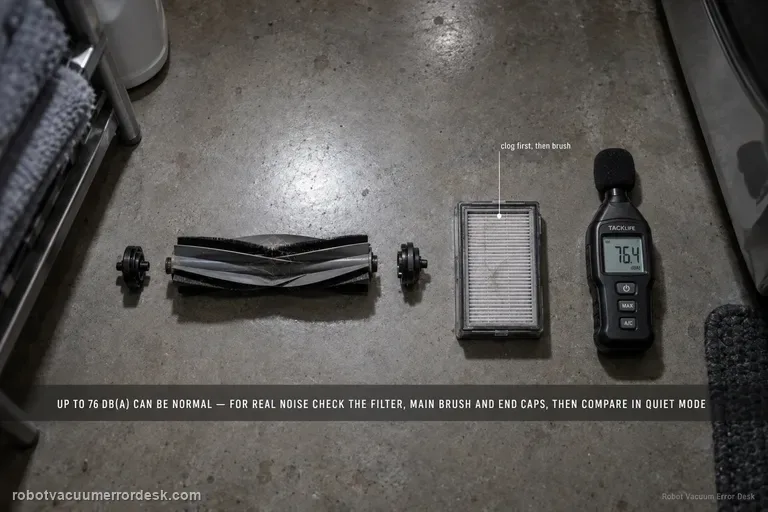
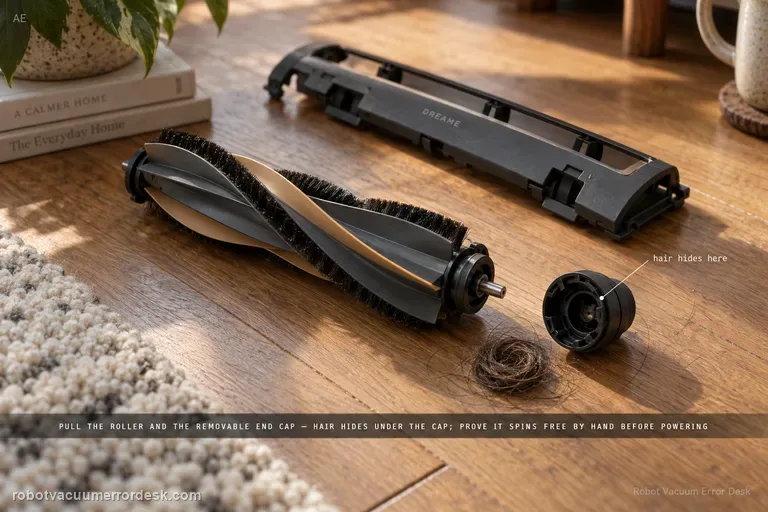
Dreame’s exact L50 Ultra AE noise article gives a useful boundary: normal operating noise is up to 76 dB(A), depending on function, and noise within that level can be normal. For noise that seems abnormal, the manufacturer points first to a clogged filter, hard objects in the main brush or dustbin, and foreign material tangled in the side/main brush. Clean those parts and compare the sound in Standard or Quiet suction. A second L50 article adds a stronger main-brush proof test: remove the brush cover and roller, clear hair/debris including the removable end cap, reinstall the roller, rotate it smoothly by hand, and make sure the cover plate is fully fastened.
Main brush jammed
Treat an L50 Ultra AE main-brush jam as a mechanical-path problem first. Dreame says large/hard debris, wires and wrapped hair can stop the conical roller, including hair hidden under the removable end cap. Remove the cover and roller, clean the full user-serviceable path, reinstall it and prove smooth hand rotation before powering the brush. The exact manual separately advises clearing hard/sharp floor objects before cleaning, which helps prevent an immediate repeat jam.
Obstacle avoidance not working
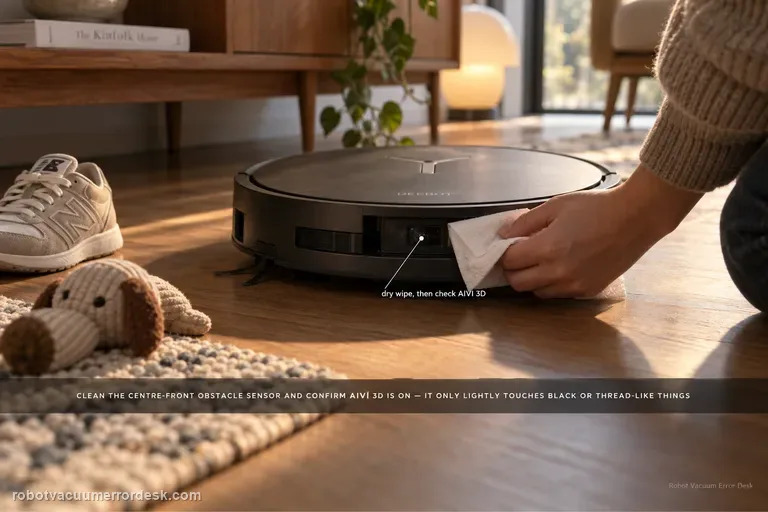
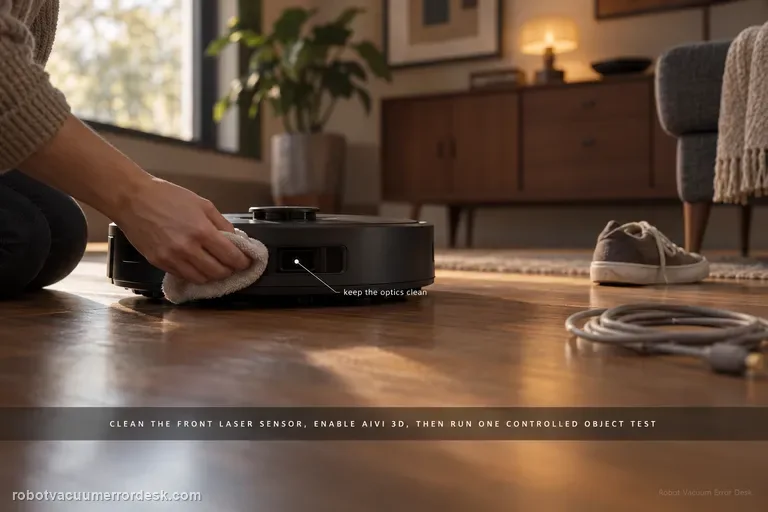
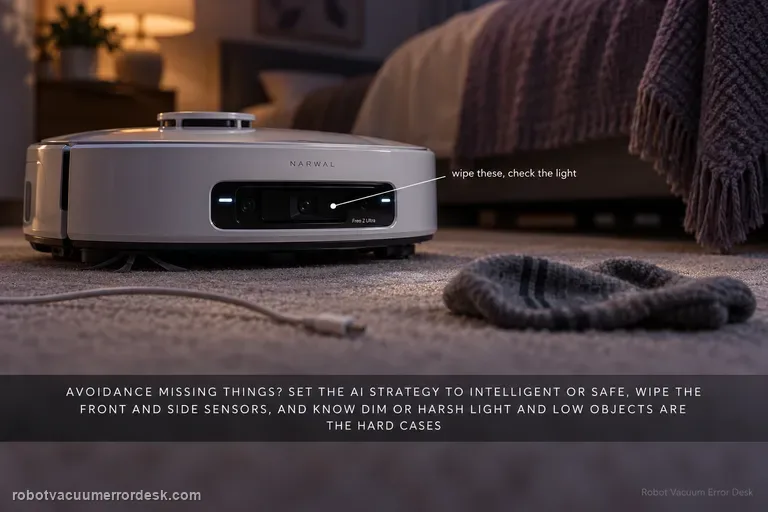
If the X11 starts bumping or fails to steer around objects, first clean the obstacle-avoidance sensor at the center front of the robot with a dry paper towel and confirm the AIVI 3D switch is enabled in DEEBOT settings. ECOVACS also notes a useful limit: the robot may slow and lightly touch black or thread-like objects. That behavior should not be confused with broad AIVI failure. Test with ordinary, visible obstacles after cleaning the sensor and verifying the setting.
Scheduled cleaning not starting
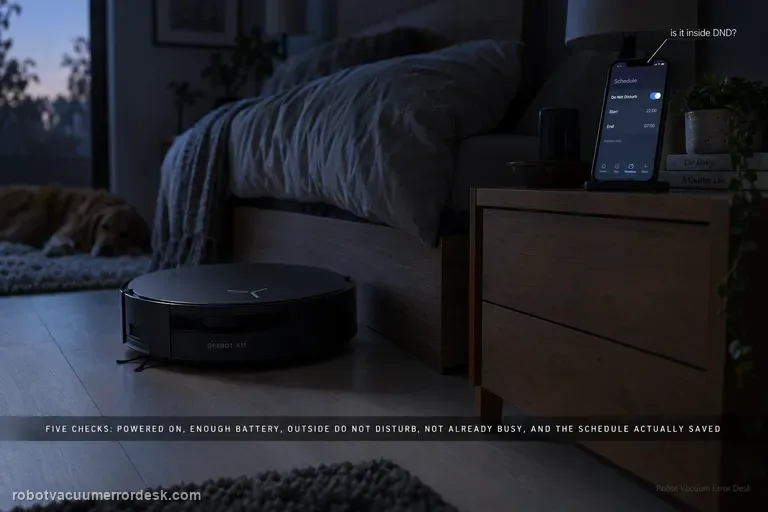
A missed X11 schedule has five official checkpoints: the robot must be powered on, battery charge must be sufficient, the scheduled time must be outside Do Not Disturb, the robot must not already be busy, and the schedule must actually be saved in the app. Check those in that order and compare the exact scheduled timestamp with DND and job history. This prevents an intentionally suppressed or conflicting task from being mistaken for a failed clock or app scheduler.
Missed cleaning areas
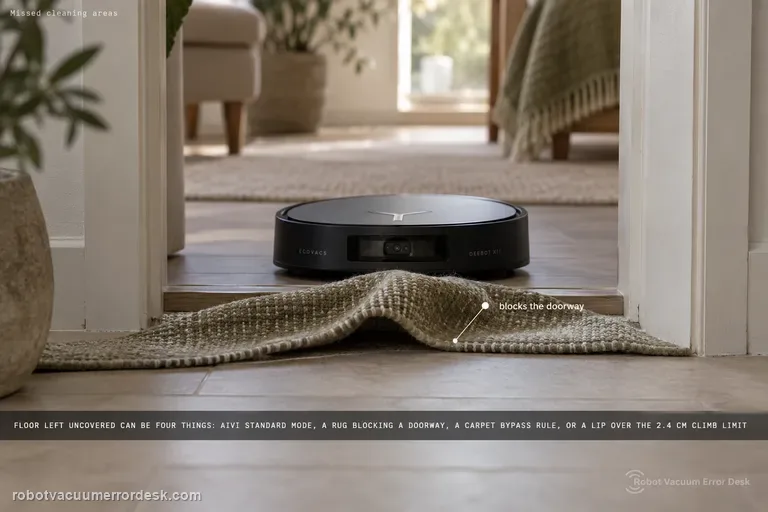
Use Ecovacs’ definition first: a 'missed cleaning area' is floor left uncovered after the robot announces that cleaning is complete. For the X11, Ecovacs then tells owners to enable AIVI 3.0 in Standard Mode, check rugs or mats that block doorways, review Map Management → Edit Map → Carpet Settings → Bypass, and remember the robot is rated to climb up to 2.4 cm. That gives you four different causes that can look identical on the finished map: a software avoidance setting, a doorway/carpet rule, a physical threshold limit, or clutter that makes the robot deliberately keep distance to protect furniture.
Messy cleaning routes
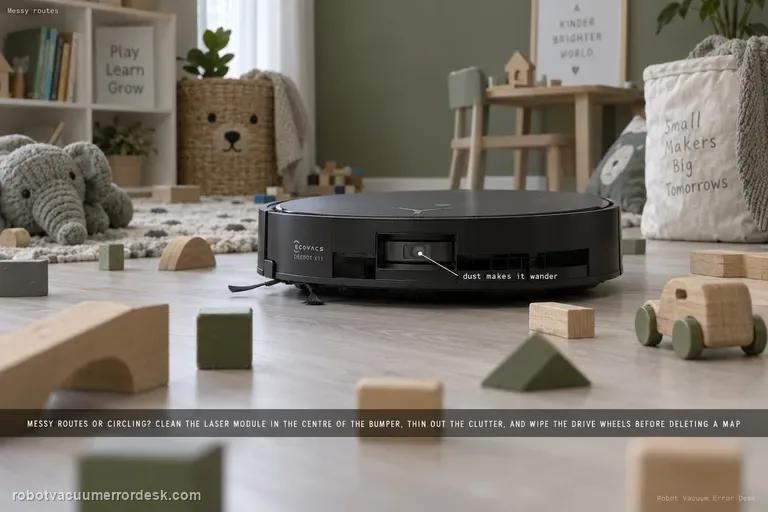
For X11 spinning, wandering or a route that suddenly looks messy, ECOVACS checks three physical/environmental inputs: dust on the laser module in the center of the bumper, a room with many obstacles that causes high-precision avoidance to make the path look irregular, and dirty drive wheels. Clean the laser with a dry paper towel, simplify one test area and wipe the wheels before deleting a map. A stable route in the controlled area points away from map corruption.
Cannot cross threshold
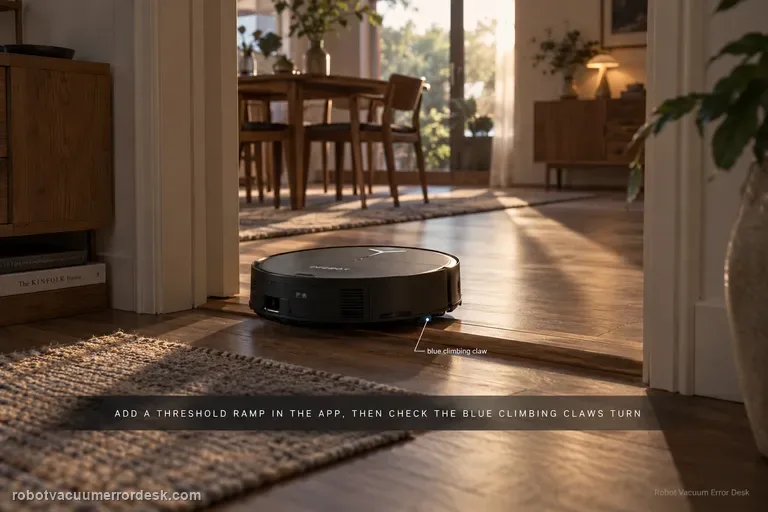
X11 threshold failures have a model-specific path that goes beyond generic “clean the wheels” advice. ECOVACS says to add a Threshold Ramp at the location in the app, power the robot off, remove the dirty-water box, clean the drive wheels and inspect the blue climbing claws for debris. Then press the trigger above a drive wheel while slowly rotating the wheel clockwise and confirm the blue claw rotates with it. A claw that does not rotate normally is an after-sales case.
Drive wheel difficulty alarm
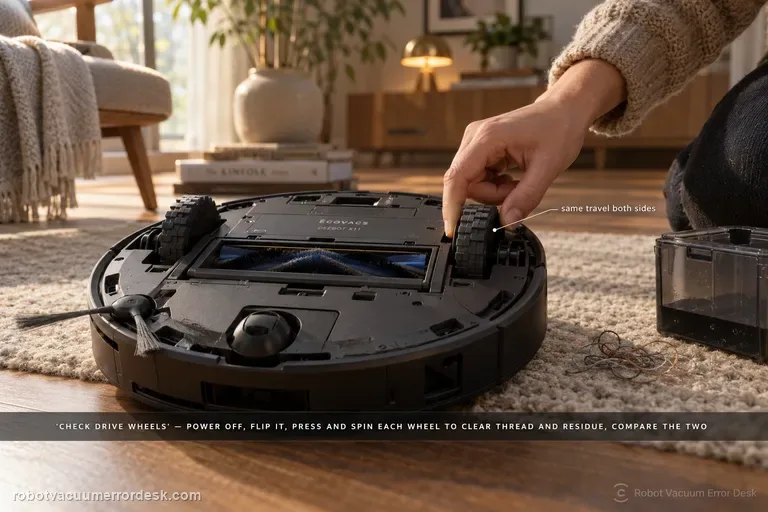
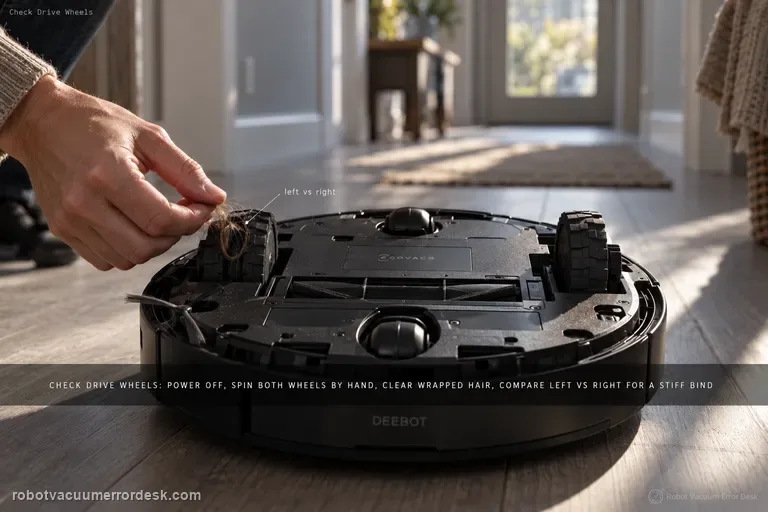
For the X11 “difficulty running / check drive wheels” alarm, ECOVACS tells you to power the robot off, remove the dirty-water box, turn the robot over, press and rotate the drive wheels to clear tangles, then wipe or brush away surface stains. The diagnosis should prove that each wheel can move through its travel without hair, thread or sticky residue. If one side remains mechanically different after cleaning, stop repeating cleaning missions and document that asymmetry for service.
Bumper stuck alert
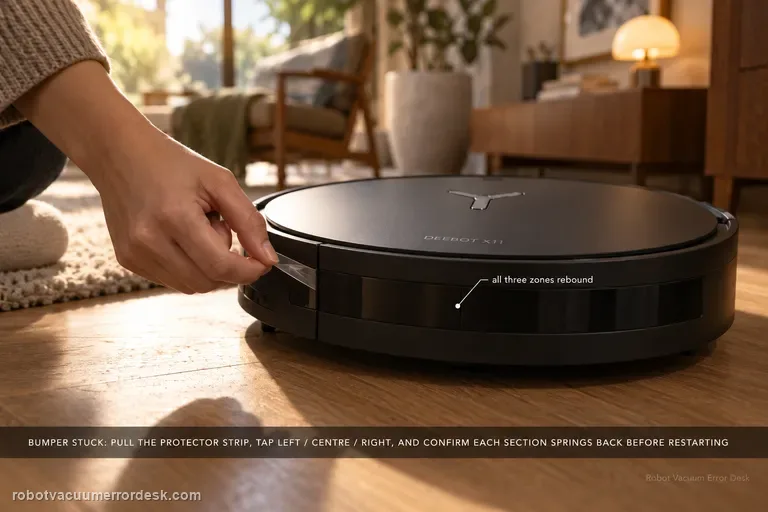
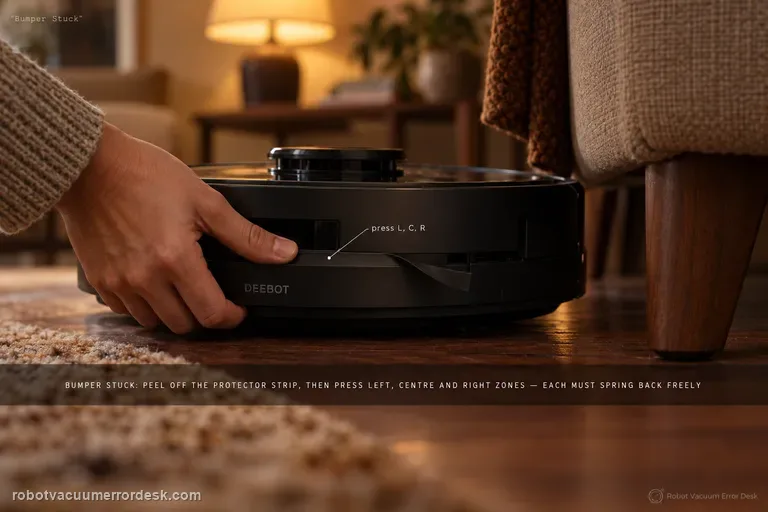
The X11 Bumper Stuck alert has a short official fix, but the useful diagnosis is to check the bumper across all three zones rather than just pushing once in the middle. Remove the bumper protector strip, gently tap the left, center and right sections, and confirm each area springs back. Restart the robot only after the mechanical response is normal. A section that stays depressed or feels different after accessible debris is cleared is the result to show ECOVACS.
Clean water not coming out
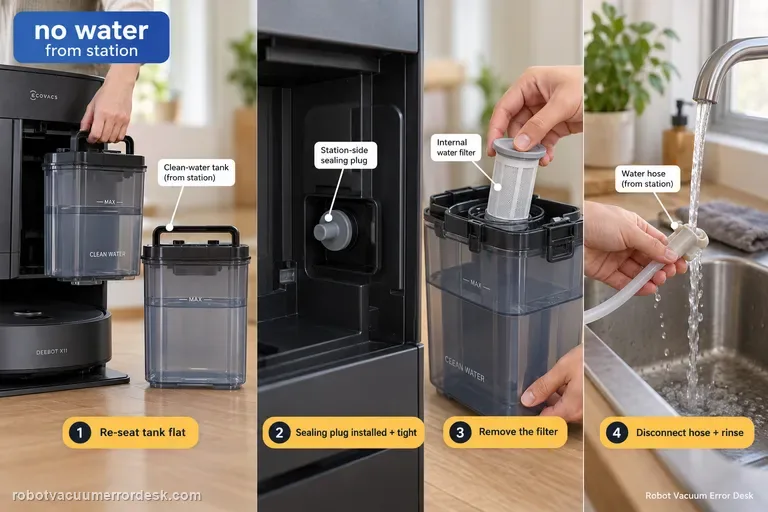
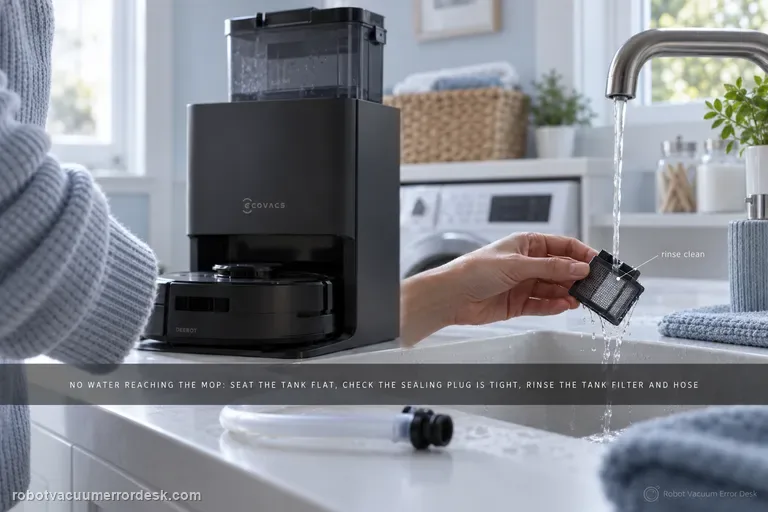
When the X11 station produces no clean water during mopping or self-cleaning, ECOVACS checks the supply path in a specific order: remove the clean-water tank, clear anything trapped between tank and station, seat the tank flat, verify the station-side sealing plug is correctly installed and tight, then open the tank, remove the filter, disconnect the water hose and rinse the filter with clean water before reassembly. That sequence distinguishes a seating/seal problem from a restricted filter/hose path.
Dirty Water Tank Anomaly
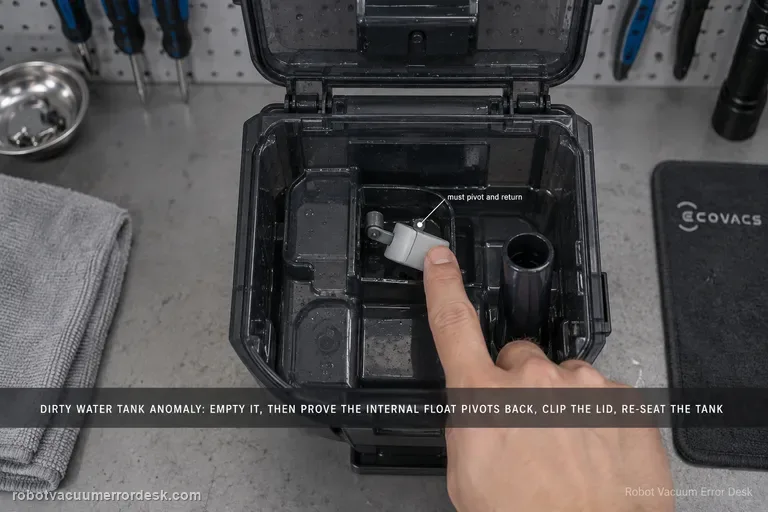
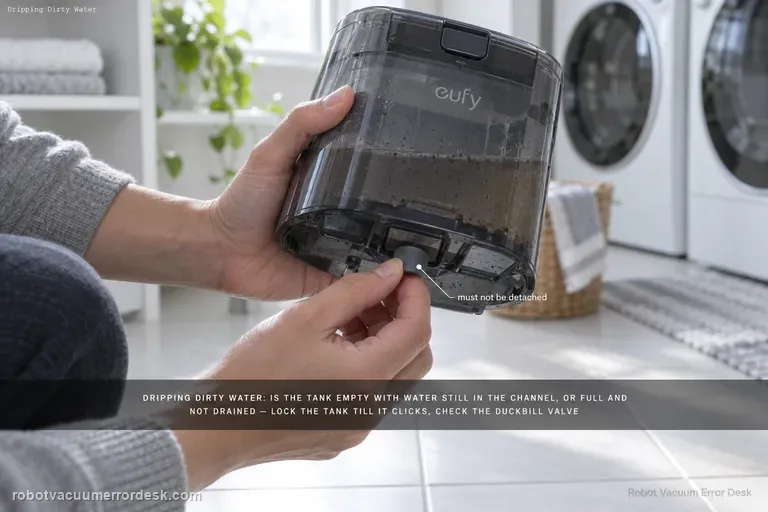
For the X11 Dirty Water Tank Anomaly alert, ECOVACS tells owners to empty and clean the tank, check that the internal float pivots and returns normally, close the top lid with all clips secured, and reinstall the tank in the station. The key distinction is between a real full/dirty condition and a tank-state detection problem caused by a stuck float or poor sealing/seating. Test the float and lid deliberately instead of only emptying the water.
Clean Water Tank Anomaly
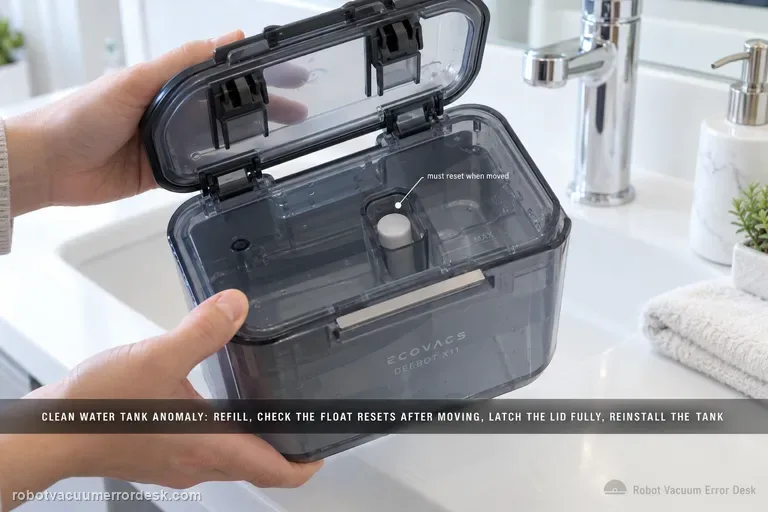
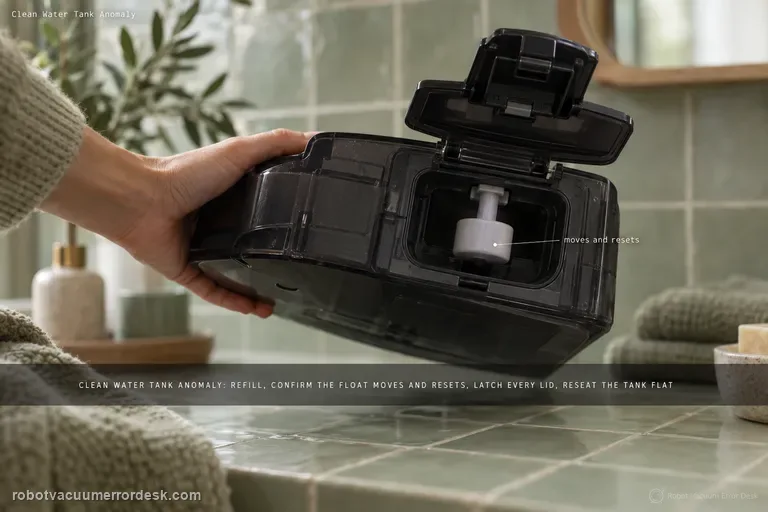
The X11 Clean Water Tank Anomaly path is about tank detection, not just whether water can flow. ECOVACS says to remove the clean-water tank, open it and refill as needed, inspect the float mechanism and make sure it resets after being moved, close the lid with all latches fully engaged, then reinstall the tank in the base station. If the tank is full but the float stays displaced or the lid/tank is not seated correctly, the alert can persist.
Base button not working / missing
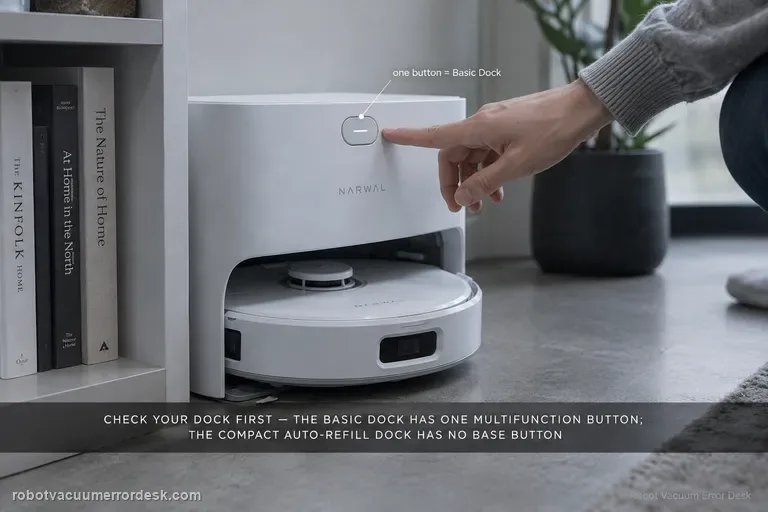
First identify which Narwal Flow dock you own. Narwal documents two versions: the Basic Dock has one multifunction button, while the compact Auto Refill & Drainage dock intentionally has no base-station button. On the Basic Dock, a short press starts/pauses/resumes, a double press starts or cancels mop-pad cleaning, a two-second hold ends a task, and a five-second hold enters or exits pairing mode. If you have the compact dock, use the Freo App or robot controls instead of diagnosing a missing switch. If a powered Basic Dock ignores every documented gesture, capture the response on video for Narwal.
Abnormal noise
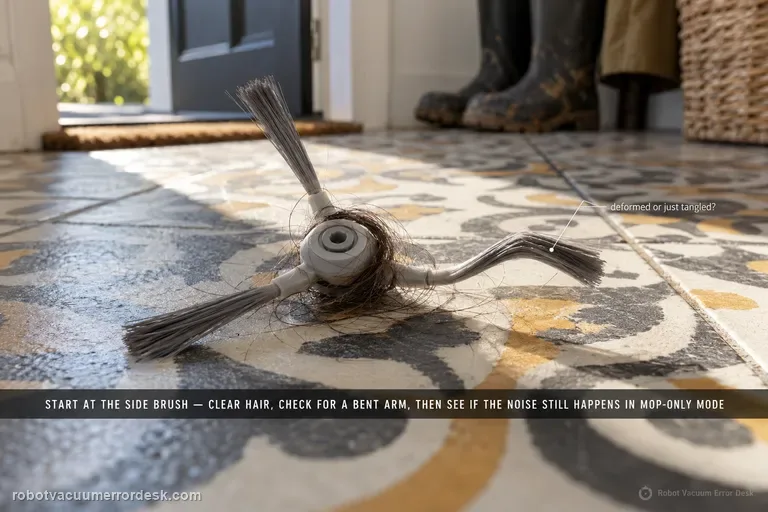
Narwal’s Flow-specific noise article starts with the side brush: clean away hair or foreign objects and check for deformation. Then compare whether the sound still occurs in mopping-only mode. Narwal’s broader robot-noise guide adds owner-safe checks for the roller brush and wheels when the source is unclear, and notes that the mopping module can make a normal motor feedback sound when fully lifted. If a clean robot still makes unfamiliar grinding, clicking or impact noise, stop speculative disassembly and record a close video showing the operating mode and moving part when the sound begins.
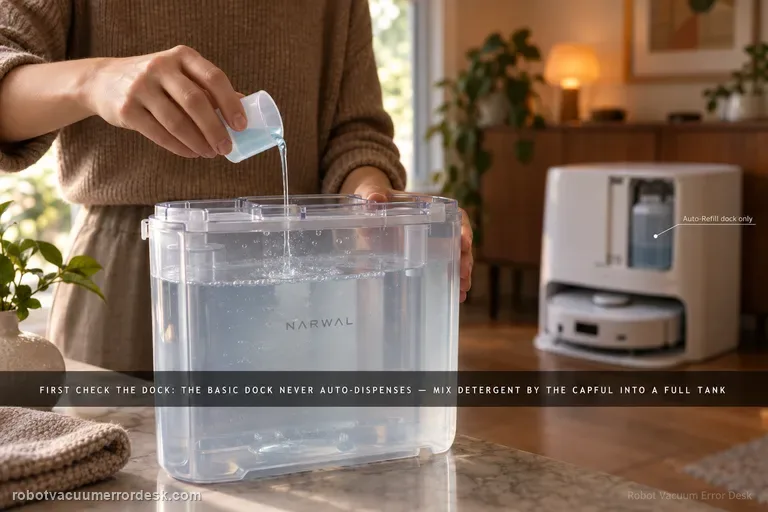
Detergent not auto-dispensing
The first test is not the detergent bottle; it is the dock version. Narwal says Flow’s Basic Dock does not auto-dispense detergent at all. With that dock, detergent is mixed manually into a full clean-water tank using Narwal’s specified capful guidance. The compact/Auto Refill & Drainage version has a built-in main detergent reservoir and can auto-dispense after the cartridge is filled and reinstalled horizontally. Narwal also documents an app switch under Device Homepage → Settings → Base Station → Automatically add detergent for Flow with Auto Refill & Drainage. If you diagnose the wrong dock as if it had the other dock’s dosing system, a normal design difference looks like a failure.
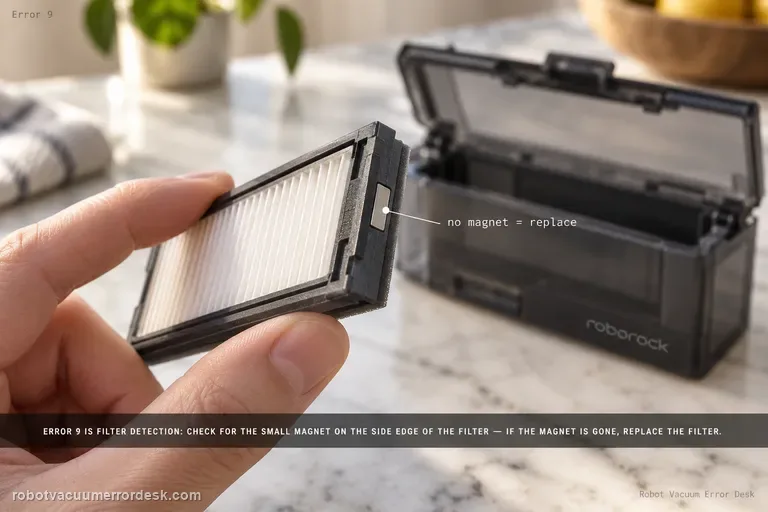
Error 9
Roborock Error 9 on the Saros 20 Sonic is a filter-detection check. The model support page says to look for the magnet on the side of the filter; if the magnet is missing, replace the filter and try again. First remove and inspect the filter carefully, clean its seating area, and reinstall it correctly. A present magnet plus correct seating but immediate Error 9 points beyond a simple missing-filter-magnet case.
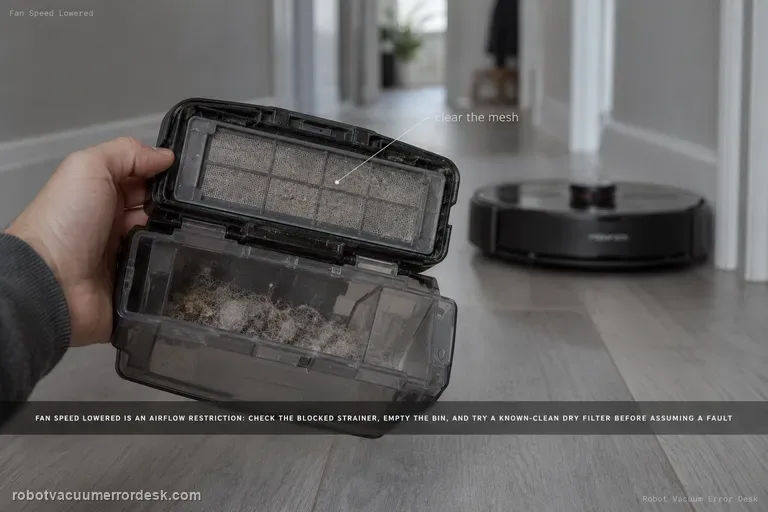
Fan speed lowered error
The Saros 20 Sonic “fan speed lowered” message is an airflow restriction check. Roborock says to inspect the blocked strainer and replace the filter to see whether the problem is solved. Empty the dustbin, clean accessible airflow surfaces, use a known-clean dry filter, then run the same suction mode again. If suction remains lowered with a clear bin/strainer and known-good filter, record the message and actual airflow behavior for support.
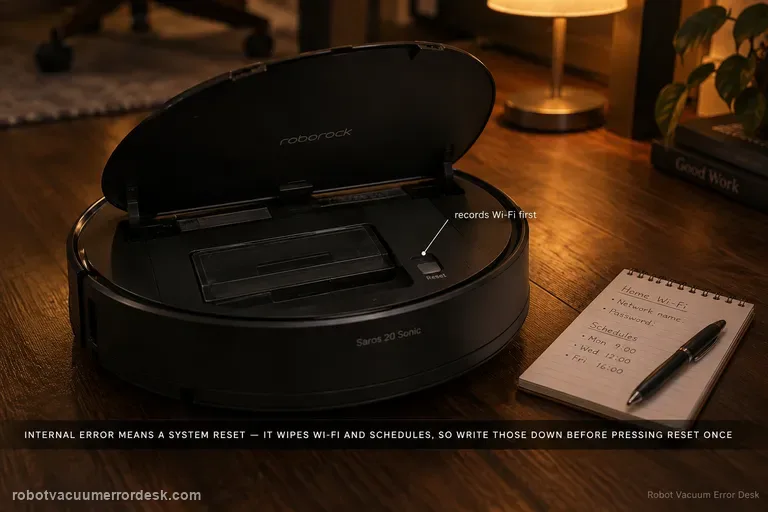
Internal error
For a Saros 20 Sonic Internal Error, Roborock’s exact model page tells owners to reset the system using the Reset button under the top cover. That reset returns current settings to factory defaults, including Wi‑Fi and scheduled cleanups, so record the network name, schedules and important app settings first. Perform one reset, reconfigure only what is necessary for a simple test, and escalate if the internal error returns.
Zone cleaning fails
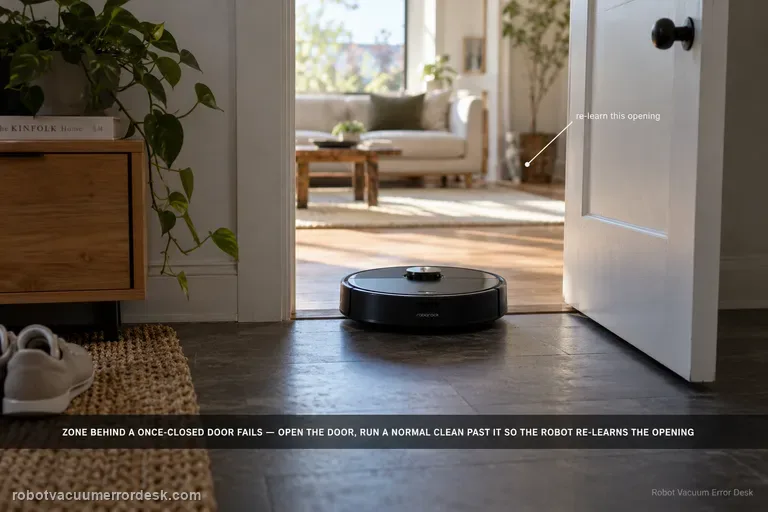
Zone cleaning on the Saros 20 Sonic can fail when the selected zone is in an area the robot previously understood as being behind a closed door. Roborock says to open the door, start a normal cleanup near that doorway so the robot recognizes the changed access, and then start zone cleaning again. The key is updating the robot’s local understanding of the doorway before repeatedly redrawing the same zone.
Misses cleaning areas
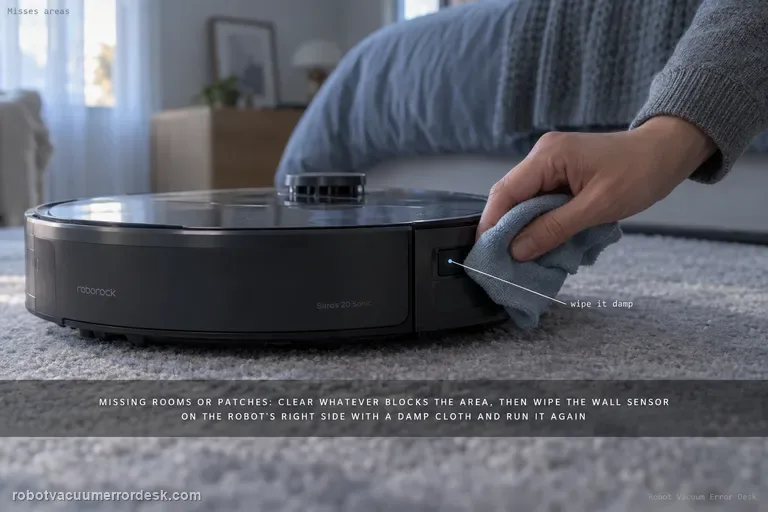
If a Saros 20 Sonic misses rooms or patches, Roborock starts with access obstacles and the wall sensor on the robot’s right side. Remove objects that block the missed area, then wipe the right-side wall sensor with a damp cloth and run another cleanup. Define “missed” only after the cleaning task finishes, and compare whether the same area is skipped again. Repeated misses with clear access and a clean wall sensor justify deeper map/navigation review.
Foamy water marks
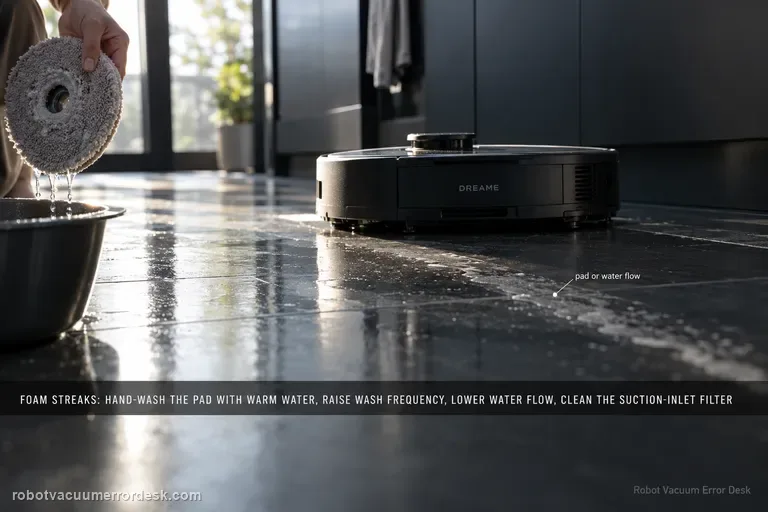
Dreame’s exact Aqua10 foam path checks four variables in order: mop-pad condition, wash frequency, app water-flow level and the suction-inlet filter. Hand-clean the removed mop pad with warm water and detergent as the support article instructs, rinse it thoroughly, and replace it if worn or permanently stained. Then increase wash frequency, reduce water flow and clean the suction-inlet filter. Do not pour household detergent into the robot’s clean-water tank; the Aqua10 manual says only clean water and officially approved cleaning solution belong there.
Water leaking outside base
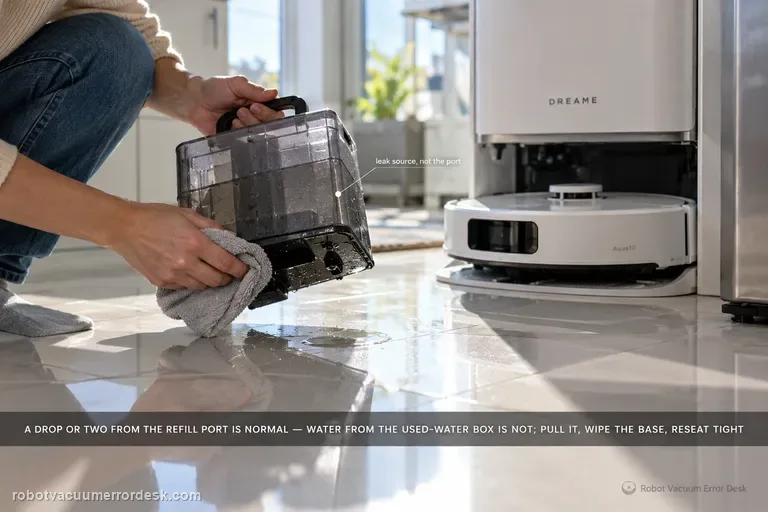
Dreame says one or two drops from the robot’s water refill port after refilling can be normal. If water is instead coming from the robot’s used-water box, remove it, wipe the bottom surface clean, reinstall it tightly and retry. Larger or persistent leakage should not be normalized.
Abnormal noise
Dreame’s exact Aqua10 abnormal-noise article starts with foreign objects around the roller brush: remove the roller, clear debris, reinstall it and retest. The exact-model manual provides useful secondary discriminators if that first check is clean: a clogged dust-box filter, hard objects in the main brushes or dust box, tangles in the main/side brushes, and suction mode can all change operating noise. Use the exact roller check first, then the manual’s non-invasive comparisons; a repeated noise with all owner-serviceable paths clear belongs with support, not internal motor disassembly.
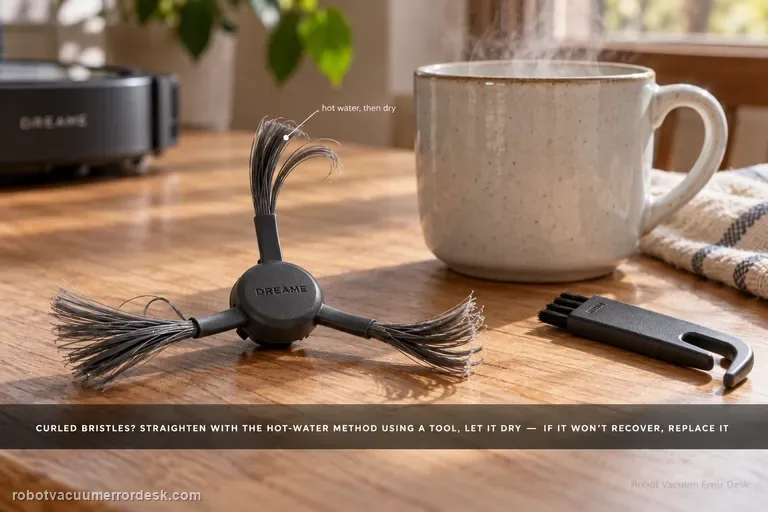
Side brush deformed
Dreame says the Aqua10 side brush uses nylon bristles that can curl in packaging or daily use. For deformation alone, remove the brush and follow the manufacturer’s hot-water straightening method using a tool rather than handling heated bristles directly; let the brush cool and dry before reinstalling it. If the bristles still do not recover, replace the brush. This page is not for a brush that will not rotate or keeps falling off — those symptoms use the separate side-brush drive/entanglement path.
Roller mop will not expand
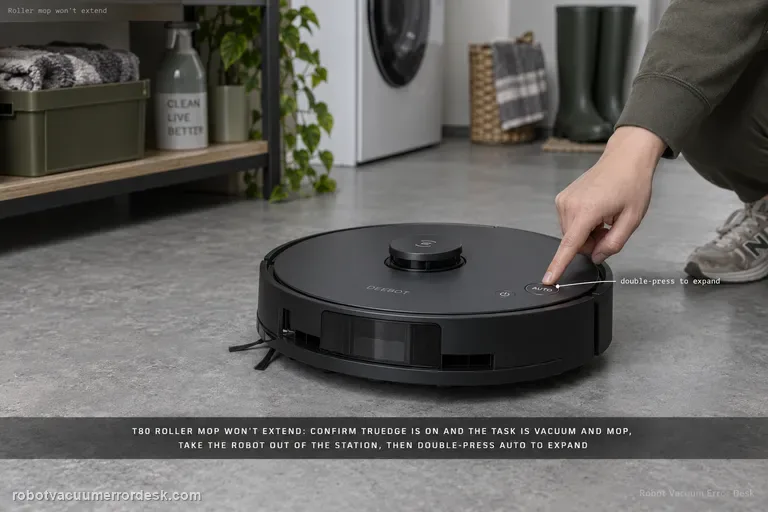
When the X11 roller mop will not extend for edge cleaning, ECOVACS checks software prerequisites before hardware: TruEdge Adaptive Edge Mopping must be enabled in Robot Advanced Settings and the cleaning mode must be Vacuum and Mop. Only then does the model-specific article move to a jammed roller mop. Confirm both app settings on the same test mission, then inspect and clean the roller if extension still does not occur.
Roller Mop Tangled alert
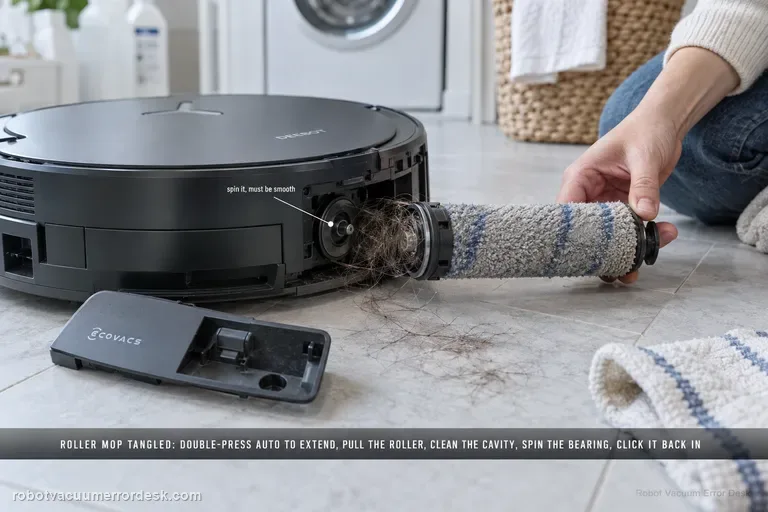
The X11 Roller Mop Tangled alert has a detailed manufacturer service path. Double-press Robot AUTO to extend the roller component, release and remove the roller, separate the end cover and clean it. Remove the dirty-water box before turning the robot over; clear the roller cavity and spin the roller-motor bearing to confirm smooth movement. Refit the end cover, push the roller into the motor until it clicks, retract it with a double press, reinstall the dirty-water box and restart.
Drip Tray Not Installed alert
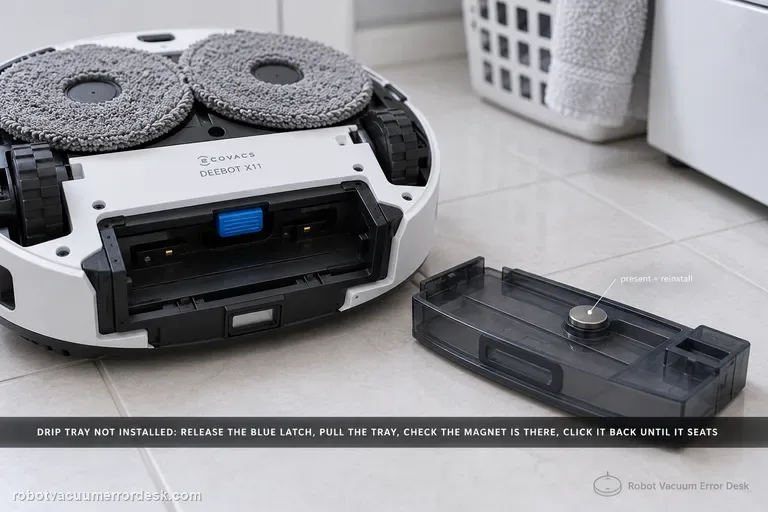
The X11 “Drip Tray Not Installed” alert has a clear hardware discriminator: ECOVACS tells owners to power the robot off, lift the roller-mop side, release the blue latch and remove the tray, then inspect whether the tray magnet is present. If the magnet is there, reinstall the tray until it clicks and restart. If the magnet is missing, contact customer service. Remove the dirty-water box first whenever you flip the robot to avoid leaks.
Anti-drop sensor dust alert
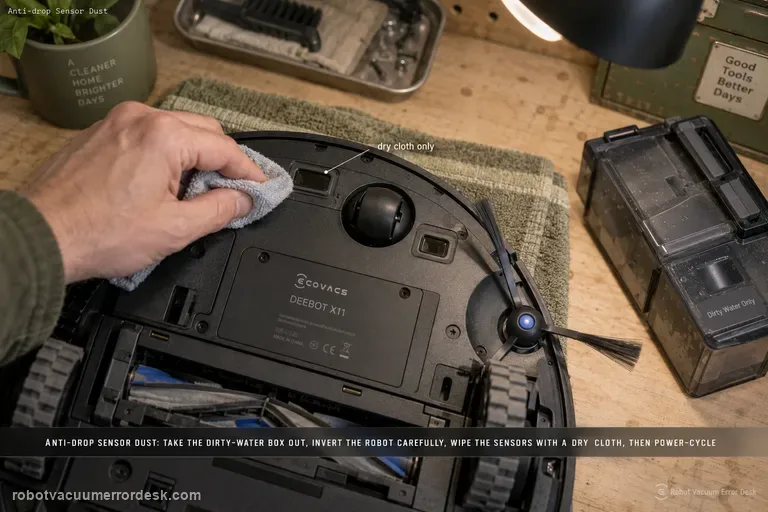
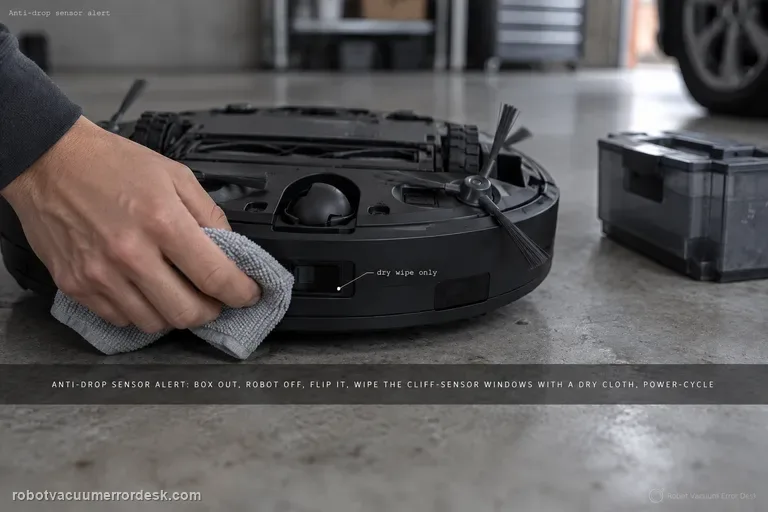
For the X11 “Anti-drop Sensors Dust Accumulation” or anti-drop sensor error, ECOVACS says to remove the dirty-water box, turn the robot over and gently wipe the anti-drop sensors with a soft, dry cloth. Reinstall the dirty-water box, then power the robot off and back on to check whether the alert clears. The important limits are dry cleaning, careful inversion and no attempt to defeat or cover the cliff sensors.
Residual water after mopping
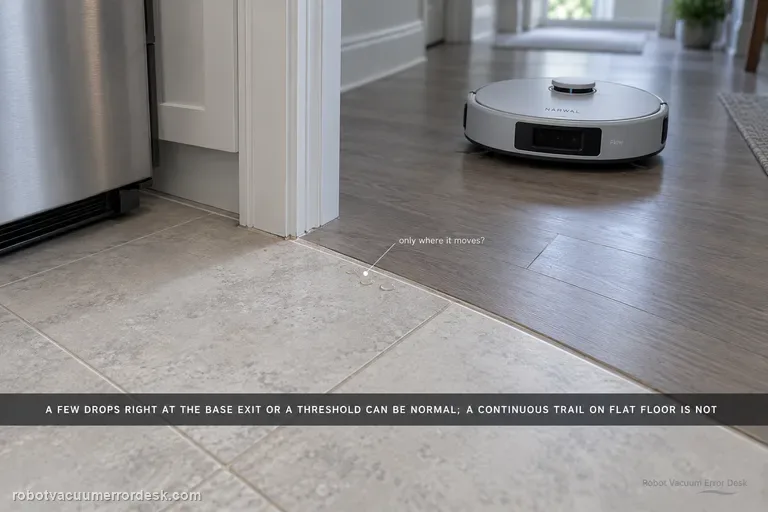
Narwal says Flow normally leaves no water in most cases, but a few droplets can be normal after significant movement—especially when the robot exits the base station or climbs a threshold. Treat quantity and pattern as the key discriminator. Dry the floor, repeat the same short route and note whether moisture is limited to those movement events or forms a continuous trail/puddle during ordinary travel. Do not open the internal water path for a few isolated drops. If the residue is clearly noticeable or persistent, Narwal asks for the robot serial number and a video of the robot operating.
One side brush is longer
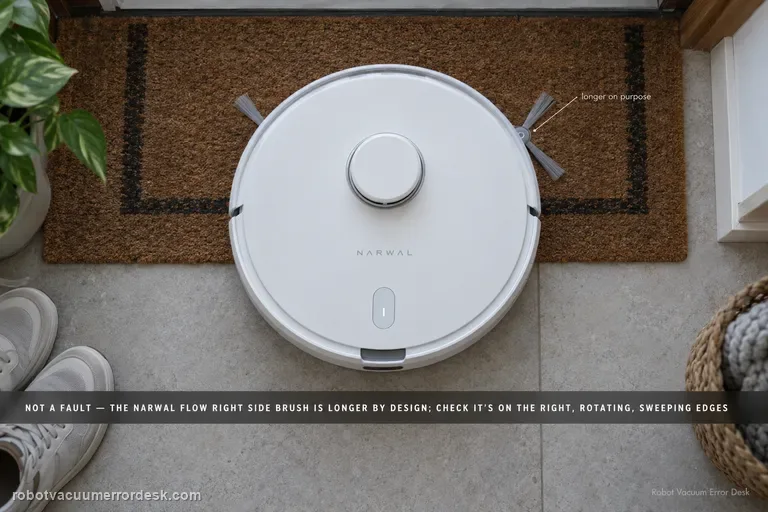
Yes—on Narwal Flow the right-hand side brush is intentionally longer. Narwal says the extra reach comes from the brush itself, not from an extend/retract actuator, so a healthy asymmetric pair should not be “fixed” or trimmed to match. Confirm the long brush is on the right, inspect for real damage or tangles, make sure any removed brush is seated correctly, and judge health by whether it rotates and sweeps edge debris normally. If the longer right brush stops rotating, repeatedly detaches or is physically damaged, that is a separate maintenance fault worth documenting for Narwal.
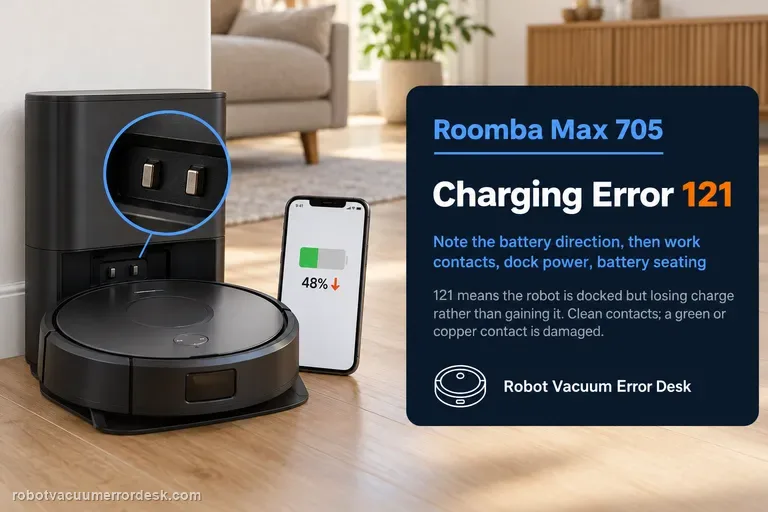
Charging Error 121
Charging Error 121 means the Roomba Max 705 is docked but losing charge instead of maintaining or gaining it. That makes the observed battery direction important: this is not merely ‘the robot will not start charging.’ iRobot’s code-specific path begins with the charging contacts, then verifies continuous dock power, and finally removes/reinstalls the battery if the external interface passes. Clean contacts with an approved lightly dampened melamine foam or cloth; if a contact is green or copper-colored, iRobot treats it as damaged. During the power test, watch whether the battery percentage or charging state continues to fall while the robot remains seated. If it does, capture that behavior. After a battery reseat, run one fresh session without moving the robot. A persistent 121 on clean intact contacts with stable dock power is a service case rather than a cue to keep polishing or repeatedly rebooting.
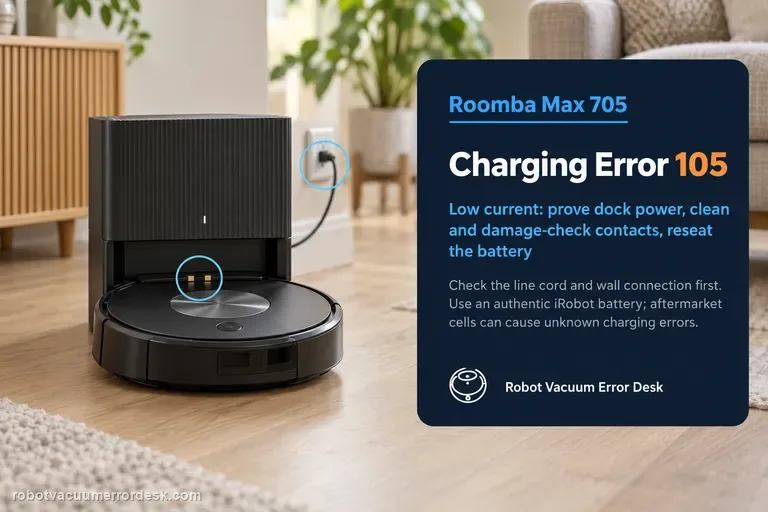
Charging Error 105
Charging Error 105 means low electrical current is reaching the Roomba Max 705. That is more specific than ‘not charging’: iRobot says the low-current path can involve the dock or power cord, debris on the charging contacts, damaged/stuck contacts, or the battery/robot side. Start by proving the dock has power, then clean both contact sets with an approved lightly dampened melamine foam or clean cloth. Inspect rather than endlessly polish: contacts that are green, copper-colored or stuck down are considered damaged and the affected robot or dock needs service/replacement. If the contacts and power path look normal, remove and reinstall the battery; iRobot says this effectively reboots the robot and specifically warns to use an authentic iRobot lithium-ion battery because aftermarket batteries can cause unknown charging errors. The pass condition is stable current/charging after each branch, not simply making Error 105 disappear for a few seconds.
Wi-Fi setup / connection
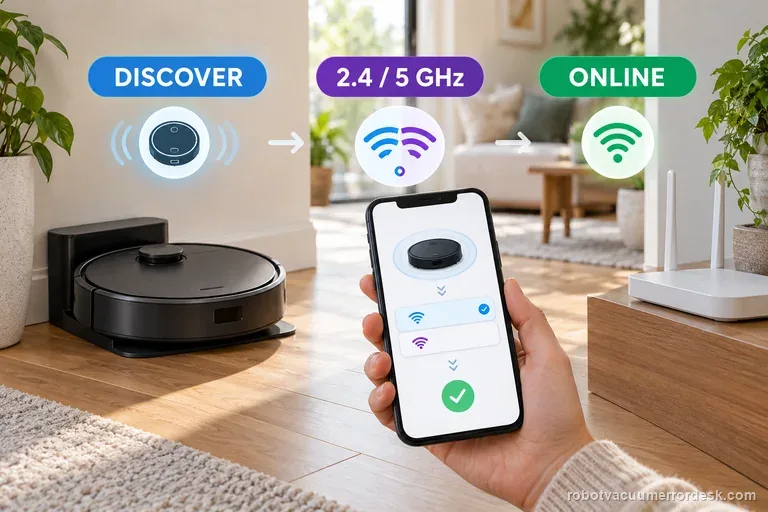
Do not force a Roomba Max 705 onto 2.4 GHz just because older Roomba advice says to. iRobot’s current Roomba Home App setup table lists the Max 705 Series as supporting both 2.4 GHz and 5 GHz. Start by keeping the robot charging on a powered dock near good Wi-Fi coverage, then verify Bluetooth, precise location and local-network access on the phone. The most useful branch is where setup stops: if the app never discovers the robot, work the phone-to-robot discovery path; if discovery succeeds but Wi-Fi provisioning fails, test the exact home network and, when practical, a phone hotspot. A successful hotspot setup points away from a dead robot radio and toward the home router, firewall, VPN, ad blocker or network configuration.
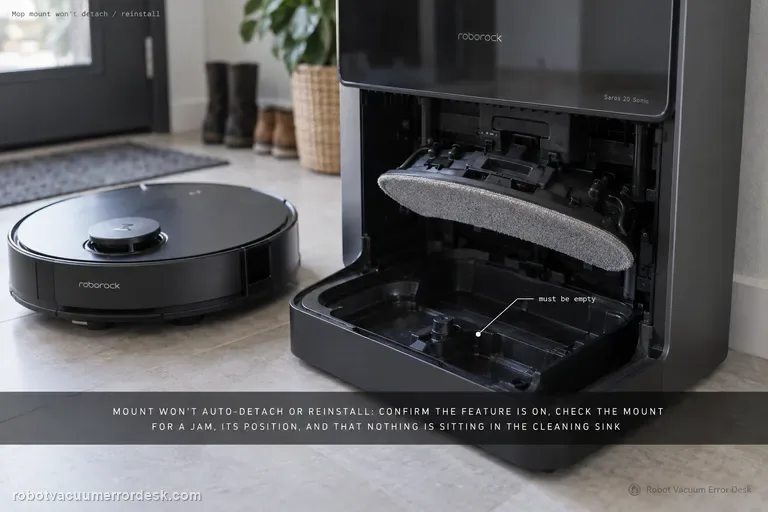
Mop installation failed
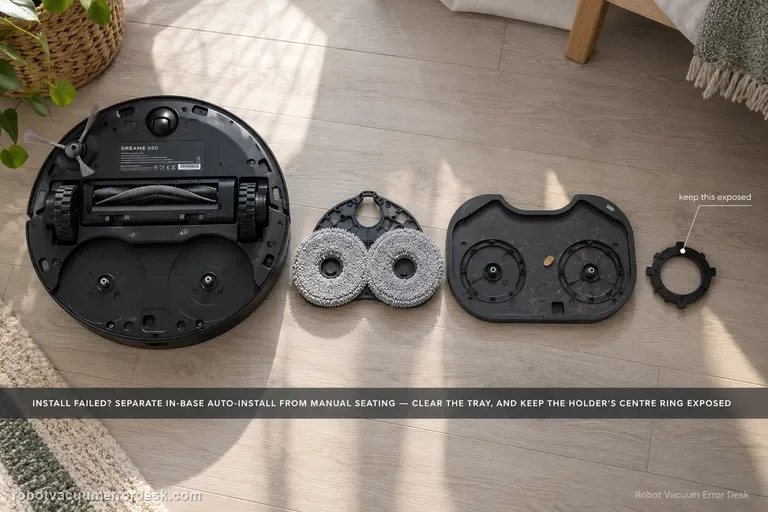
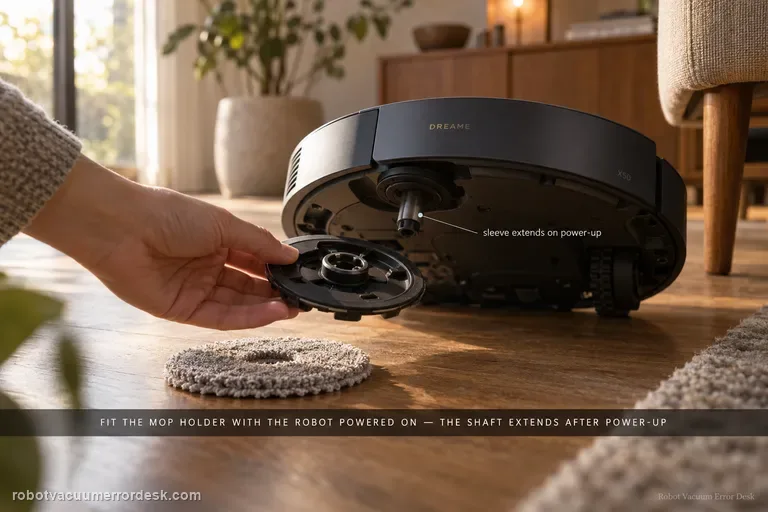
First classify where the error occurs. Dreame’s exact X60 article separates an in-base automatic installation failure from an outside-base case where the mop pad holder must be installed manually. A second X60 support article adds two high-value checks: foreign objects on the cleaning tray and whether the mop is fitted so the holder’s central ring remains fully exposed. If a clean, correctly fitted holder still fails after one restart/reinstall, document whether the same side fails and escalate instead of repeatedly cycling the installation mechanism.
Unusual main-brush noise
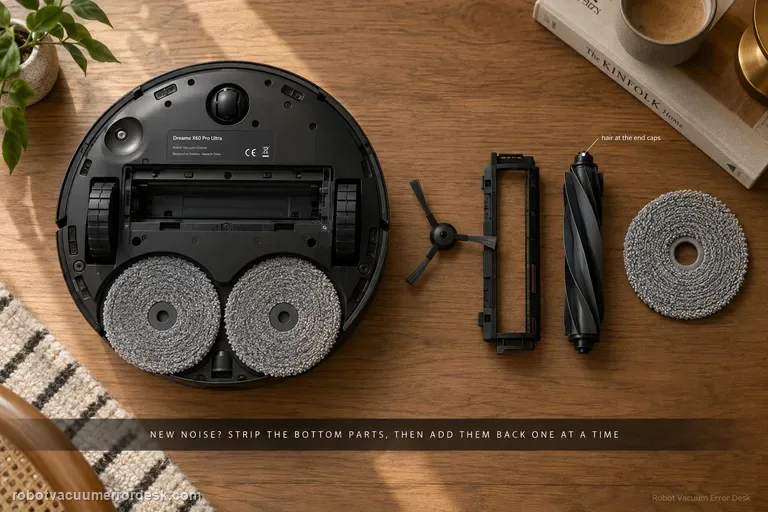
Treat a new X60 noise as an isolation problem, not a reason to replace the main brush immediately. Dreame’s exact-model procedure starts by removing the user-serviceable bottom components — side brush, roller-brush cover, roller brush and/or mop pad — and running a very short safe test. If the sound changes, reinstall one component at a time. A deformed side brush, hair around roller end caps, debris in the roller groove or a brush cover that is not secured on both sides can all create noise. If the sound remains with those parts removed, move to the drive wheels, caster and filter state. Dreame also notes that soft crawling mats can produce contact noise because the robot sinks slightly and the lowered roller reaches deeper. The useful endpoint is a repeatable source, not a long sequence of resets.
Cannot cross threshold
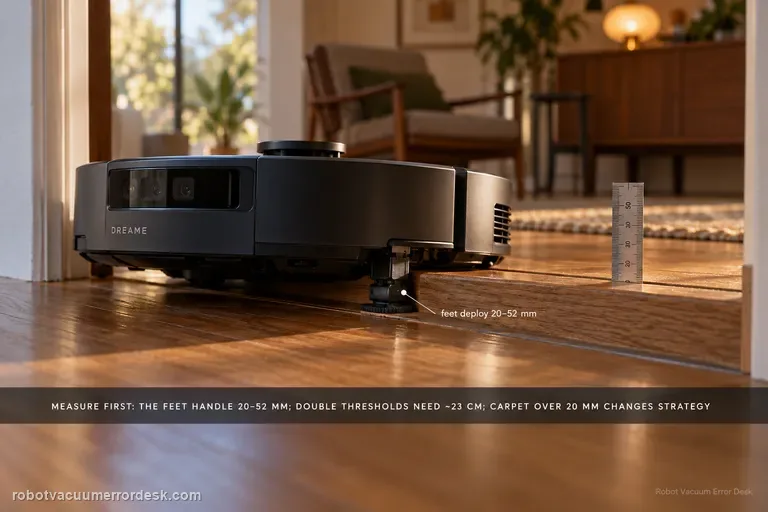
Measure the obstacle before calling the X60’s behavior a navigation fault. Dreame’s current X60 support page distinguishes obstacle height, double-layer width/geometry, dark surfaces, mechanical-foot behavior, chassis lifting and carpet strategy. The robot’s mechanical feet are used when a threshold is greater than 20 mm but less than 52 mm; if those feet do not reset in time, a tangling warning can appear. Double-layer obstacles add a width constraint of about 23 cm, and carpets thicker than 20 mm use a different chassis-lift strategy. Treat 52 mm as a conditional capability boundary, not a promise that every 52 mm doorway will be crossed regardless of shape, approach or surface.
Cannot enter low furniture
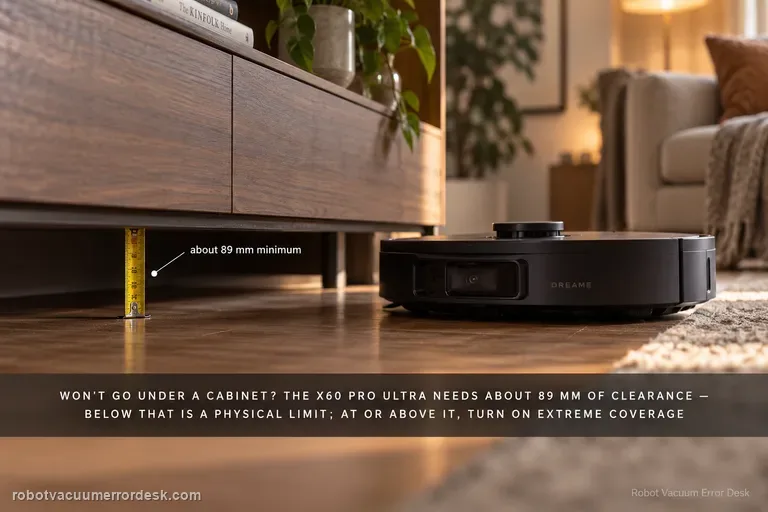
Measure before changing settings. Dreame states that the X60 Pro Ultra Complete needs approximately 89 mm of furniture clearance; an opening below that is a physical limit, not a mapping fault. If the lowest usable opening is at or above that figure, check Settings → Ground Cleaning Settings → Extreme Coverage and, where useful, mark a Low-Height Area in map editing. Because Extreme Coverage lowers the robot’s profile, Dreame also warns you to inspect the floor and underside of furniture for protrusions such as loose nails or hidden cable channels before enabling the behavior.
Stain detection wrong
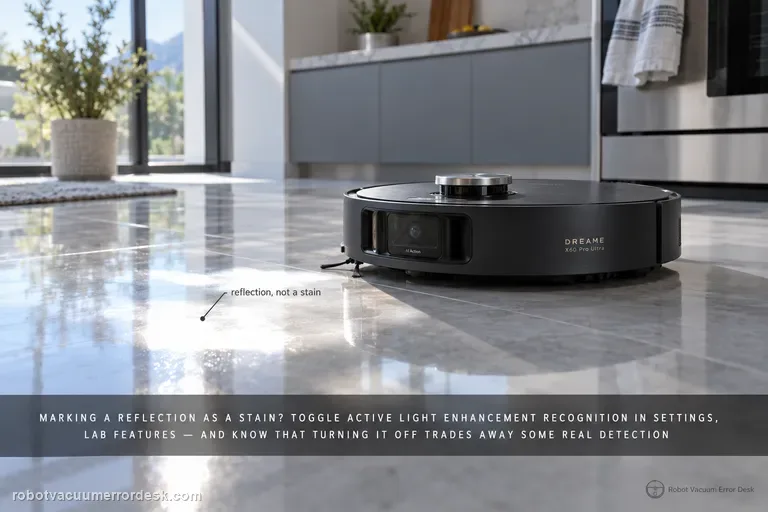
First name the recognition error: reflection marked as a stain, dense pet hair not recognized, pet hair avoided instead of cleaned, blue active-light annoyance, a supported stain still missed, or a repeatable false positive. Dreame gives a different X60 action for each. Reflection false positives point to Active Light Enhancement Recognition in Settings → Lab Features. Dense pet-hair clumps need both Large Particle Boost and Active Light Enhancement Recognition; sparse low-profile hair may simply be handled by normal suction. You can disable the blue active light, but Dreame warns that stain-recognition ability will decrease. If a supported target is still missed or misidentified, update firmware, verify Stain Recognition/Large Particle Boost and use Report an Error with a controlled example rather than changing unrelated navigation settings.
Water stains or dripping
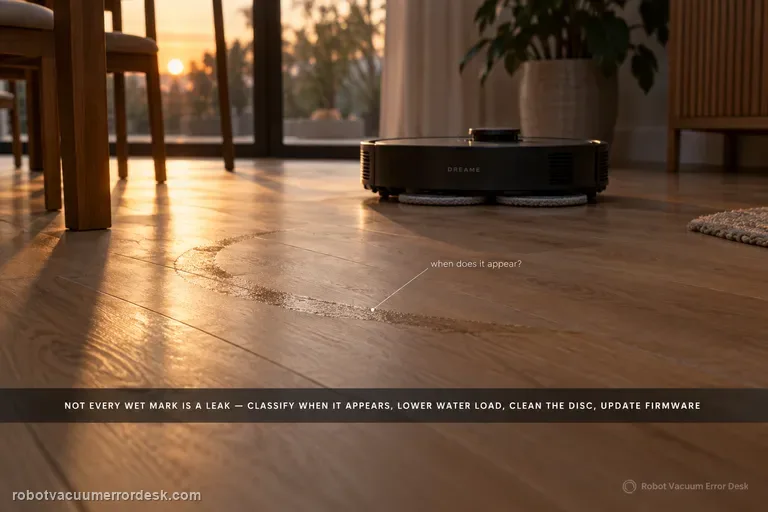
Not every wet mark under an X60 is a leak. Dreame distinguishes ordinary post-mop moisture, a few initial-use droplets left from factory water-circuit testing, and small droplets created when the robot rehydrates or spins the mop from persistent/excessive dripping that should go to service. Classify when the water appears, lower avoidable water load, clean the disc, update firmware, and use Dreame's 1–2-use observation window only for minor early-use droplets.
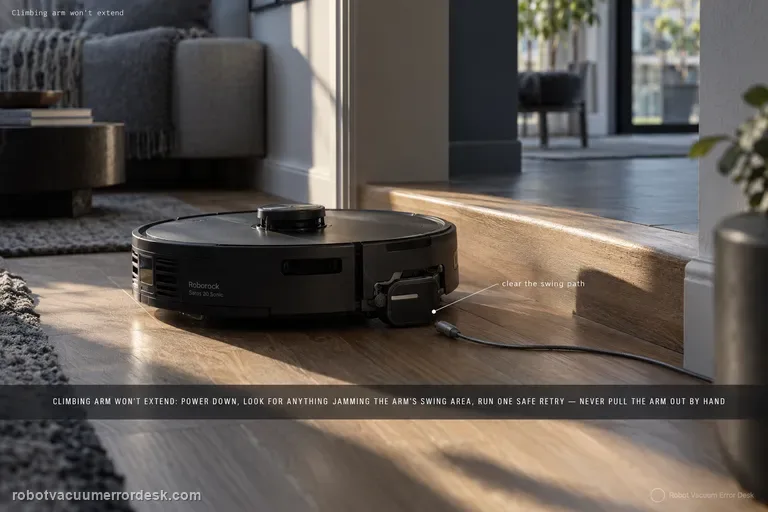
Extension arm stuck
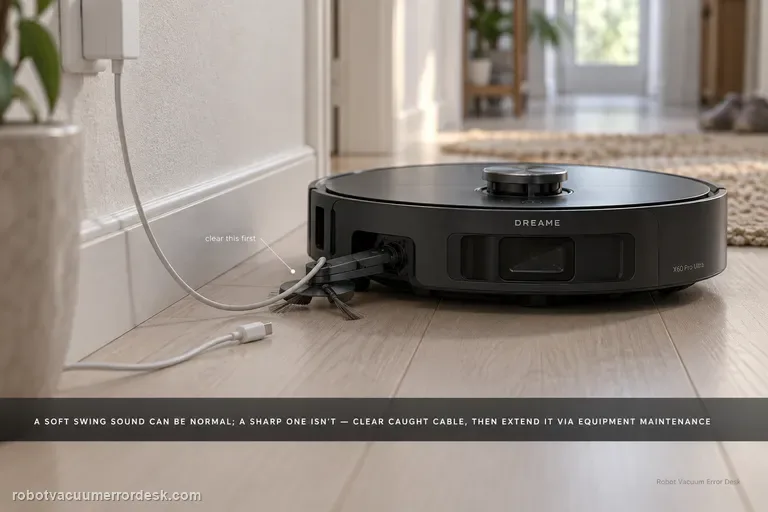
First decide whether the X60 arm is actually stuck. Dreame says a slight outward-swinging sound from the dual motors/gearboxes can be normal; a sharp abnormal sound is not. If a wire or rag is caught, stop the robot, clear loose floor hazards, then use Settings → Auxiliary Functions → Equipment Maintenance to extend the module far enough to remove the obstruction safely. If the arm remains extended after the obstruction is gone, Dreame provides App Settings → More Functions → Device Maintenance → Reset Mop → Retract. Do not force the linkage by hand when the app can command the mechanism.
Missed cleaning areas
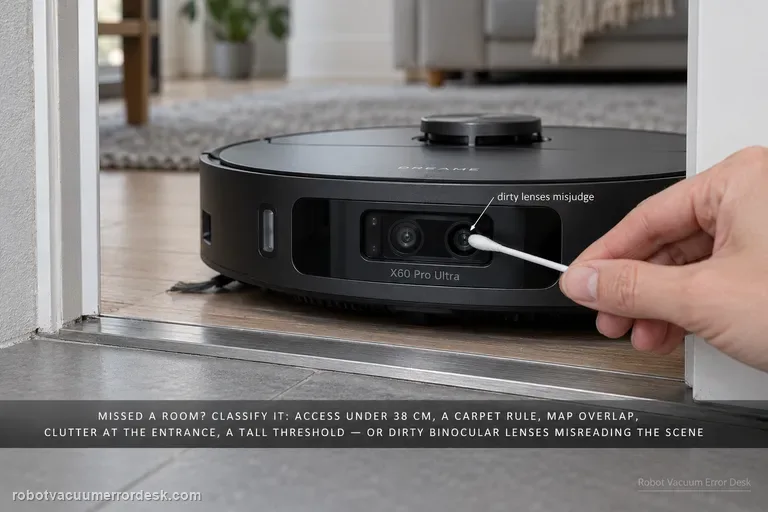
When the X60 misses a room or patch, do not delete the map first. Dreame’s X60 cleaning-function support page lists several distinct causes: access narrower than about 38 cm, carpet-avoidance rules, map overlap/positioning error, objects at entrances, thresholds beyond what the robot can cross, obstacle-avoidance behavior that leaves small margins, and dirty binocular lenses that can misjudge the scene. The fastest diagnosis is to classify the miss as physical access, intentional software avoidance, bad map position or perception. Preserve the map, measure the doorway, inspect carpet/threshold rules, clear only the entrance, clean the binocular lens, then run one targeted retest.
Cooling fan loud while charging
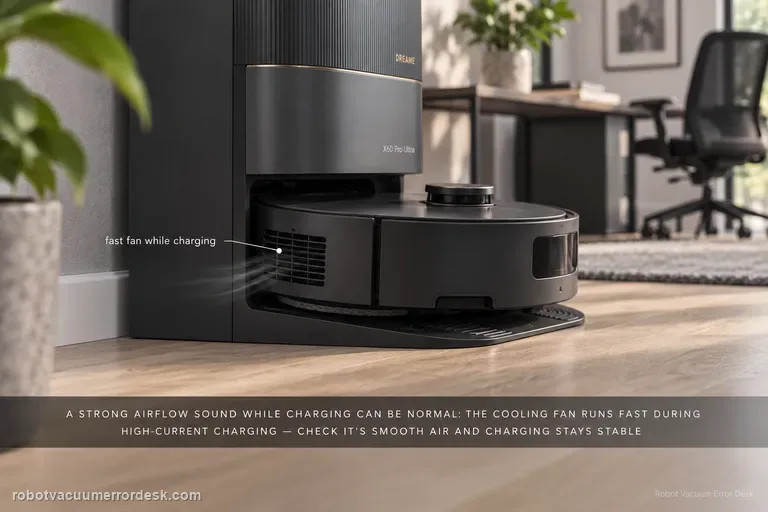
A strong airflow/fan sound from the X60 during charging can be normal. Dreame’s exact X60 article says the cooling fan may run at high speed when battery-pack temperature rises in scenarios such as “unlimited battery life” and 11A charging. A second X60 battery article explains that the fast charger monitors battery temperature with an NTC sensor and can reduce charging speed if overheating is detected. Confirm that the sound is smooth airflow tied to charging and that charging remains stable. Grinding, scraping, burning odor, repeated shutdowns or a charge fault belong to a different branch and should not be normalized as ‘just the fan.’
Not charging
A T80 OMNI that will not charge should be split into three questions before any battery guess: is the station actually powered, does the robot acknowledge charging when it is placed on the station by hand, and are the two sets of contacts clean and springing normally? ECOVACS also documents an Energy-Saving Charging setting, so a robot that holds near 30% outside the configured window is behaving differently from one that shows no charging state at all. Prove those states in order and save the battery hypothesis for last.
Clean Water Tank Anomaly
For the T80 OMNI Clean Water Tank Anomaly, stay on the tank-detection branch first: remove the fresh-water tank, refill it, verify that the float mechanism moves and resets, secure every lid latch, then reinstall the tank flat in the station. The goal of this page is to make the station recognize the tank and its level correctly. If the alert clears but fresh water still does not reach mopping or station self-cleaning, stop repeating tank-detection checks and switch to the separate clean-water-not-dispensing path, which tests the downstream seal, filter and hose. Keeping those two symptoms separate prevents a no-flow problem from being mistaken for a tank-state alert.
Clean water not dispensing
When the T80 OMNI has a recognized clean-water tank but no fresh water reaches mopping or station self-cleaning, troubleshoot the removable water path before assuming a pump failure. ECOVACS tells owners to seat the tank flat with no object trapped between tank and station, confirm the station sealing plug is fitted tightly, then remove the tank filter, disconnect the hose and rinse the filter with clean water. A separate Clean Water Tank Anomaly alert is a different branch that adds water level, float and lid checks.
Difficulty running / drive wheels
For the T80 OMNI 'difficulty running / check drive wheels' alarm, keep the first pass mechanical and comparative. Power the robot off, remove the dirty-water box before inversion, then press and rotate both drive wheels to find wrapped hair, thread or a hard bind. Clean the tread with a damp-but-wrung cloth or brush, dry it, and compare left versus right spring and rotation on a flat hard-floor test. If one wheel remains stiff or the alarm returns immediately on a clean dry surface, stop treating it as a map problem.
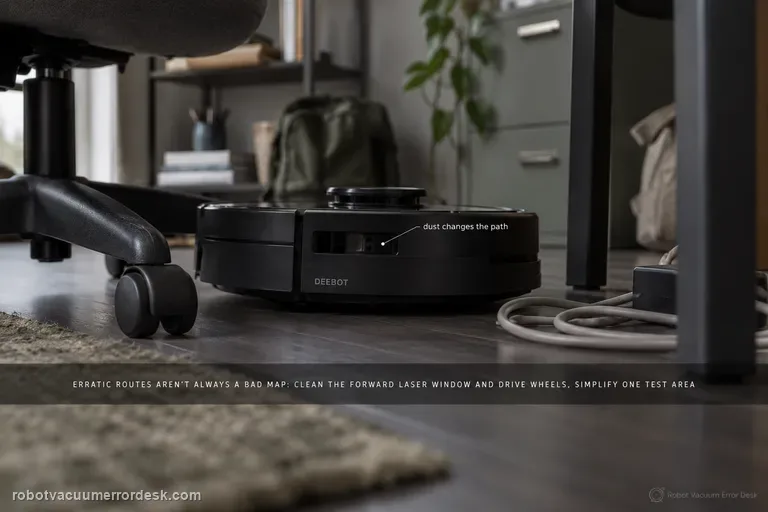
Erratic cleaning paths
Erratic T80 routes are not automatically a bad map. ECOVACS' exact-model article starts with three concrete causes: dust on the forward laser module, an obstacle-dense room that makes high-precision avoidance look irregular, and dirty drive wheels that change the robot's actual motion. Clean the optical and traction inputs, simplify one small test area, and compare a repeated route before restoring or deleting the map. Use the separate map-distortion path only when the saved map itself shows overlap or skew.
Laser Sensor Abnormal
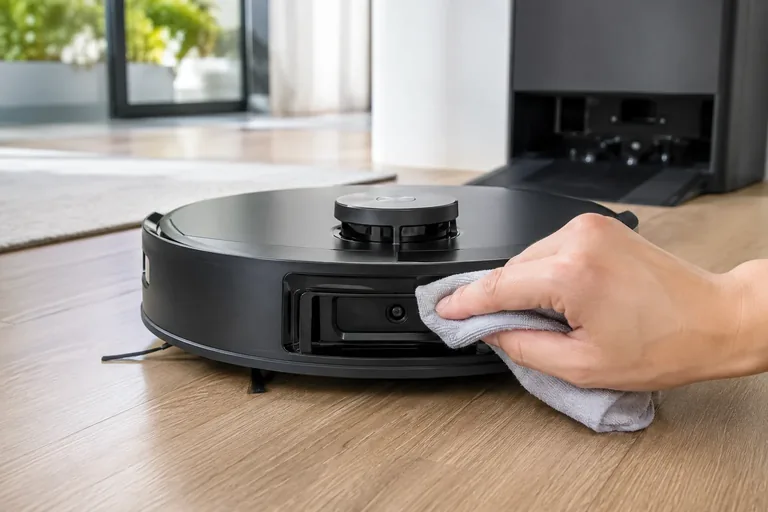
For the T80 OMNI 'Laser Sensor Abnormal' alert, ECOVACS gives a short exact-model recovery path: gently orient the laser unit so its radar lens faces forward, clean that lens with a soft brush or clean cloth, power the robot off for a few seconds, then restart it. The important additions are diagnostic: do not force a laser unit that is mechanically stuck, do not use liquids on the optical window, and prove the result with a short open-floor run. If the alert returns immediately with a clean lens and free external movement, the fault has passed the sensible owner-maintenance boundary.
Roller Mop Tangled
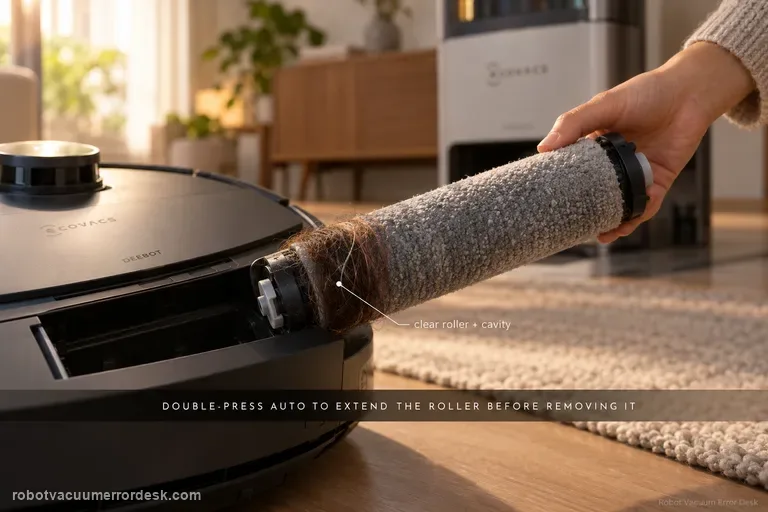
Do not pull a tangled T80 roller while the mechanism is retracted. ECOVACS' exact-model sequence is to double-press AUTO so the roller-mop component extends, release and remove the integrated roller, take off its end cover, clear the roller and cavity, check the roller-motor bearing for smooth movement, reinstall the end cover, align the roller with the motor until it clicks, retract the component, reinstall the dirty-water box and restart. The companion removal guide also warns that expansion mode is required and that the roller and mop are integrated rather than separately replaceable.
Resume Cleaning not working
A T80 OMNI that charges but never continues an unfinished cleaning job should be diagnosed as mission-state logic before it is treated as a charging failure. ECOVACS says Resume Cleaning must be enabled, only works in Auto mode, will not activate during Do Not Disturb, will not resume after the return-to-charge sequence produced an error alarm, and can be interrupted by restarting or resetting the robot. Build one controlled Auto-mode test that intentionally requires a recharge, leave the robot and map alone during that break, and observe whether it resumes after enough charge is available.
Anti-drop sensors dusty / error
For a DEEBOT T80 OMNI anti-drop sensor dust/error alert, use a dry optical-cleaning path rather than trying to defeat the cliff sensors. Remove the dirty-water box, switch the robot off, invert it safely, and wipe the anti-drop sensor windows gently with a soft dry cloth. Reinstall the box and power-cycle the robot, then test on level flooring well away from stairs. If the alert clears on a light, ordinary floor but returns only on a very dark or highly reflective edge condition, record that surface effect; if it returns immediately everywhere with clean sensor windows, the fault is no longer explained by surface dust.
Bumper Stuck alert
For the T80 OMNI Bumper Stuck alert, ECOVACS asks for a direct mechanical spring-back test, not a map reset. Remove the bumper protector strip, then press/tap the left, center and right bumper zones separately. Each zone should move inward and return freely. Clean only accessible debris around the bumper seam, then run a short open-floor test. If one zone remains depressed, returns slowly or the alert recurs immediately with free visible movement, stop prying at the bumper assembly and send ECOVACS a video of the three-zone comparison.
Dirty Water Box Abnormal
ECOVACS’ T80 Dirty Water Box Abnormal alert refers to the robot’s onboard Dirty Water Box, not the station’s larger Dirty Water Tank. Remove the onboard box, empty it, clean its filter and close the lid firmly for a tight seal. Then press the drain port: if the box contains water, pressing the port should release water; clean that port with a brush if it is blocked. The manufacturer adds a mechanical station test: press the charging contacts on the base’s right side for 1–2 seconds, release them and check whether the drain rod moves up/down smoothly. The same T80 support set also shows how to clean/reseat the dirty-water box and water tray, including the positive “click” on reinstallation.
Map distorted or overlapping
Do not delete the T80 map first. ECOVACS’ exact distortion/overlap article says to use Map Management → Restore Map to revert to the original saved map. Only if that original map is inadequate does ECOVACS tell you to delete it and create a new one. When a rebuild is necessary, the T80 Mapping Guide adds the conditions that make the new test meaningful: open doors, remove floor obstacles, provide sufficient lighting, power the robot on, place it directly in front of the charging dock and let it dock, keep the robot online for Quick Mapping, wait for the “Mapping completed” announcement, and manually back up the map after editing.
Obstacle avoidance not working
Do not judge the T80 from one bump. ECOVACS’ exact path says to clean the laser sensor centered on the front bumper and confirm Intelligent Avoidance/AIVI 3D is enabled. It also warns that black or thin objects may still be lightly touched. The useful test is therefore a controlled, repeatable obstacle in an open area: clean optics + enabled avoidance + a normal visible object. If that test fails repeatedly, you have evidence of a sensing problem rather than an object-class limitation.
Wi-Fi setup / connection failure
For a DEEBOT T80 OMNI that will not connect to Wi-Fi, use the T80 onboarding sequence before changing router settings: keep the robot near the station, use ECOVACS HOME, scan the robot QR code, enter the home Wi-Fi password, switch the robot on, briefly press the network/reset button when the app asks, and confirm the voice prompt that the Bluetooth hotspot has been released. ECOVACS’ T80 network guidance also calls for a 2.4 GHz-capable home network, Bluetooth enabled on the phone, strong Wi-Fi coverage, a current ECOVACS HOME app, and no VPN/proxy or captive-portal style network during pairing. The key diagnostic is the stage: QR recognition, Bluetooth discovery, home-Wi-Fi authentication, or final cloud connection. Do not factory-reset simply because the final screen says connection failed.
Roller mop will not expand
A T80 roller that will not extend should be treated as a conditions-and-mechanism problem, not immediately as a failed motor. ECOVACS says to confirm TruEdge Adaptive Edge Mopping is enabled and the task is in Vacuum and Mop mode, then check the roller for a debris jam. The companion roller guide adds two important installation facts: expansion mode is required for removal/installation, the robot should be outside the station when you double-press AUTO, and the roller must align to the motor until it clicks. Prove the settings, clean/reseat the roller, then run one repeatable edge pass.
Finds station but slips returning
When a T80 OMNI finds the station but slips during the final approach, do not delete the map first—the robot has already demonstrated that it can locate the dock. ECOVACS' exact-model path is physical: dry excess water from the mop-washing tray and surrounding floor, clean then dry the drive-wheel treads, verify the roller mop is correctly installed, verify the mop-washing tray is seated, then place the robot directly in front of the base and press AUTO for a close return test. That test separates final traction/seating from long-range navigation.
Auto-empty / dust collection not starting
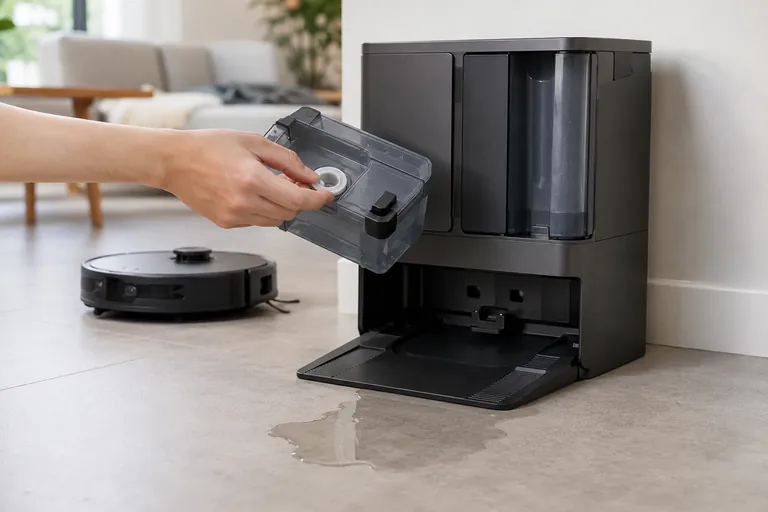
Treat X10 Pro Omni self-empty failures as two different states: “collection never starts” versus “fan runs but debris does not transfer.” First confirm the Omni Station has a steady white power light and its lid/bag state is normal, then clear the robot outlet and station path. eufy’s alert table also distinguishes a cooling self-empty fan from a permanent failure. In heavy-debris homes, eufy recommends 15-minute Pet-mode emptying with Turbo or Max suction to reduce repeated packing.
Omni Station leaking water
Stop repeated wash cycles and identify the leak path first. eufy’s exact X10 station guidance starts with the clean-water tank rubber seal, then the dirty-water tank seal, then the cleaning-tray float. If those are normal, the clean-water tank one-way valve becomes the next owner-level discriminator; persistent leakage beyond that can indicate an internal station water-path fault.
Not charging or powering on
Start at the powered dock, not the battery. eufy’s X10-specific sequence is: confirm the Omni Station shows a steady white indicator, clean the robot/station charging contacts and signal lenses, use the robot Reset button if it remains unresponsive, then rule out temperature protection. eufy lists 4–45°C (39.2–113°F) as the protective range boundary and advises warming/cooling farther into range before retrying charge.
Error 18
Error 18 on a Roomba i5 means it could not return to the Home Base or starting position. Treat the numbered error as a controlled docking diagnosis: prove dock power, keep the base fixed and clear, inspect the caster and drive wheels, then test the i5 facing the dock from about 6 ft (1.8 m). Unlike j-Series robots, the i Series is among the models iRobot lists with an RCON sensor for dock detection, so the close-range test helps evaluate that homing path. If the i5 docks from close range but fails after long missions, placement, navigation context, remaining battery and area coverage are stronger suspects than the dock itself.
Not charging
For a Roomba i5 that will not charge, first prove the Home Base or Clean Base is powered and that the robot is actually touching both charging contacts. iRobot warns that battery status may not refresh reliably from a remote connection, so check locally and use a timed before/after reading. Clean the contacts, allow a deeply exhausted robot to wake, and separate manual charging from autonomous docking. If the i5 never acknowledges charge, use the supported reboot or battery re-seat path. Only after those controlled checks should battery or robot-side charging hardware become the leading suspect; newer i5 hardware revisions can also be non-modular, which affects the service route.
Error 23
On the RV2300-series Shark Matrix, Error 23 means the robot cannot find the Self-Empty Base. Treat that as a localization/base-acquisition problem before treating it as a battery problem. Confirm the base is powered and has not moved, restore the owner-guide clearance of roughly 3 ft (1 m) on each side and 5 ft (1.5 m) in front, clear the approach, dry-clean sensors and charging contacts, and make sure the wheels are not dragging. Then place the robot a short distance directly in front of the powered base and command Dock. If that short test passes, long-route mapping or base permanence is the stronger suspect. If it fails with the base clearly powered and visible, the base-detection path is ready for Shark support.
Not charging
A Shark Matrix that will not charge should be tested at the base before you blame the battery. The RV2300-series owner guide distinguishes the base's powered/not-charging state from its charging state and describes the robot's charging indicators. Confirm the Self-Empty Base has power, manually seat the robot squarely, dry-clean the charging contacts on both sides, and allow a very low battery enough time to recover; the guide notes that a full charge can take up to about six hours. If the robot charges only after repositioning, treat alignment and docking as the stronger issue. If the base is powered and the robot never acknowledges charge even when hand-seated, charging hardware or battery service becomes more credible.
Resume cleaning off
If the X40 Ultra returns to the base and charges normally but never continues unfinished work, stop troubleshooting charging contacts and prove the resume feature itself. Dreame’s X40-specific setup path is Device home → Settings → More Functions → Resume Cleaning Mode. Dreame’s general recharge-and-resume guidance explains the intended behavior: a low-battery cleaning task returns to charge and later continues the unfinished area. Enable the exact X40 setting, start a sufficiently large normal cleaning job, let the robot create the recharge breakpoint by itself, and avoid cancelling or replacing the mission while it charges.
Side brush stops on carpet
On X40 Ultra, a side brush that lifts and stops on carpet can be normal behavior, not a failed motor. Dreame’s exact X40 carpet-setting page says side-brush cleaning on carpet is disabled by default to reduce secondary contamination, and you can enable Settings → Carpet Settings → “side brush rotates on carpet.” Dreame’s newer X40-series support adds that the brush may also lift during positioning, recharging, cross-zone navigation and voice calls. First prove the brush rotates on hard floor, then reproduce the same carpet transition before and after changing only the carpet setting.
Dirty water not draining from cleaning tray
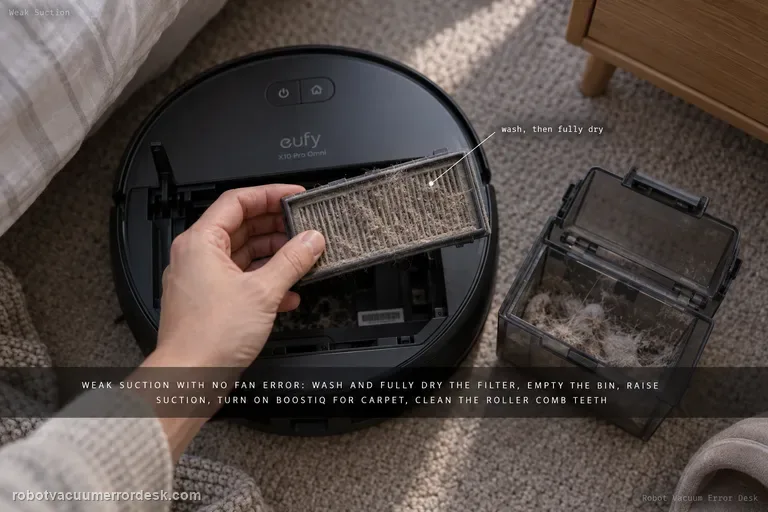
If dirty water remains in the X10 Pro Omni cleaning tray, start with the dirty-water tank: make sure the tank is not full and its lid is tightly closed. Clean clogged tray filter holes, then use eufy’s lid-pressure test during Wash Mop to check whether the dirty-water tank seal ring is leaking. Update firmware and collect logs/photos if the issue persists.
Weak suction / poor cleaning
For X10 Pro Omni weak pickup without a suction-fan error, follow eufy’s performance path in order: clean and fully dry the filter, empty the dustbin, raise suction power, enable BoostIQ for carpet, clean the roller-brush comb teeth, then inspect wear items that are easy to miss—the side brush and the rubber strip on the roller-brush guard. eufy says a filter older than about six months that still performs poorly after washing is a replacement candidate.
Cleaning tray water level abnormal
For the X10 Pro Omni “water level of the station’s cleaning tray is abnormal” alert, start by checking whether water is actually pooled in the tray and dry it if needed, then inspect the tray’s metal detector for water droplets. Also confirm the cleaning tray is installed correctly and the dirty-water tank is closed/seated so the station can pump water away.
Mop cloth almost dry
For a Saros 20 Sonic that leaves the mop cloth almost dry, use the current model manual as the owner-safe baseline: its Common Issues table says to increase water flow in the mobile app when there is no or little water during mopping. If that does not change the cloth, verify the dock can support a normal wash/refill cycle—clean-water tank seated and filled, dirty-water tank seated with capacity, and the cleaning-sink water filter installed correctly. Then run one dock-started mopping test without changing several settings at once. Do not open the robot’s internal water path, probe outlets with a needle, or remove an internal tank; those actions are not part of the current Sonic manual’s owner procedure.
Full-house cleaning incomplete with PowerBoost
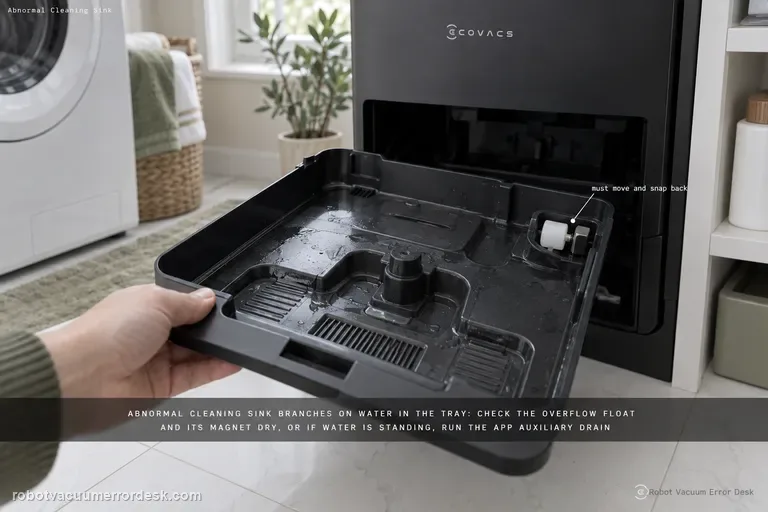
If the X11 still cannot finish a whole-home mission even after PowerBoost Charging is enabled, ECOVACS gives two model-specific settings to reduce the load on the mission: set suction to Standard from the control page, then go to Settings > Station Advanced Settings and set Mop Washing Frequency to “by time” at 10 minutes. Test a comparable full-house route after those changes. If it still cannot complete, preserve battery/job history rather than repeatedly changing several performance settings at once.
Abnormal cleaning sink alert
The X11 “Abnormal cleaning sink” alert branches on whether water is present in the mop-washing tray. First make sure the tray and overflow float are installed correctly and check the float magnet. If the tray is dry, clear any obstruction so the overflow float moves and snaps back. If water is standing in the tray, ECOVACS moves to dirty-water tank sealing, the tank-base plug, the app Auxiliary Drain function, tray cleaning/reinstallation and a station power-cycle before retesting drainage.
Error 18 / cannot return to dock
On the Roomba i3/i3+, Error 18 means the robot could not return to the Home Base or its starting position; it is not a charging-error code by itself. Prove the dock has power and has not moved, clear the approach, clean both charging-contact sets and the dock/RCON homing surfaces, check the caster and drive wheels, reboot the i Series robot, then face it toward the dock from within about 6 ft (1.8 m) and send it Home. If that close-range test works but a normal mission still fails, dock placement, environmental interference or mission range becomes the stronger lead. iRobot lists i3/i3+ coverage at up to about 1,600 ft², so a long mission ending with a very low battery can also reduce the margin for a successful return.
Error 13 charging
For S8 Error 13, use the dock indicator as the first electrical clue. Roborock says the dock light is off when the robot/dock charging contacts are properly connected; if it remains on with the S8 seated, reposition and clean both contact sets. Then verify the dock cable and wall outlet, power-cycle the dock if needed, and watch for sustained battery increase. This is a charging-contact diagnosis, so do not delete maps or start with battery replacement.
Cannot find dock
Treat 'cannot find the dock' as a homing problem until the S8 actually reaches the station. Roborock says return failures can follow a different starting location, manual movement, obstacles, poor dock placement or dirty homing surfaces. Keep the dock against a wall with about 0.5 m clear on each side and 1.5 m in front, clean the dock signal-transmission area and the robot’s front sensor, then compare a nearby Home test with a full cleaning return started from the dock. If nearby docking works but whole-room return fails, map/localization becomes stronger. If the S8 reaches the dock but will not charge, stop using this guide and switch to charging/Error 13 diagnostics.
Error 1
Q7 Max Error 1 means the LiDAR turret or laser is blocked. Check for physical obstruction first, then power the robot and watch whether the laser unit spins. If it is stalled, Roborock’s Q7 support says to gently rotate it manually and restart. Do not open the turret housing.
Error 5
Q7 Max Error 5 means the main brush is jammed. Remove the brush, clear hair from the brush and bearings, clean the two installation slots and both ends, then reinstall it correctly. Roborock’s Q7 support suggests a Carpet-mode test after the tangles are removed.
Error 23
Q7 Max Error 23 means the robot could not return to the dock. The exact manual says to clean the dock location beacon and retry. Also keep at least 0.5 m clear on each side and more than 1.5 m in front, avoid direct sunlight/blocking the beacon, clean the robot’s front sensor and run a short return test before moving the dock again.
Error 13
S7 Error 13 means charging failed, but it does not automatically mean the battery is bad. Roborock’s S7 manual identifies Error 13 as a charging error, and its current support path checks the robot/dock contacts, dock indicator, power-cable seating, a roughly two-minute dock power cycle and another outlet. Manually place the S7 on the dock so navigation is removed from the diagnosis, then prove that charging remains active long enough for the battery percentage to rise.
Auto-empty not working
Dreame’s current X40 Ultra dust-collection page separates a cycle that never starts from one that runs but moves little debris. Confirm the station is powered, the dust bag is correctly installed and not full, and the robot/base/dust-box collection ports are clear. In Dreamehome, make sure Dust Collection is enabled and remember that DND blocks dust-collection commands. Clean the charging-contact window that carries station communication, then run one controlled empty cycle and inspect whether debris actually moved.
Auto Resume not working
ECOVACS gives five hard conditions for X8 Auto Resume: the feature must be enabled, the cleaning task must be Auto Cleaning, the expected resume time must be outside Do Not Disturb, the robot must return to charge without a fault alarm, and the robot must not be restarted or factory-reset after the resume state is created. Diagnose those conditions in that order before blaming the battery or map. A useful proof test starts from a clean Auto Cleaning mission with enough unfinished area to force a recharge, records the return-to-station event, confirms that charging begins without a new fault, and then leaves the robot untouched until it either resumes or clearly fails to do so outside DND. If that controlled mission does not resume, save the mission history and settings before any reset so ECOVACS can see which prerequisite was satisfied.
Wi-Fi / Offline
Treat Omni S2 Wi-Fi as a pairing-path problem, not a reason to factory-reset the robot. eufy says S2 supports 2.4 GHz Wi-Fi only: verify the SSID/password, keep Bluetooth on, confirm the circular light is fast-flashing white, then reset only Wi-Fi by holding CLEAN + Return to Base for 3 seconds. A mobile-hotspot test is the clean discriminator before escalation.
Missed Areas
Before remapping an Omni S2, prove the space is physically accessible. eufy lists concrete limits: passages need about 36 cm, thresholds over 35 mm can block room entry, some high/long-pile carpets are intentionally avoided, and furniture clearance below 10.5 cm is not reachable. Open doors, clear false obstacles, then use Spot Clean for an area skipped after objects moved.
Error 6018
Error 6018 on the eufy Omni S2 means the UniClean base detected a problem during water refilling or mop washing. Do not confuse the model name S2 with older eufy 'Error S2' wheel-module codes. For Omni S2 Error 6018, eufy says to clear the robot's roller/brush/wheels, reseat the dirty-water reservoir, inspect charging pins, inspect the base water-injection nozzle and the screen-module silicone seal, then restart mop washing.
Poor Cleaning / Mopping
Split the symptom before changing parts. For weak mopping, eufy says to raise cleaning intensity and water level, enable Dirty Spot Cleaning for heavily soiled areas, and accept that hardened oil, glue or paint may still need manual cleaning. For weak vacuuming, clean the dustbin/filter, inspect the dustbin air-outlet silicone seal, replace worn brushes, then verify coverage and run a controlled second pass. Carpet results should be judged separately with higher suction if needed.
Not Charging / Slow Charge
eufy says a normal Omni S2 full charge takes about 4 hours. If the battery does not rise or charging is much slower, clean the robot charging pins, make sure the base pins move and spring back, push the robot fully into the base for firm alignment, restart the robot for 3 seconds, then unplug the base for 30 seconds. If a unit used for more than about a year still charges poorly after those checks, battery aging becomes a documented possibility.
Base Station Disconnect
A base-disconnect message is a communication problem, not automatically a docking or charging failure. eufy’s S2 path is: restart the robot and wait about 1 minute, unplug the base for 1 minute and restore power, perform the documented manual robot–base reconnection if needed, then move the base to a more open location away from metal furniture or large electronics if interference is possible. Retest the link before deleting maps or troubleshooting charging hardware.
Error 6011
On the Omni S2, Error 6011 is the specific path for a clean-water tank that is reported empty even though water is still present. Start by filling above the minimum and up to the MAX line for the proof test. Then inspect the clean-water tank seal plug, the screen-module silicone seal and screen-module seating, and finally the base water-injection nozzle. This is different from Error 6018: 6011 is a false/failed clean-water-empty detection path; 6018 is a water-injection or mop-wash abnormality.
Error 6119
Error 6119 on the Omni S2 is a dust-collection airflow warning, not a water-system error. eufy's exact path starts with the base dust bag, then moves through the robot dustbin/filter and rear dust-collection ports, and finally the base-station dust duct/port. After the airflow path is physically clear, homes with pets or frequent hair buildup can use Standard dust-collection mode and increase collection frequency to reduce repeat blockages.
Vacuum & Mop only vacuums
If the Omni S2 is set to Vacuum & Mop but never activates mopping, do not use the weak-cleaning article first: this is a mode/surface-detection problem. eufy's exact S2 path says to restart the robot, clean the underside ultrasonic sensors, consider floors with large gaps or complex/reflective patterns that may be misidentified as carpet, and check multi-floor/no-base-station context. When the S2 cannot detect its base on another floor, it can switch to Vacuum-only to keep the task running.
Unusual noise
Do not treat every Omni S2 sound as a failing motor. eufy's exact S2 support says a rhythmic click over large tile/wood seams can come from the omni-directional wheel, and the mop-wash pump can run every 40–80 seconds for about 10 seconds as part of normal dirty-water handling. For a new scraping, grinding, persistent rhythmic sound or high-pitched wash-station whistle, isolate the source: brush-cover seating and debris, omni/driving wheels, cleaning roller, dustbin/HEPA airflow, side-brush condition, then the dirty-water reservoir duckbill-valve path described by eufy.
Mop streaks / water marks
Visible streaks or water marks are a finish-quality problem, not the same intent as 'mop never activates' or 'missed areas.' eufy's S2 support starts with water delivery and roller cleanliness: use High water level when low/medium dries too quickly on absorbent or textured flooring, shorten roller washing when the roller carries dirt (eufy's example is 55 → 30 minutes), clean the dustbin/filter/brush path so dry debris is not smeared into the wet pass, and deep-clean or replace a worn, oil-coated or sticky roller mop.
Stuck on carpet / rug
An Omni S2 that gets stuck because a rug edge or carpet material is caught is not automatically a drive-wheel failure. eufy's exact S2 path first checks carpet recognition: manually add the carpet in Edit Map > Carpet Editing > Add Carpet when detection is wrong. For thin/lightweight rugs that the bumper or brushes push or lift, secure the corners or create a no-go zone. Very dark or black carpets can also be misrecognized, so use a controlled comparison and isolate that surface rather than deleting a good map or replacing wheel hardware first.
Auto-empty won't start
Do not treat every Qrevo Curv emptying complaint as a clogged dock. Roborock's Curv manual separates a cycle that never starts from a cycle that starts but empties poorly. Automatic emptying can be disabled, is suppressed after a return during DND, does not trigger when the robot comes back without cleaning, does not trigger when you place the robot on the dock by hand, and is blocked below 10% battery. The dock dust-container cover also has to be installed. After those trigger conditions are proven, run one manual emptying cycle. If manual emptying starts strongly, the hardware can create suction and the remaining fault is automatic trigger/state logic. If the motor starts but airflow is weak or noisy, switch branches and inspect the main brush/cover, filter, air duct, suction and air inlets, robot dustbin and disposable bag instead of repeating app resets.
Mop wash won't start
Treat 'no mop wash' as a trigger-and-water-path problem, not as the same issue as weak washing or cold wash water. Roborock's Qrevo Curv manual says mop cloths are not washed if they were not used, and the robot will not return for washing if it did not start from the dock or if the dock is not found on the active app map. For a valid wash trigger, run a small mopping task from the mapped dock and let the robot return naturally. Then check the clean-water tank is filled and seated, the dirty-water tank is emptied and seated, and the cleaning-tray module/filter is correctly installed. Finally start one manual mop-wash cycle. If manual washing works, the dock water system can operate and the remaining problem is the automatic trigger/map state. If manual washing also fails, preserve tank/tray status and any dock error for support instead of deleting the map immediately.
Auto-drying won't start
For a Qrevo Curv drying complaint, first distinguish three states: drying never starts, drying starts but ends early, or drying completes and the mop cloths still feel damp. Roborock's Qrevo Curv manual says Auto-Drying can be disabled in the app, that drying begins as needed after mop washing or cleaning, and that it can be started or stopped manually in the app. The troubleshooting table adds two key discriminators: leaving the dock during drying ends the cycle early, and high humidity may require a longer drying duration. The same Curv manual says the DND period can be configured to allow or suppress drying, so a failure that appears only overnight is a settings clue rather than immediate evidence of failed dock hardware. Therefore prove Auto-Drying, the DND drying permission and a valid post-wash trigger first, keep the robot docked for the test, then adjust duration for humidity before escalating.
Error 450
Error 450 on the Roomba Max 705 Combo means the clean-water reservoir needed for dock-to-robot replenishment is being treated as missing, not merely low. The useful recovery path is physical and state-specific: remove the reservoir completely, fill it to MAX, then reinstall it so it is fully seated; make sure the robot is correctly seated on the AutoWash dock and the charging interface is engaged; then refresh the Roomba Home App and retry the water operation. Keep the Max 705’s two liquid concepts straight: the AutoWash system still needs clean water for refill, while the separate StayClean concentrate supplied with the Combo does not replace the clean-water reservoir. If a full, properly seated tank still produces 450, save that exact condition. Do not drift into Error 451/other low-water troubleshooting or repeatedly reboot unrelated components, because the diagnostic value is proving that the expected tank is present and recognized.
Error 453
Error 453 is an AutoWash dock alignment failure after multiple attempts to position the Max 705 closely enough for the refill nozzle to extend. It is not the same as ‘cannot find the dock.’ iRobot’s code-specific procedure focuses on the mechanical interface around the wash/refill position: reinstall the Pad Wash Roller left side first, verify the robot bin is correctly installed, press the movable port on the bin to make sure it can move, inspect the dock nozzle housing for obstruction, and test the two dock buttons that lift the charging contacts. Each button should move freely and the corresponding contact should spring upward; it should not remain stuck in the pressed position. Only after those external checks should you reboot the robot and briefly power-cycle the dock, then run one return/refill retest. Do not pull or force the nozzle or contacts into position by hand.
Error 461
Error 461 means the AutoWash dock believes clean water is being pumped — its tank level is decreasing — but the Max 705 robot tank is not reporting the expected rise. iRobot calls this an air-pressure build-up/nozzle-tube problem and warns that fluid may be spilling outside the robot during refill. Start by removing the robot bin/tank and drying any liquid on the dock ramp, then reinstall the robot tank and seat the robot correctly. Fill the dock’s clean-water reservoir to MAX. In the Roomba Home App, open Pad and Dock Control and run ‘Rinse pad wash System’ once to flush debris, reinstall the dock tank and retry refill. Only if the code persists should you use iRobot’s unusual but explicit tube-prime test: tilt the dock backward about 45 degrees while retrying refill. If that succeeds, return the dock to normal; iRobot says repeated tilting should not be necessary once the tube is filled. Stop immediately for uncontrolled leakage.
Wi-Fi setup
The Omni E28 uses a 2.4 GHz Wi-Fi connection. Before resetting anything, confirm the password and test whether the robot can join a phone hotspot. For a clean pairing test, keep the robot, router and phone close together. If setup still fails, eufy says to hold the Power and Recharge buttons together for 3 seconds until the network-reset voice prompt, then reconnect. A hotspot that works while home Wi-Fi fails points away from a dead robot radio and toward the home network or credentials.
Failed to return to station
For the E28 message “Failed to return to station or dock,” eufy starts with the station environment rather than the battery: make sure the base is powered, sitting flat, reachable through an open doorway and not blocked by nearby objects. eufy also says not to power off or move the station while the robot is operating. If the robot charges normally when manually seated but cannot return autonomously, keep the diagnosis on dock visibility/placement and navigation rather than replacing charging hardware.
Water Injection Error
The E28 “Water Injection Error: Please check the app for troubleshooting” is a wet-system fault, not a generic low-water warning. eufy says to confirm water in the base tank, inspect the robot wheels/side brushes/roller brush/roller mop for obstruction and correct seating, check the Portable Deep Cleaner and cleaning tray, and keep the station on a hard level surface. The manufacturer also calls for checking water-injection-port rebound and sewage-outlet security, then using one Roller Self-Cleaning test to see whether water leaks into the tray.
Wastewater Extraction Error
eufy says the E28 “Wastewater Extraction Error” usually means an air leak is preventing dirty water from being extracted into the tank. Start with the dirty-water tank latch and the foam shipping pad around the Portable Deep Cleaner, then inspect the robot/PDC/tray, free the dirty-water-tank float, place the base on a hard level surface, and check the exposed extraction/sewage interfaces. Finish with one Roller Self-Cleaning observation; persistent murky water or leakage in the tray is evidence to stop repeated wet cycles and escalate.
Dripping dirty water
For an E28 that drips dirty water, eufy first separates an empty dirty-water tank with water still in the drain channel from a full tank that the station failed to drain. Then lock the tank until it clicks, remove any Portable Deep Cleaner foam pad, inspect the dirty-water-tank duckbill valve for detachment, and check the tank-to-roller-mop contact area. If water flows correctly down the tank base, eufy says a worn roller mop or excessive water-output setting becomes the next discriminator.
Roller mop not drying
For an eufy E28 roller mop that stays damp, first separate a wet-tray/drainage problem from a true drying problem. eufy says standing water in the cleaning tray can indicate a drainage issue that leaves excessive moisture in the roller. If the tray is draining normally, identify the selected drying mode: the station defaults to Adaptive Drying, while eufy recommends Standard Drying when high humidity prevents complete drying. The exact E25/E28 guidance also gives useful timing baselines—Standard Dry is 5 hours and Quick Dry is 3.5 hours. Run a complete cycle without interruption and evaluate the roller only at the end. A roller that remains clearly wet after a full 5-hour Standard Dry cycle with a normally drained tray is much stronger evidence of a station drying problem than dampness after an abbreviated Quick Dry cycle.
Mop cloth will not wash
If the Roborock Saros 20 Sonic will not wash its mop cloth, first separate a normal no-wash condition from a dock fault. The manual says the mop will not be washed if it was not used, and the robot will not return for mop washing if it did not start from the dock or no dock is present on the app map. After those conditions pass, check clean-water supply, dirty-water capacity and the cleaning-sink water filter. A controlled mop task that starts at the dock is the cleanest proof because it tests the full return-and-wash path without mixing in manual relocation.
Auto-drying will not start
When Saros 20 Sonic auto-drying does not start, check the setting before treating the dock as failed. Roborock’s manual says auto-drying can be disabled in the app. If drying starts but ends early, the manual gives a different discriminator: the cycle ends in advance if the robot departs the dock. A third branch is performance rather than startup—high humidity can require a longer drying duration. Keep those three states separate: disabled, interrupted by departure, or complete but insufficient in humid air.
Hot-water mop wash not working
If the Saros 20 Sonic is washing the mop but the hot-water function seems absent, the model manual gives one owner-facing control: check that Mop Washing Temperature is set to Hot Water in the app. That makes this a setting-first diagnosis, not a reason to descale, dismantle the dock or add hotter water manually. Confirm the exact setting, trigger one normal mop-wash cycle, and distinguish 'wash does not run at all' from 'wash runs but hot-water mode appears not to engage.' The manual also marks dock water outlets and drying areas as hot surfaces, so avoid touch-based temperature tests.
Side brush will not extend
A Saros 20 Sonic side brush that does not extend at every corner is not automatically broken. Roborock’s manual says to verify FlexiArm Design Extended Cleaning is enabled, and it explicitly notes that the side brush does not extend for every corner or every pass along a wall. That normal selective behavior is the key discriminator. Only after the feature is on and the robot reaches a suitable edge should you check whether the side brush is physically jammed. Use one repeatable wall/corner test instead of expecting extension continuously across the room.
LiDAR will not raise or lower
The Saros 20 Sonic’s moving LiDAR should not be judged by whether it raises or lowers continuously. Roborock’s manual says the LiDAR sensor lowers itself only when the robot cleans under furniture or appliances. That means a raised sensor in open floor is normal. If the sensor fails to move when the robot actually enters a low-clearance situation, the owner check is to inspect for objects stuck around the LiDAR sensor. Do not press, pry or force the tower; use a controlled open-floor versus under-furniture comparison to decide whether the behavior is normal context-aware movement or a repeatable mechanism fault.
Mop mount will not detach or reinstall
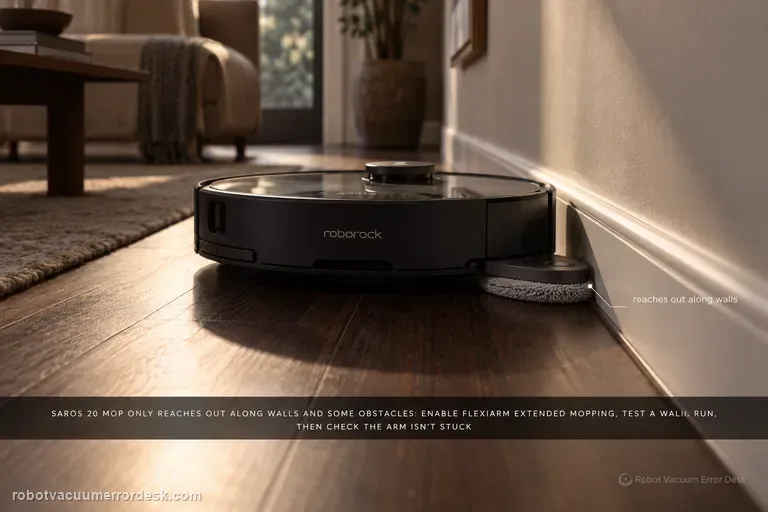
When the Saros 20 Sonic will not automatically detach or reinstall its mop cloth mount, the manual gives a multi-branch checklist. First verify Auto-Detach/Reinstall Mop Cloth Mounts is enabled; the feature works only under specific conditions, so a non-detach event is not always a fault. Then check whether the mount is jammed, whether it is placed in the position where removal occurs, whether it is installed correctly on the robot, and whether anything is sitting in the cleaning sink. Run one controlled dock cycle after those conditions are set instead of manually forcing the mount.
Mop cloth will not extend
The Saros 20 Sonic mop cloth does not extend continuously. Roborock’s manual says to verify FlexiArm Design Extended Mopping is enabled and notes that the mop extends only along walls and certain obstacles. That selective rule is the first thing to preserve when diagnosing a 'mop will not extend' search. If the feature is enabled and you test a suitable wall/obstacle route, then check whether the mop extension structure is stuck. A pad that remains centered in open floor can be normal; a pad that never extends across repeated valid edge interactions is the stronger fault pattern.
Climbing arm will not extend
For the Saros 20 Sonic climbing arm, Roborock’s manual gives a deliberately narrow owner check: look for foreign objects obstructing the climbing arm’s swing area. That means the safest diagnosis is mechanical observation, not a reset sequence or internal repair. First confirm the complaint is tied to an actual obstacle/threshold attempt, power the robot down, inspect the visible swing area and remove accessible debris. Then run one safe repeat. Do not pull the arm outward by hand or assume it must extend continuously; the useful evidence is whether a clear mechanism still fails during a repeatable crossing attempt.
Charging abnormal
Treat an X50 that reaches the station but will not charge as a charging-path problem, not automatically as a docking problem. Dreame’s exact X50 support page starts with current firmware, a powered base station, clean charging contacts and a restart. The X50 manual adds two useful discriminators: make sure both ends of the station power cord are fully connected, and remove any foreign object at the robot’s connectors. Manually seat the robot so the metal contacts meet, then watch for the normal charging indication. If the robot cannot physically complete the final approach or the charging pins do not rebound normally, use the separate X50 docking-failed path instead. If contact is proven and charging still never begins, stop polishing the same contacts and send Dreame the charging state, firmware version and a short video.
Wi-Fi setup failure
For first-time X50 network configuration, start with the hard compatibility rule: Dreame says the robot supports 2.4 GHz Wi-Fi and does not support a 5 GHz Wi-Fi connection. Then keep the robot/phone in strong Wi-Fi coverage, allow phone location permission for the Dreamehome app, and complete the handoff from the robot’s temporary hotspot back to the app after the voice prompt. Dreame also recommends simple letters/numbers in the Wi-Fi name and password for troubleshooting and suggests testing a different phone or a second phone’s hotspot if pairing still fails. The X50 manual adds two useful checks: verify the Wi-Fi password and, if the robot is not ready to be configured, exit and re-enter the app before retrying. This page is for configuration failure, not a robot that was paired successfully and later went offline.
Abnormal noise
First reproduce when the X50 becomes noisy. Dreame’s exact model article splits the symptom into two scenarios: a strange sound during normal cleaning, where an entangled brush is the first check, and an unusual driving-wheel sound during rapid mapping, where tire/ground friction, debris or wear on the tire are the first owner checks. The X50 manual adds a broader operating-noise branch: a clogged dust-box filter, a hard object in the main brushes or dust box, tangled main/side brushes, or high suction can increase noise. That means the useful test is not ‘does it sound loud?’ but ‘does the sound track brush rotation, suction level, or wheel travel during mapping?’ Do not open a hub motor or fan because an internet post guesses at an internal bearing. Isolate the mode first, service only user-removable parts, then capture the sound for Dreame if it remains frequent or loud.
Spins in circles
Dreame’s exact X50 article gives a seven-check path for a robot that spins or keeps turning in the same place. Start with foreign material around the drive wheel, then confirm the LDS is rotating and that its upper cover rebounds normally. Check for hair/debris in the LDS rotating area and for a lifted/cocked sticker or larger object on the robot’s top surface. Then press the impact plate/bumper to confirm it rebounds and wipe the line-laser and AI-identification sensor windows clean. Restart only after those physical states are known. This is not the same intent as ‘map will not save’: a circling robot has a live movement/localization problem, while a map-save problem can occur after otherwise normal driving. Do not force the retractable LDS tower or dismantle a drive wheel. If the X50 still spins after the documented checks, preserve a short video and escalate.
LDS sensor malfunction
Use this page when the X50 reports an LDS sensor malfunction or the localization sensor itself appears obstructed/deformed—not merely because the retractable LDS will not raise or lower. Dreame’s exact model article gives four owner checks: update firmware, inspect the LDS for anything obstructing it or for deformation, clean the radar and robot cover, and restart. The manual identifies the retractable top unit as the VersaLift sensor and says it is intentionally lowered while the robot is in standby, charging, or cleaning low-clearance areas, so a lowered tower by itself is not proof of malfunction. If the problem is specifically that the LDS cannot raise/lower on command, switch to the separate lifting-function guide, which includes the app’s radar-lifting setting and remote-control test. For a true malfunction that persists after a clear/clean sensor and restart, do not dismantle the turret; send Dreame the exact message and a video.
LDS won’t raise/lower
For an X50 whose retractable LDS specifically will not raise or lower, use the lifting-function branch rather than the generic LDS-malfunction page. Dreame’s exact support article says to check current firmware, move the robot to an empty unobstructed area, verify that the radar lifting function is turned on in the app, and use the remote control in the app’s accessibility settings to test whether the radar can raise/lower normally. Then inspect the radar surface and top cover for lifted stickers or debris, clean them, and restart. The manual is important context: the VersaLift sensor is intentionally lowered in standby, while charging and during low-clearance cleaning. So ‘tower is down on the dock’ is not a failed lift test. Do not pull the tower upward or disassemble it. If the remote-control lift test fails in an open area after cleaning/restart, capture that exact result for Dreame.
Not vacuuming dust
For an X50 that runs but leaves dust or loose debris behind, Dreame’s exact model article starts with blockage, not motor replacement: inspect and clean the roller brush, roller-brush cavity and dust bin. For difficult scenes with accumulated debris or clumps of hair, Dreame recommends more frequent cleaning and a higher suction level, while stubborn material may still need manual removal. The X50 manual adds the maintenance detail that the dust-box filter can be removed, gently tapped, and—if rinsed along with the dust box—must be cleaned with water only, no detergent, and dried completely before reinstalling; it also warns not to clean the filter with a brush, finger or sharp object. Use a small controlled debris strip to prove pickup after each branch. This page is about vacuum pickup, not a side brush failing to reach a corner or the base failing to auto-empty after the cleaning run.
Mop falls off
Dreame’s exact X50 support says a mop tray/holder that falls off can be caused by installation state, the pad itself, floor obstacles or cleaning mode. A model-specific detail matters first: Dreame says the mop pad holder cannot be installed while the robot is turned off; after power-on, the holder shaft sleeve automatically extends, so install the holder with the robot powered on. Make sure the mop pad is attached evenly to the holder and replace a worn pad that will not hold securely. Then check the route: carpets, thresholds, small steps and loose cables can snag the tray. Dreame recommends a designated mopping area for problematic zones and Mop after Vac in Cleaning Settings, and notes that this model supports automatic mop installation/removal. If the holder physically detaches despite correct powered-on installation and a clear route, restart once and capture the detachment for support. Do not create a separate near-duplicate page for ‘mop pad holder falls off’ unless the diagnostic intent materially differs.
Wi-Fi / app connection failure
The Freo Z Ultra is a 2.4 GHz-only Narwal model, so a failed setup should first be separated into band, phone-permission, app-pairing and home-router problems. Narwal’s network guide says to power the robot and base normally, keep the base where Wi-Fi is strong, enable Bluetooth and location permissions, then add the device inside the Narwal Freo App rather than pairing it through the phone’s Bluetooth menu. If setup still fails, a temporary 2.4 GHz phone hotspot is a useful discriminator: a successful hotspot connection points back toward the home router or its signal, while failure on both networks makes the robot/app path more suspicious. Do not factory-reset the robot merely because the app says offline; preserve the failure stage, screenshots and current map first.
Mapping failed / wrong map
For a Freo Z Ultra that maps the home incorrectly, misses rooms, places itself in the wrong area or throws a localization-style problem, preserve the current map first and determine whether the failure happened during first mapping or after a previously good map changed. Narwal’s mapping guidance says doors to wanted rooms should be open, floor and base-station obstacles should be cleared, people should stay about two meters away and out of doorways, and the base should not be moved after mapping. For Freo Z Ultra specifically, Narwal also calls out removing the protective camera stickers before mapping. If the base was moved or the active temporary map conflicts with reality, remapping is appropriate; if only a small new area was omitted, the robot may add it during later cleaning, so immediate map deletion is not always necessary.
Obstacle avoidance / collisions
Freo Z Ultra obstacle avoidance is not a single sensor with a single cleaning step. Narwal’s exact-model guidance says the AI avoidance strategy can be set to Intelligent or Safe, and it also explains that dim light, direct strong light and blind spots around low objects can reduce visual avoidance performance. Narwal’s broader recognition troubleshooting says to clean the forward and side sensor surfaces and notes that very small obstacles can remain challenging even on AI-camera models. Start by documenting the object, lighting and approach direction, then clean only the user-accessible sensor surfaces and repeat the same controlled route. If Safe mode improves clearance, the hardware may be functioning but the selected avoidance behavior was too permissive for that scene. A persistent miss on a clear, well-lit test object after cleaning is a better support case than random resets.
Errors 1009 / 1010
Narwal explicitly lists Freo Z Ultra as an applicable model for Errors 1009 and 1010 in its robot-vacuum error index. On Z Ultra, the official owner path is intentionally narrow: clean the mopping module and restart the robot; if the error persists, contact support. Do not import the sealing-plate inspection written for Freo Z10/Z10 Ultra into a Z Ultra repair just because the code numbers match—Narwal separates those model groups in the same error entry. Before cleaning, preserve the exact code and the task state in the app, then inspect only the removable user-serviceable mop components for hair, grit or poor seating. After reinstallation, restart and run a short safe mopping test. A recurring 1009/1010 after correct cleaning/reseating is a service case, not an invitation to pry into the lift drive or modify the mop mount.
Errors 1022 / 1023
Errors 1022 and 1023 are Narwal’s Base Station Not Found path. The official branch changes depending on where the robot is when the error occurs. Near or on the base, Narwal says to verify base power, check installation/condition of the roller-brush assembly, rear drive wheels and caster, cleaning pad/tray or ramp components, and remap if the base was moved. When the error occurs away from the station, Narwal specifically points to cleaning the base-station reflector stickers. That location split is the key discriminator: do not immediately delete the map when the robot is physically at the dock with a power or seating problem, and do not replace a charging part when the robot simply cannot find the mapped station from a room. If the controlled checks fail, support wants the serial number, occurrence time and video.
Dust collection timing / failure
Freo Z Ultra can look like it “forgot to auto-empty” when it is actually following Narwal’s moisture-control sequence. Narwal’s exact-model product help says that after a cleaning task, the robot dust bin is dried to avoid pulling sticky wet waste into the collection path, and dust collection starts before the next task rather than immediately after the previous one. So the first diagnostic question is timing: did collection fail when it was genuinely scheduled to run, or are you expecting an after-task empty cycle that this model intentionally postpones? If a real collection cycle starts but debris remains, Narwal’s base-station guide says to check whether the dust bag/bin is full and inspect all three dust inlets for hair clogs, then manually run intensive dust collection from the app. If no collection starts when requested, preserve the app/station state and avoid repeatedly cycling a blocked system.
Mop drying not working / interrupted
Freo Z Ultra normally dries its mop pads with 40°C air after mop washing, and Narwal documents Strong, Silent and Smart drying behavior. Strong Drying is designed around roughly four hours, while Silent Drying can take under five hours; Smart Drying can choose behavior around Do Not Disturb. Before diagnosing a failed heater or fan, confirm drying actually started after a completed mop-wash cycle or from the Washing & Drying control, then leave the robot/mops in the base for the full selected mode. Removing the robot or mopping module early can end the drying process. If the app reports Error 1039 or 1040, Narwal labels those as mopping-pad drying interrupted and directs owners to contact support with video. That exact error path should not be diluted into endless DIY cleaning when the normal start conditions are already met.
Hot-water mop wash not heating
Freo Z Ultra supports hot-water mop washing, but Narwal does not expose a manual temperature slider for the user to force a fixed water temperature. The exact-model product help says to enable Smart Temperature-Controlled Mopping System under Settings > Base Station, after which the robot/base automatically adjusts wash-water temperature according to dirt type and wash cycle. That means “the water is not always very hot” is not enough to diagnose a fault. First verify the feature is enabled and that you are observing an actual mop-wash event. If the base consistently produces no heated wash water when the function should be active, Narwal’s base-station troubleshooting explicitly includes Freo Z Ultra and says to unplug the base power cord to restart it; persistent failure goes to support. Do not open a powered wet base or try to bypass the temperature-control system.