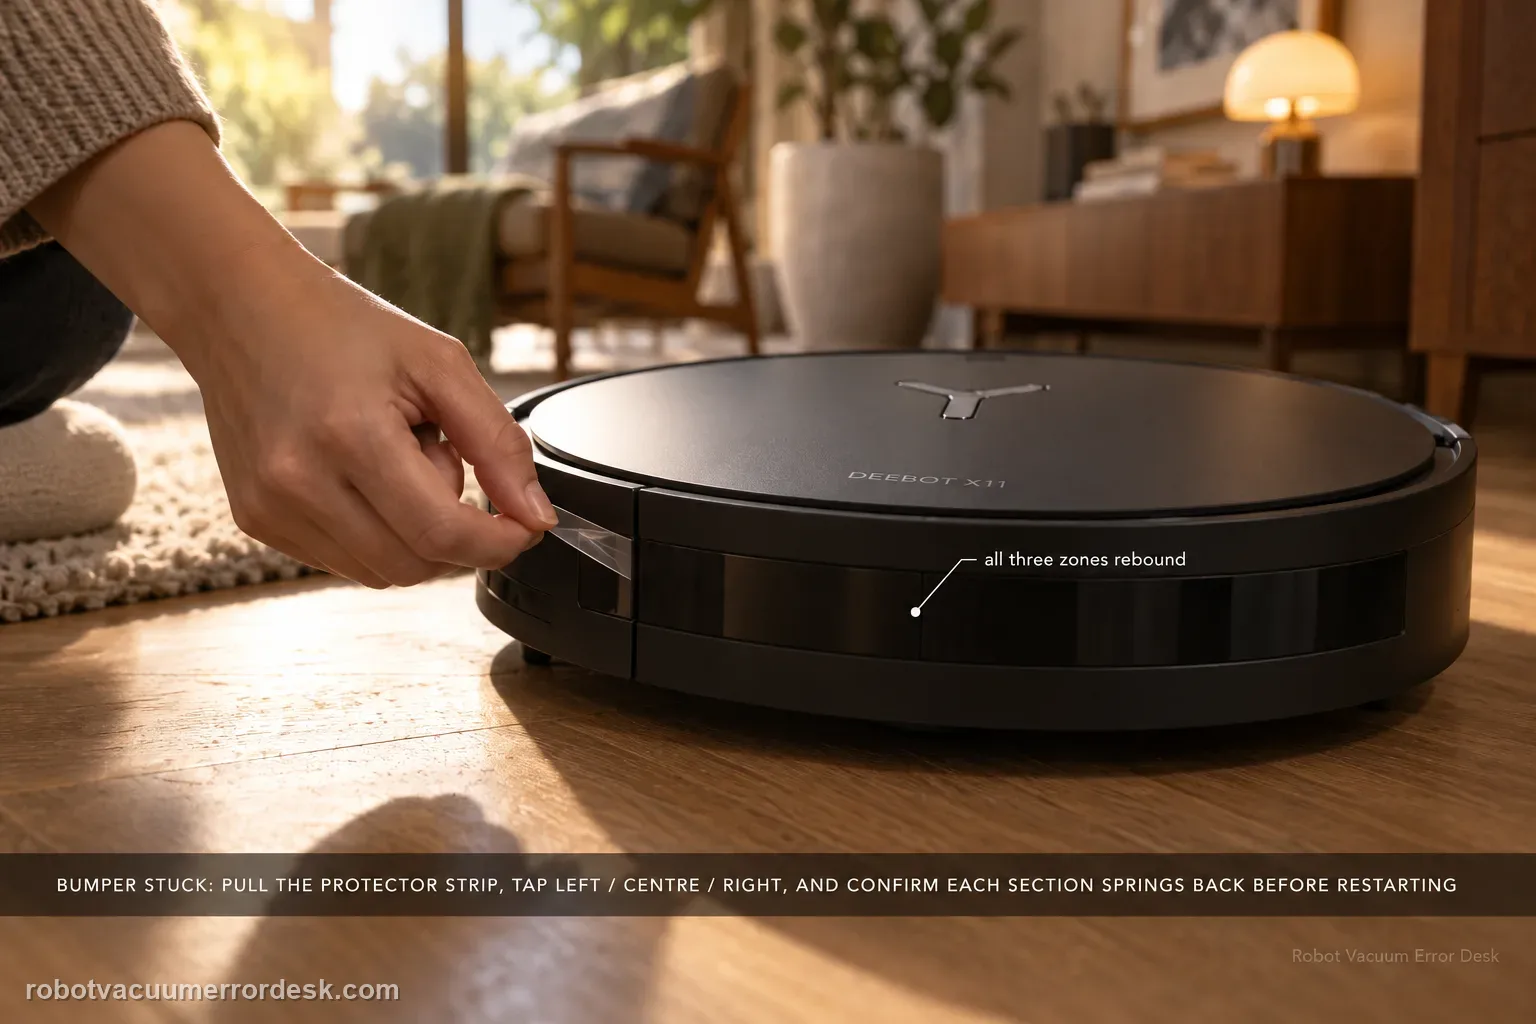
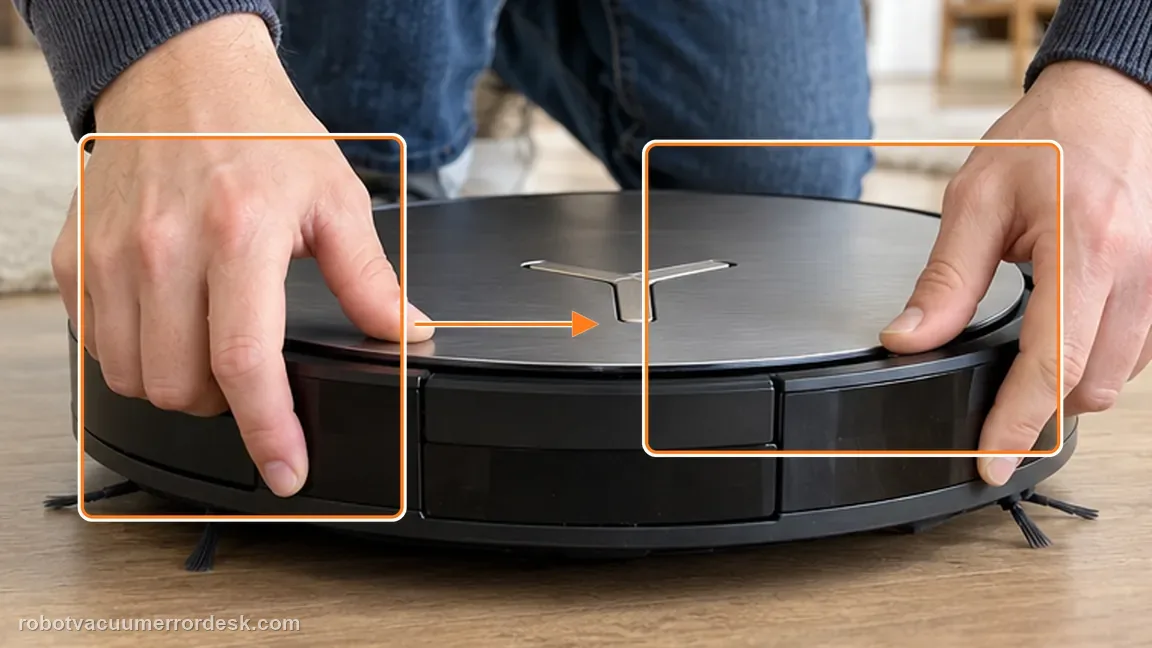
The X11 Bumper Stuck alert has a short official fix, but the useful diagnosis is to check the bumper across all three zones rather than just pushing once in the middle. Remove the bumper protector strip, gently tap the left, center and right sections, and confirm each area springs back. Restart the robot only after the mechanical response is normal. A section that stays depressed or feels different after accessible debris is cleared is the result to show ECOVACS.
Confirm the exact model and exact code, light pattern or symptom.
Run the lowest-risk physical or software check first.
Use each pass condition to decide what the result actually narrows down.
Confirm this is the right issue
- The X11 displays a Bumper Stuck alert.
- The bumper feels sticky or does not spring back evenly.
- A protector strip or debris may restrict bumper movement.
- The Bumper Stuck alert returns even though there is no furniture pressing on the bumper.
- One side of the bumper feels slower or does not spring back like the center and opposite side.
What’s most likely causing this
A shipping/protector strip still interferes with bumper travel
Hair, grit or a small object is trapped in the visible bumper seam
One of the left, center or right bumper sections does not spring back normally
The bumper moves by hand but the alert immediately returns after restart
The fault is local to the bumper input rather than the saved map
A persistent bumper/sensor fault remains after accessible debris is removed
Reading your test result
| What you observe | What it narrows down | Next move |
|---|---|---|
| Bumper protector strip is still fitted | The external strip can affect bumper movement | Remove the strip before testing spring-back. |
| Only one of left/center/right stays depressed | The bumper is binding locally | Clear only accessible debris and retest that section. |
| All three sections spring back normally | The mechanical bumper check passes | Restart the X11 and run an open-area confirmation. |
| Alert returns before any new collision | The fault is not being triggered by a fresh obstacle contact | Record the alert and bumper-response video for support. |
| Bumper is cracked, jammed or needs forced movement | The owner-safe inspection limit has been reached | Stop prying and contact ECOVACS for repair guidance. |
Do not factory-reset by default. Use the exact model’s reboot/network-reset procedure only when the manufacturer path calls for it.
Work through these checks in order
Remove any bumper protector strip
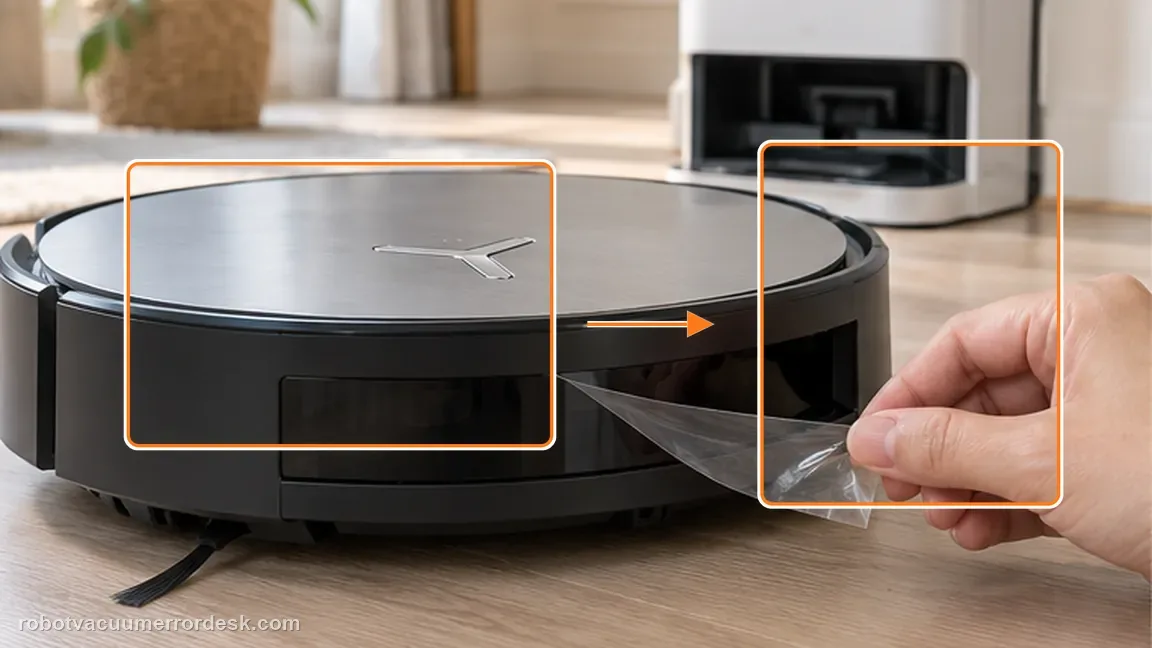
Ecovacs starts with the protector strip because even a small shipping/protective piece can prevent full bumper travel. Check the full front arc rather than only the center. Why it matters: The protector strip can interfere with the bumper’s free movement, so ECOVACS starts by removing it. Do not diagnose the spring mechanism while an external strip is still able to hold the bumper.
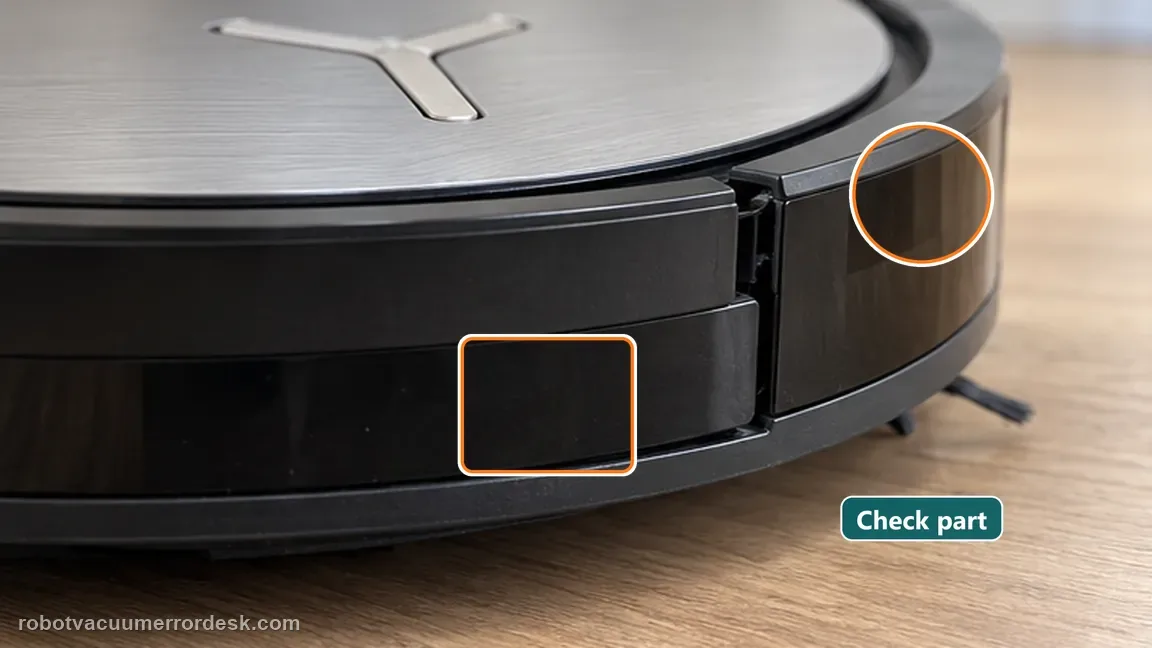
Inspect the bumper seam for debris
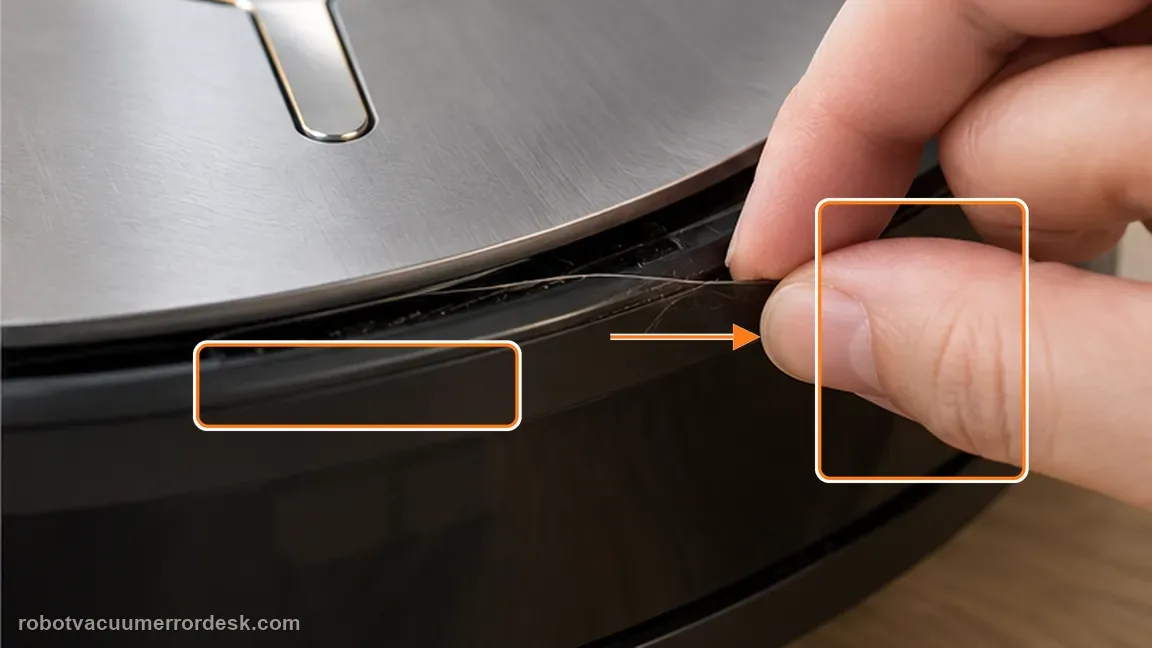
With the robot powered off, look along the gap between bumper and chassis for hair, grit or a small object that could create friction. Remove only accessible debris; do not pry the bumper assembly apart. Testing left, center and right matters because a bumper can bind locally. A center press that rebounds normally does not prove the two outer sections are moving freely.
Test left, center and right spring-back
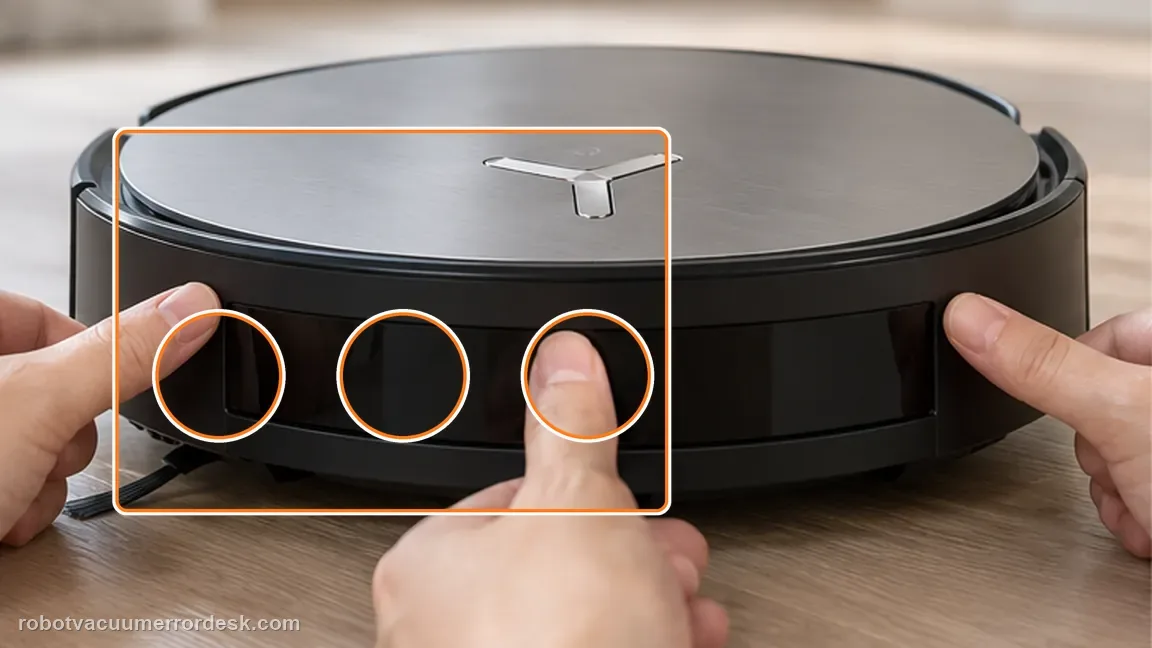
Gently tap or press each section as Ecovacs directs. Compare the return speed and travel on all three positions; one slow section is useful evidence even if the alert is intermittent. Use gentle taps rather than force. You are checking return movement and whether a section remains held in, not trying to pry the bumper open or defeat its safety function.
Restart and run an open-floor test
Restart the X11 on a flat area away from furniture. The goal is to prove the local bumper input is normal before blaming navigation or rebuilding a map. Restarting after mechanical movement is restored gives the alert logic a clean state. If the warning returns immediately, preserve which bumper section felt abnormal during the manual test.
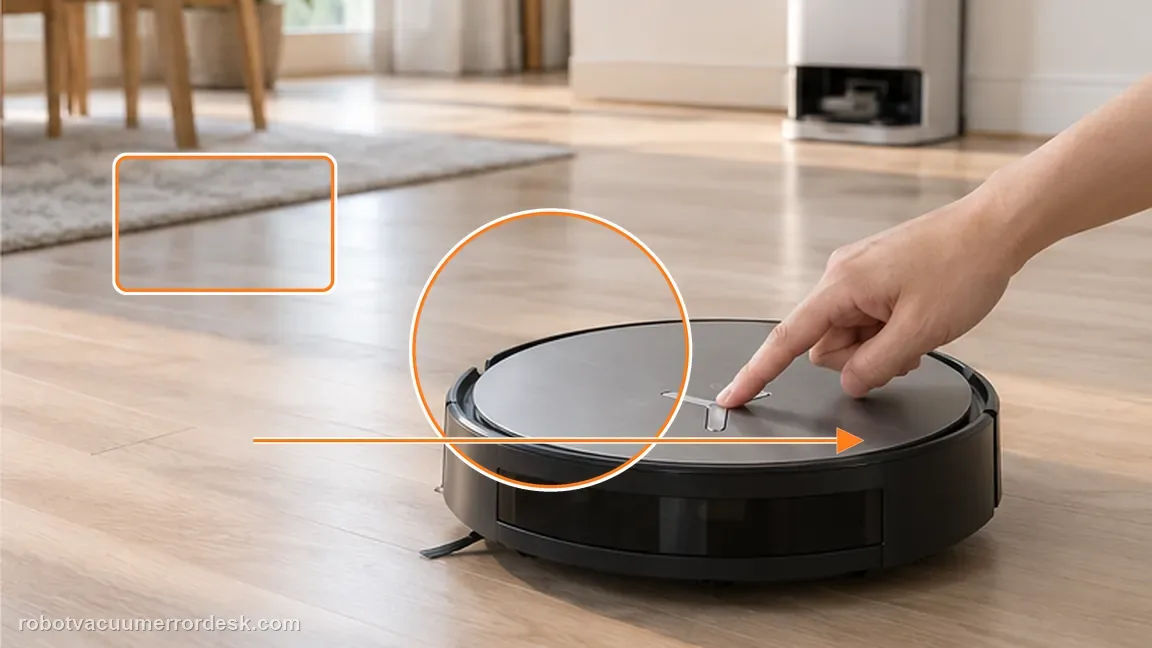
Compare spring-back again after restart
If the alert returns, power the robot off and repeat the same gentle left, center and right bumper comparison. Note whether the same section is slow or stays inward. A repeatable one-section difference is more useful than repeatedly cleaning an already-clear seam, and it avoids prying or deep tool use around the bumper assembly.
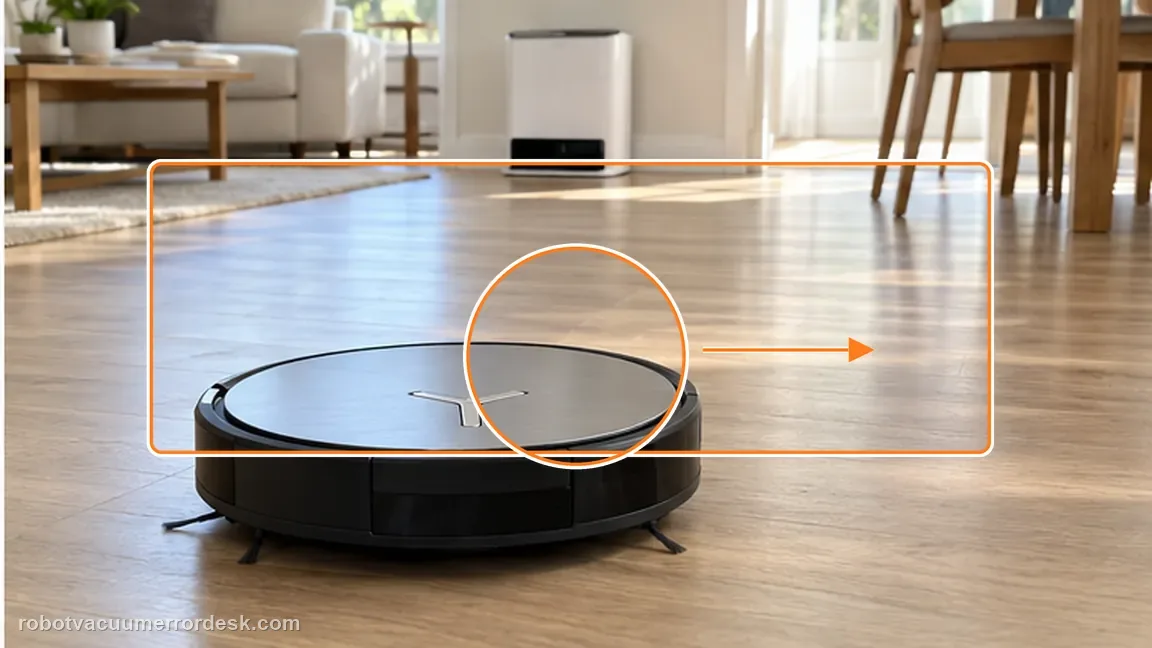
Run a short obstacle-free confirmation
After the bumper rebounds normally and the robot is restarted, run a short clean in an open area. Watch whether the alert returns before the X11 contacts furniture.
If one bumper section still binds, does not spring back, or the alert returns even though all sections move freely, stop repeated impacts and contact Ecovacs. A short close-up video showing left/center/right spring-back is more useful to support than another map reset. Include a close video of left, center and right spring-back and whether the alert returns before a new collision after restart.
Before you contact support, gather this
A reproducible case moves a support call past the basic troubleshooting script faster than “it doesn’t work” does, and it keeps the clues from your own tests on record.
- Exact model name and the error code / voice prompt exactly as shown
- A photo or screenshot of the app error and the time it occurred
- A short list of the checks already completed and what happened after each one
- Map/station screenshot when the problem involves return-to-station or mapping
Where this comes from
Ecovacs DEEBOT X11 OmniCyclone — Bumper stuck alert
The exact X11 support path checks removal of the bumper protector and verifies spring-back at the left, center and right bumper sections before restarting the robot.
Additional official source: ECOVACS US — DEEBOT X11 OmniCyclone Support Center ↗Last editorial review: September 5, 2026Regional note: manufacturer help centers, model suffixes, mains-power requirements and warranty procedures can differ by country. If the source redirects to a local support site, confirm that the model/hardware scope still matches before following a region-sensitive step.
This guide is rated Official model support. See what each evidence label means →
Questions people ask
Should I hit the bumper hard to free it?
No. The official check is a gentle spring-back test. Hard impacts can damage the bumper or switch mechanism. Use gentle left/center/right presses to compare spring-back; the goal is to find a binding section, not to force the bumper past its normal travel. Do not use hard impacts as a “fix,” because the official check is normal spring-back, not forced travel.
Can a tiny piece of debris cause the alert?
Yes. Grit or hair in the bumper seam can add enough friction to keep one section from returning normally. A tiny object in the visible seam can hold one section inward, so inspect what is accessible without prying the bumper assembly apart. A short video of one slow section returning can be much more useful than another restart.
Should I delete the map first?
No. A Bumper Stuck alert is a local mechanical input problem first. Prove normal bumper movement before changing navigation data. If all sections rebound normally but the alert returns before any collision, preserve that immediate restart behavior for ECOVACS instead of deleting the map. That clean open-floor test helps show whether the alert is internal rather than caused by a new physical collision.
Why does my DEEBOT X11 keep saying “Bumper Stuck”?
ECOVACS says to remove the bumper protector strip, then gently test the left, center and right bumper sections for normal spring-back before restarting. A local bind can be missed if you press only the middle. If one zone stays depressed or the alert comes back in an open area without a new collision, capture that behavior for support.
Can I pry open the X11 bumper to clear a stuck alert?
Do not turn the owner check into a disassembly job. The official X11 path is limited to removing the protector strip, gently tapping the three bumper sections, confirming they rebound and restarting. You can remove plainly accessible loose debris from the visible gap, but if the bumper needs force or a shell panel must be opened, stop and contact ECOVACS.
Did this diagnostic narrow the fault?
Use this as an editorial signal, not a popularity counter. If a feedback address is configured you can email the note; otherwise you can copy it for your own support record.