Map, Navigation or Missed Areas
Map corruption, moved docks, temporary maps, blocked LiDAR and trapped-robot states can look similar. Preserve the map until the failure is classified.
Ask what changed first: dock location, firmware/app state, room layout or sensor visibility. Avoid factory reset until the map context is documented.
What the symptom points to
Localization/reference mismatch rather than a cleaning-hardware fault.
LiDAR/camera/sensor visibility, bumper state or wheel movement.
Map boundary, no-go zone, threshold or room-specific obstacle.
Do not erase the evidence
- Factory reset before taking screenshots of the bad map
- Cleaning optical sensors with aggressive chemicals
- Treating a single missed room as proof the navigation module failed
Capture the current map, robot location, station location and the exact area it misses. If the issue followed a firmware update or dock move, record that timeline too.
Matching model-specific guides
50 diagnostics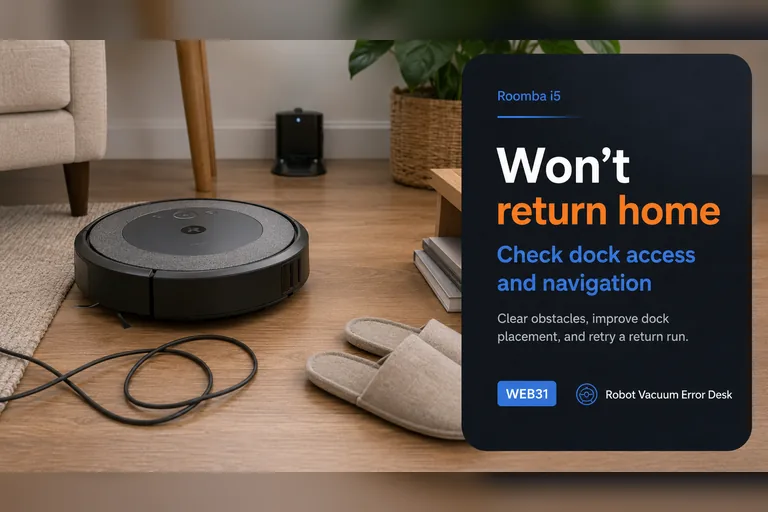
Won't return home
When a Roomba i5 simply 'won't return home' without a clear Error 18 message, first determine which stage fails. If it cannot dock from a short clear approach, troubleshoot the Home Base, RCON/bumper area, contacts and wheels. If it docks perfectly from about 6 ft but fails after a long cleaning mission, focus on whole-home context: whether the robot or base was moved, how far the return begins from the dock, remaining battery and environmental interference. iRobot notes that physically moving a Roomba during a mission can make Home Base recovery harder and publishes range guidance for the i3/i4/i5 family. This symptom-first page therefore starts with a close test before map deletion or battery replacement.
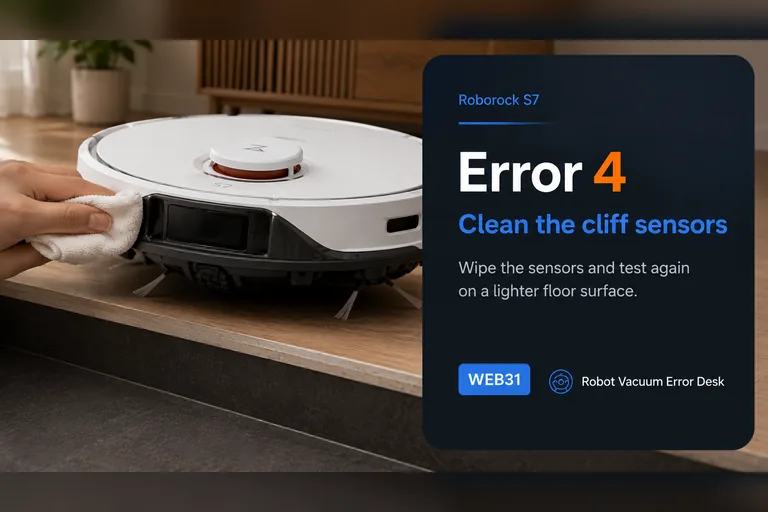
Error 4
Roborock S7 Error 4 is the cliff-sensor path. The official S7 support sequence is short but diagnostic: wipe the underside cliff sensors and make sure the robot is not sitting on dark or shag carpet. Do that comparison on a bright, flat hard floor well away from stairs. If the error disappears there and returns only on one rug, treat the surface as the trigger and exclude it in the map. Never tape over cliff sensors to force the robot onto that surface.
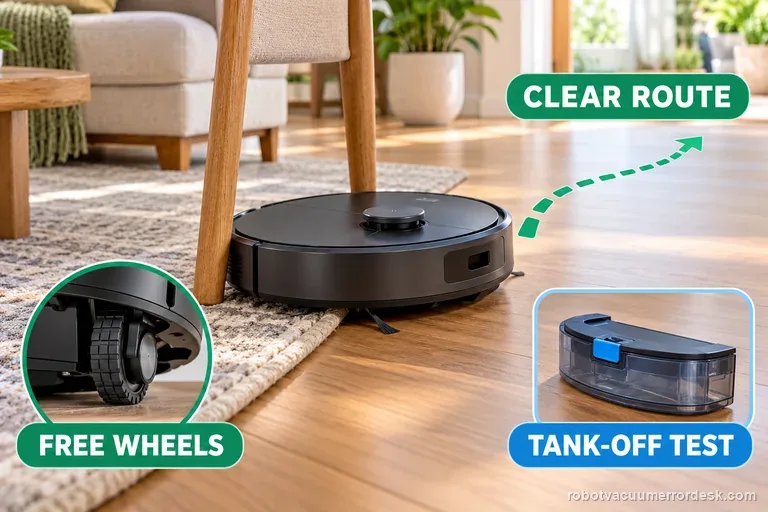
Error 8
The Q7 Max manual defines Error 8 as “Robot trapped.” First clear obstacles around the robot and relocate it. If the problem repeats, manually compare the drive wheels and, when a water tank is installed, remove it for an isolation test before escalating.
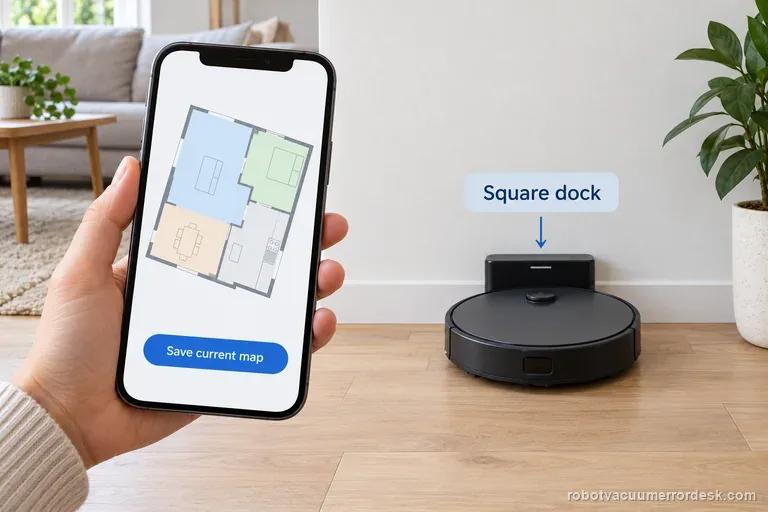
Map tilted
A tilted S7 map does not prove a LiDAR fault. Roborock says dock placement can cause the angle: save a screenshot, place the dock square with clear space, and run one normal clean without moving it. If the saved map stays tilted, switch Map Saving off and on for the next clean, then compare the new map before restoring room edits.
Can't find dock
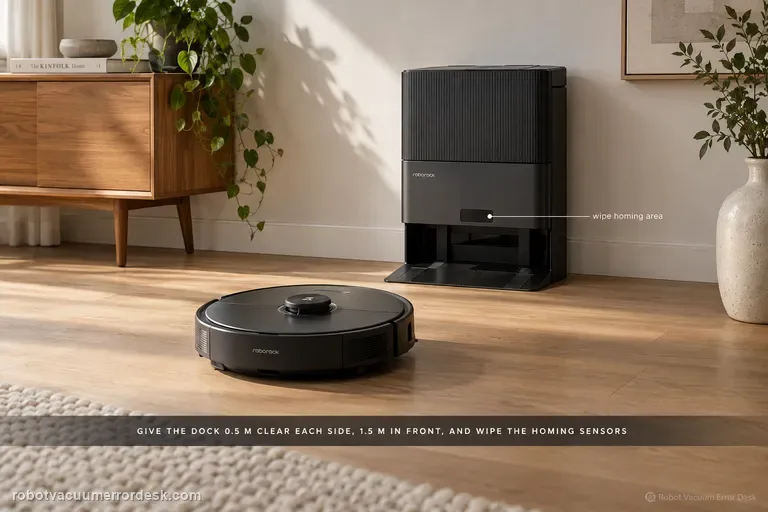
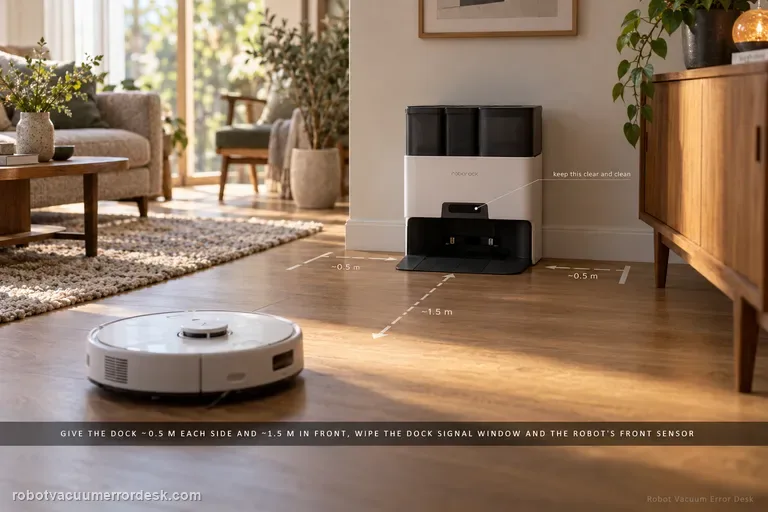
For a Qrevo that cannot find its RockDock, separate navigation from station functions. Roborock’s support says return can fail after manual relocation, a different start point, obstacles, poor dock clearance or dirty homing surfaces. Keep the station against a wall with about 20 inches (50 cm) to either side and 59 inches (1.5 m) in front, clean the dock signal area and robot front sensor, then compare a near return with an automatic return after a real cleaning task. Do not treat a charging or mop-wash fault as the same problem once the robot has actually reached the dock.
Can't find dock
For an S7 that cannot find its dock, separate final homing from whole-home localization. Roborock says return can fail if the robot started elsewhere, was moved manually, meets an obstacle, or cannot see a correctly placed dock. Give the dock about 0.5 m of side clearance and 1.5 m in front, clean the dock signal area and robot front sensor, then run a nearby return. If nearby docking works but a normal mission fails, focus on the map/dock reference rather than charging hardware.
Error 7
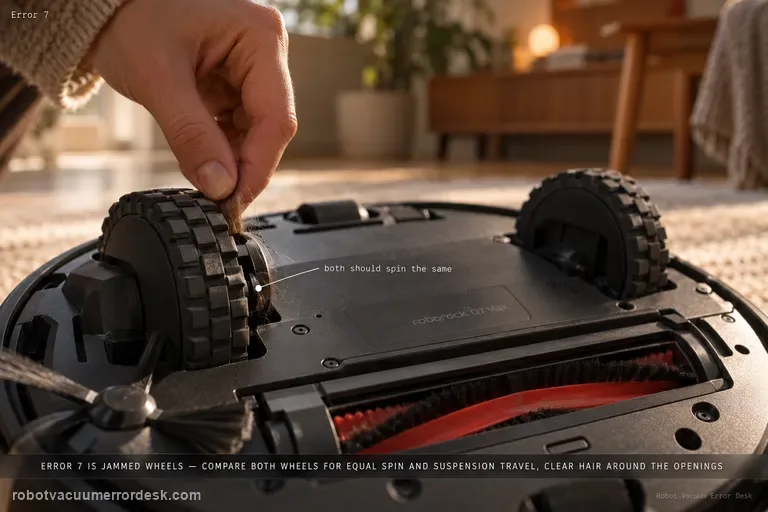
The Q7 Max manual defines Error 7 as “Wheels jammed. Move the robot and restart.” Before restarting, compare the two drive wheels for normal rotation and suspension travel and remove accessible hair or debris around the wheel openings.
Laser sensor error
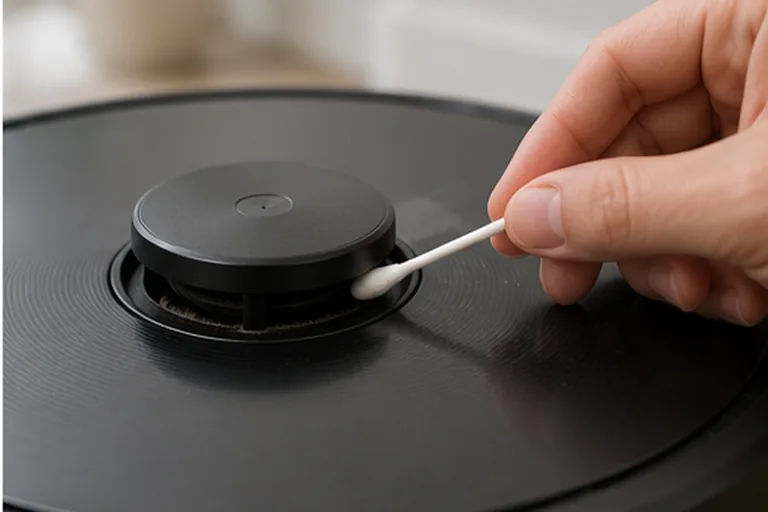
Start by writing down the exact X10 Pro Omni voice prompt, because eufy distinguishes four useful states: laser sensor stuck, laser sensor blocked, laser sensor error, and laser sensor cover stuck. Then power the robot on and watch the radar/LiDAR. If it rotates, clean the emission and reception apertures. If it does not rotate, remove the dustbin, gently invert/shake the robot as eufy instructs and verify the radar is not externally obstructed. If the cover-stuck prompt remains, press the cover only enough to confirm its normal click. A persistent hardware 'laser sensor error' after these external checks is a support case, not a reason to open the LiDAR module.
Misses areas
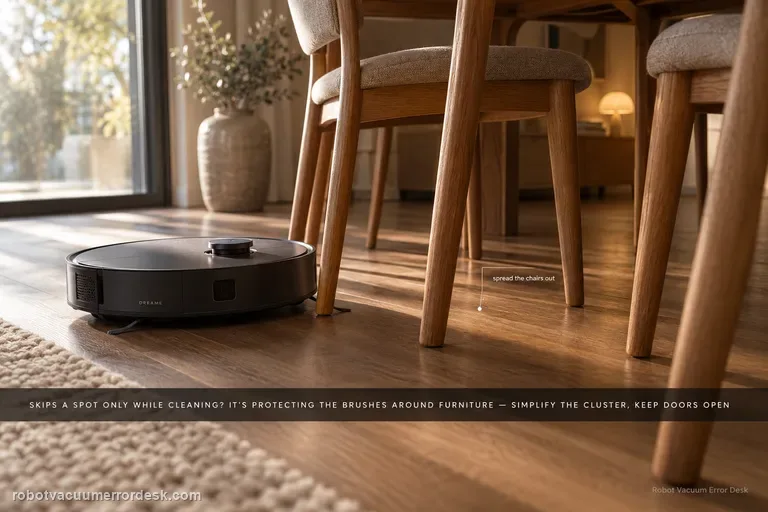
When an L20 Ultra can reach a spot in Whole-House Cruise but skips it during cleaning, Dreame says cleaning can deliberately treat chair legs or multi-wheel furniture as wall/obstacle geometry to protect the brushes and mop pads. First simplify that local furniture cluster and rerun the same room without deleting a good map. For whole rooms that are missed, the exact manual adds a different access check: keep the door open, look for a threshold above about 2 cm, and dry any wet or slippery approach before calling it a navigation fault.
Can't find base
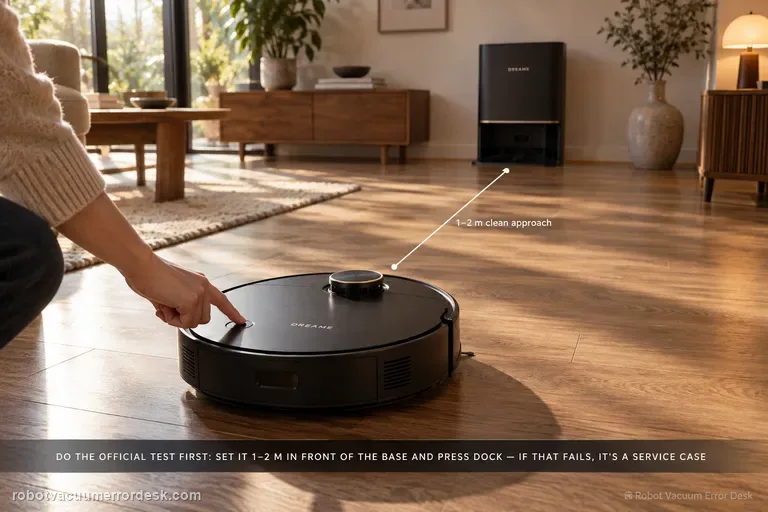
Start with Dreame’s short-range proof test, not a map reset. Confirm the base is powered, place the X50 about 1–2 meters in front of it, then press Dock. If the robot cannot return from that short clean approach, Dreame says to contact after-sales rather than treating the problem as a normal room-layout issue. If the short-range return works, move to placement: keep the station against a wall with about 1.5 m clear in front and 0.5 m on each side, away from routers/TVs and mirror-like surfaces. Then confirm the robot normally starts from the base, the top LDS rotates, drive wheels move freely, and the ramp extension is clean. Restart/reset is a late branch because Dreame warns that reset clears saved data including maps.
Map not saving
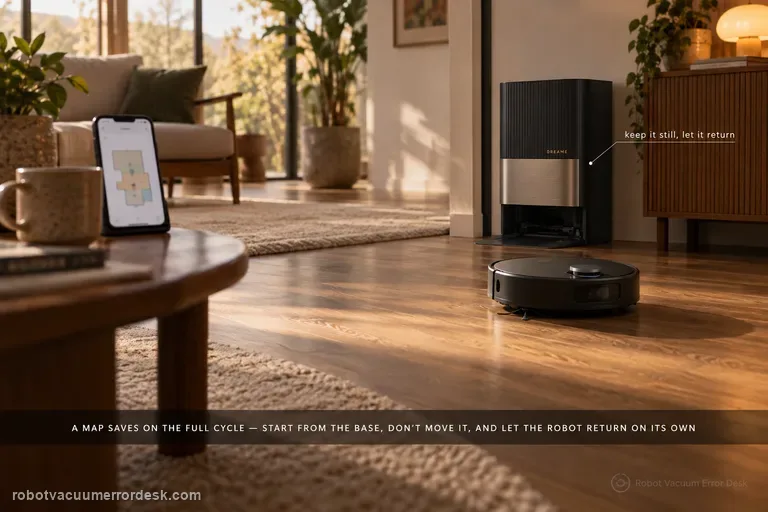
For the X50, a map is not just a drawing created at startup; Dreame ties reliable saving to the full mapping/cleaning cycle. Update firmware first, place the base where it can stay fixed with clear surroundings and good Wi-Fi, then rebuild the map only after that setup is stable. Start the robot from the station and do not move the base during the task. Most importantly, let the robot finish and return automatically: Dreame warns that manually sending it to charge or physically placing it on the base because the battery is low can prevent the map from saving successfully. If an alarm occurs while the robot is building the map, resolve it promptly and resume from a cleaned area rather than judging the final map while the task is still faulted.
Error 1011
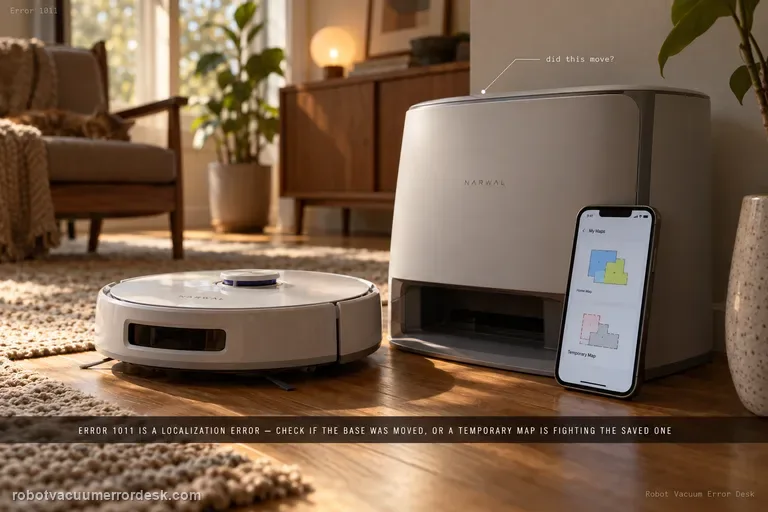
Narwal defines Error 1011 as a localization error. Check whether the base station was moved; if it was, remapping may be required. Also check whether the robot is operating on a temporary map that no longer matches its physical location.
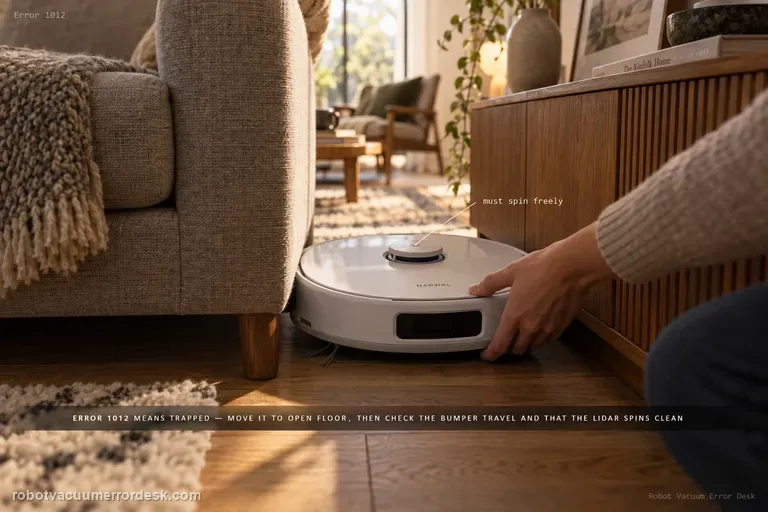
Error 1012
Error 1012 means the robot is trapped. Move the Freo Z Ultra into an open area and remove surrounding obstacles, then check the bumper, whether it can return to base, and whether the LiDAR rotates normally without a red warning.
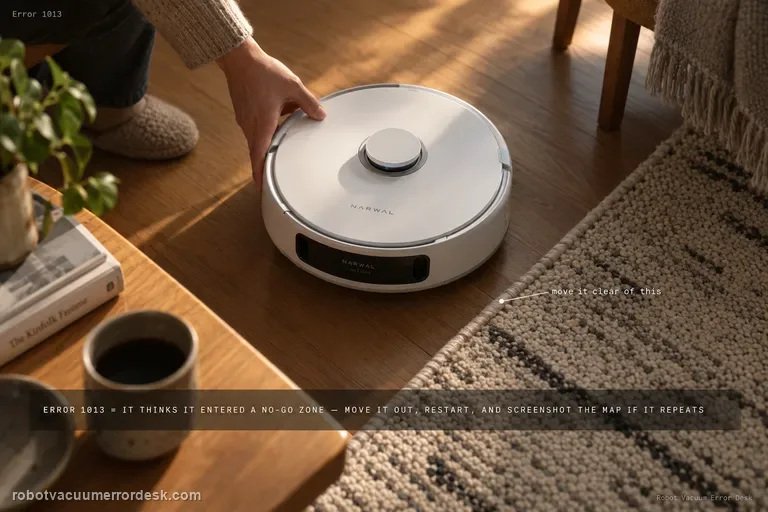
Error 1013
Error 1013 means the robot believes it entered a No-Go Zone. Move it out of the restricted area and restart. If the error repeats, save a screenshot of the map and restricted zones, the robot location, and the exact error message before changing boundaries.
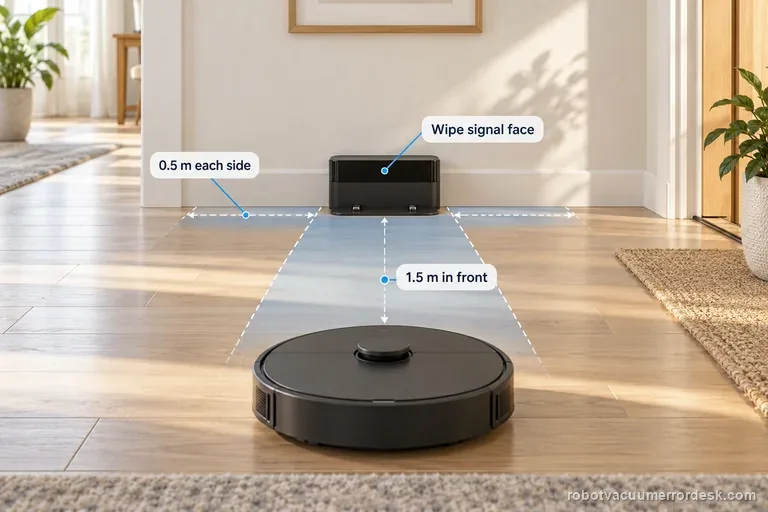
Can't find dock
If the Roborock Saros 20 Sonic cannot find its dock, check the dock is plugged in and test from the saved map without carrying the robot. Roborock lists a different start location, obstacles, or manual movement as causes. Keep 0.5 m clear at each side and 1.5 m in front, then wipe the dock signal area and robot front sensor.
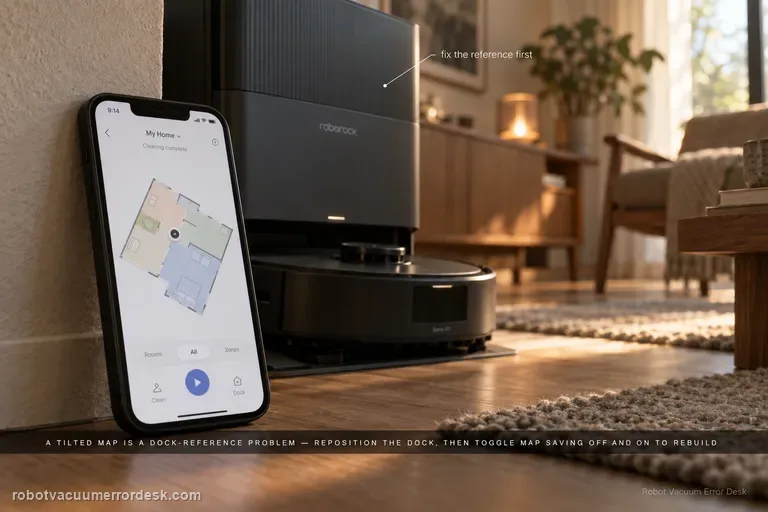
Map wrong angle
A Saros 20 Sonic map that appears rotated or at the wrong angle is usually handled as a dock-placement/map-orientation issue. Roborock says the map should display horizontally or vertically. Move the dock to a clearer location with roughly 0.5 m at each side and 1.5 m in front; if orientation stays wrong, switch Map Saving off and back on so the next cleanup creates a new map. Preserve a good map before rebuilding.
Cleaning in circles
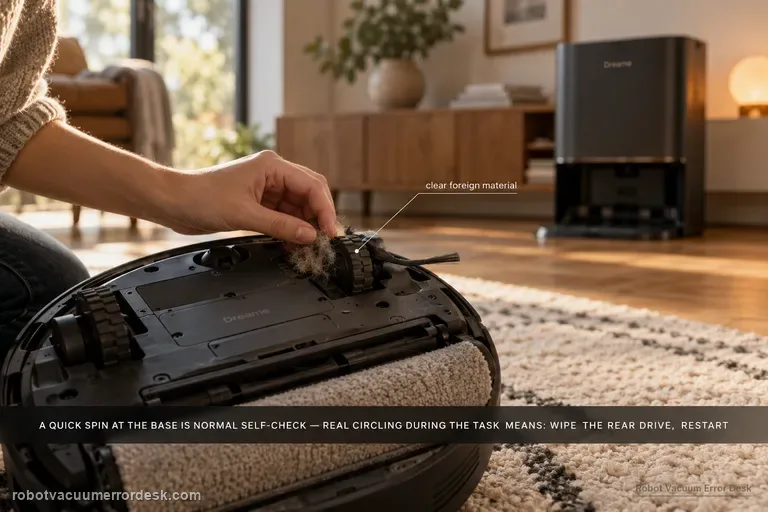
The Aqua10 can rotate around the base station briefly and still be behaving normally: Dreame says the robot locates itself and performs a self-check before leaving the base. The fault pattern is continued circling during the cleaning task. For that case, Dreame directs owners to inspect and wipe the rear drive for foreign material, power the robot off, restart the task, and escalate if the behavior persists.
Map skewed / overlapping
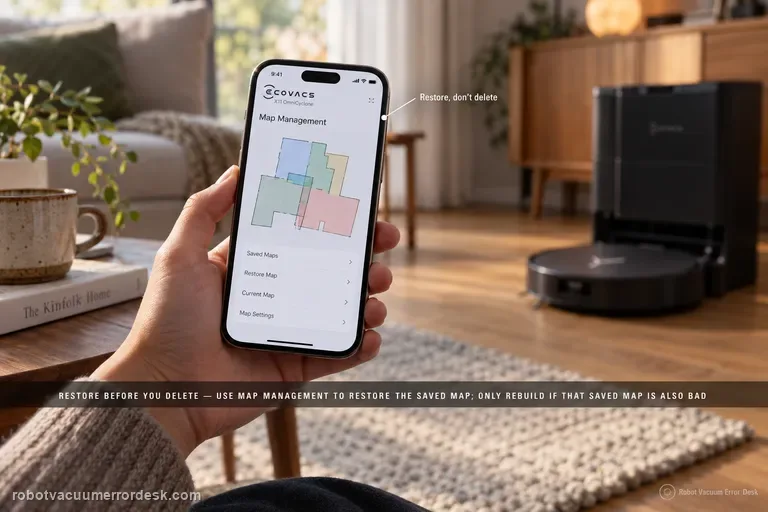
Restore before you delete. ECOVACS’ X11 support tells owners to use Map Management and restore the initially saved map when the floor plan becomes skewed or overlapping. ECOVACS’ broader map guidance explains why that order matters: restore returns to a saved/backup state, while deleting and Quick Mapping destroys the current map and starts over. If restore works, stop. If the saved map is also bad, prepare the home, start from the station and rebuild once under stable conditions.
Won't return to base
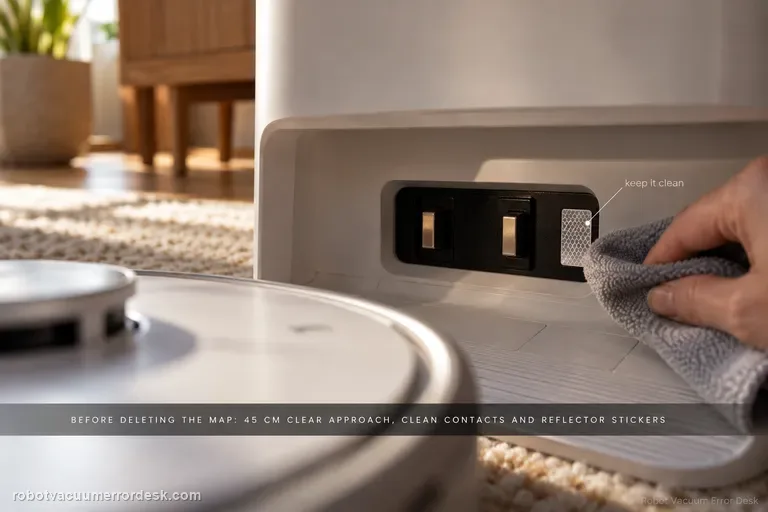
Do not start by deleting the map. First give Narwal Flow a compliant base area: hard and level, away from direct sunlight, with about 45 cm / 1.5 ft of clear approach space. Narwal’s current return-to-base troubleshooting then calls for cleaning the robot/base charging contacts and reflector stickers, checking the drive and caster wheels for oil or debris, confirming the cleaning tray and roller-brush cover are seated correctly, and remapping only if the base station was moved. A short return from near the dock can then separate final-entry trouble from whole-home localization. If Flow still cannot return, record the final approach for support instead of repeatedly remapping.
Error 1
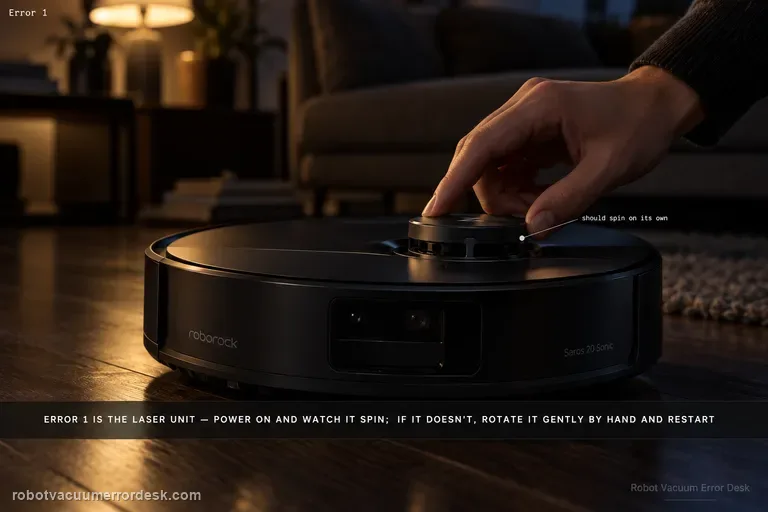
Error 1 is a laser-unit fault path, not a reason to delete the map first. Roborock’s exact Saros 20 Sonic support says to power the robot on and verify that the laser unit is spinning. If it is not spinning, gently rotate it manually and restart. The key is the physical pass/fail observation: spins normally, does not spin but frees gently, or remains bound/fails again. Preserve the map while you prove that hardware state.
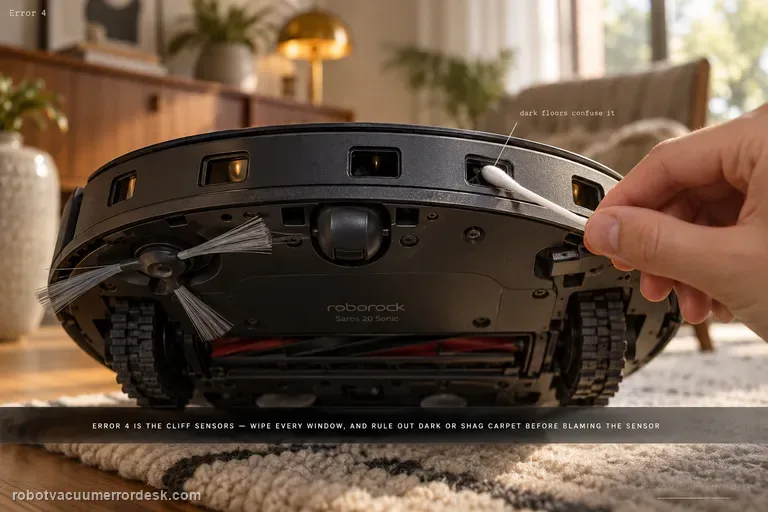
Error 4
Saros 20 Sonic Error 4 points to the cliff/anti-drop sensing path. Roborock says to wipe the cliff sensors and make sure the robot is not operating on dark or shag carpet, which can confuse the downward-facing sensing. Clean every accessible cliff-sensor window, move the robot to a normal light hard floor, restart and test there. A repeatable Error 4 on a safe ordinary floor after cleaning is the point to escalate.
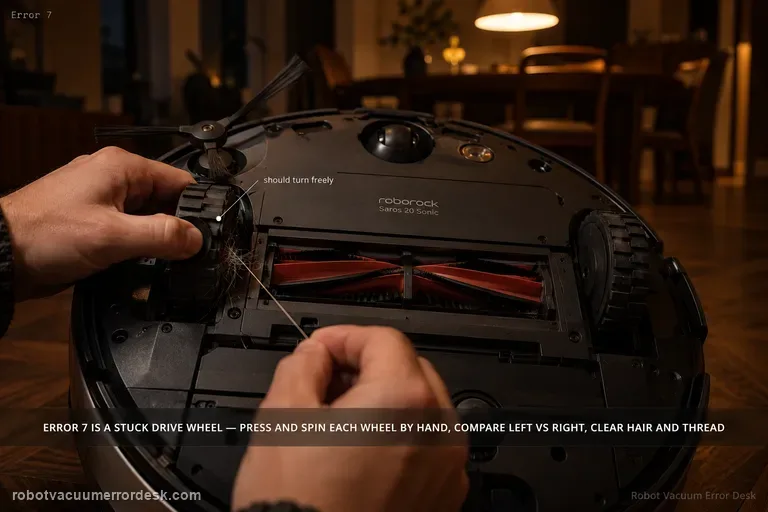
Error 7
Saros 20 Sonic Error 7 is a wheel-stuck diagnosis. With the robot stopped and safe to handle, press and spin each drive wheel manually and compare left versus right movement. Remove hair, thread or debris that prevents free travel. Then run a short test on clear hard floor before adding rugs or thresholds back. If one wheel still binds or Error 7 returns without environmental obstacles, document that side for Roborock support.
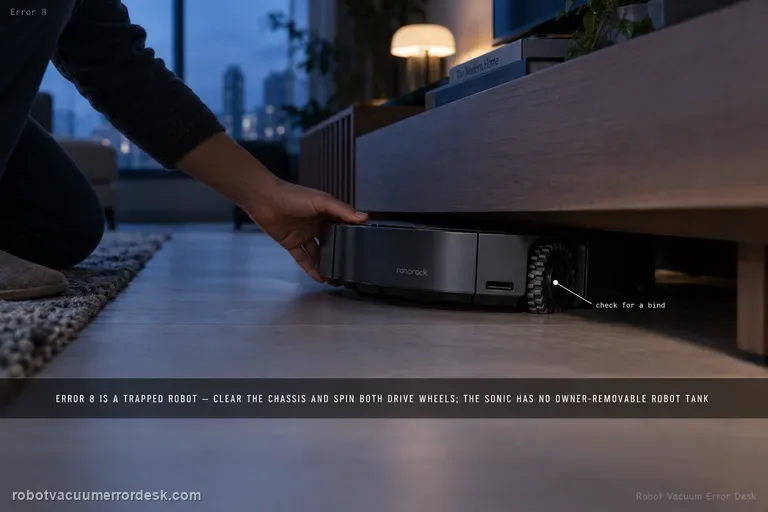
Error 8
Roborock’s Saros 20 Sonic support lists Error 8 as a trapped-robot check: clear obstacles and press/spin the drive wheels to find a bind. That support entry also includes a generic “remove the water tank if installed” step. The current Saros 20 Sonic manual does not show an owner-removable robot water tank; it shows a self-filling port on the robot and removable clean/dirty tanks in the dock. Do not open the robot or try to remove an internal tank. Clear the chassis, compare both drive wheels on safe hard flooring, and run one short control test. If Error 8 returns with free wheels and no obstruction, escalate with the exact code and a short video.
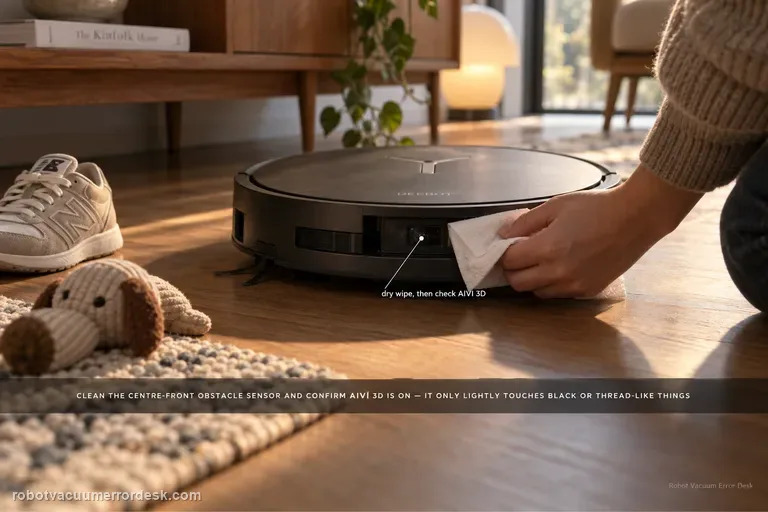
Obstacle avoidance not working
If the X11 starts bumping or fails to steer around objects, first clean the obstacle-avoidance sensor at the center front of the robot with a dry paper towel and confirm the AIVI 3D switch is enabled in DEEBOT settings. ECOVACS also notes a useful limit: the robot may slow and lightly touch black or thread-like objects. That behavior should not be confused with broad AIVI failure. Test with ordinary, visible obstacles after cleaning the sensor and verifying the setting.
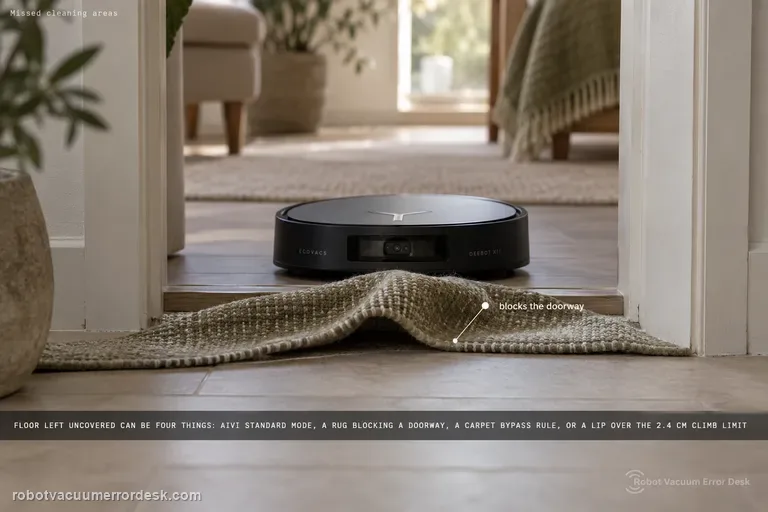
Missed cleaning areas
Use Ecovacs’ definition first: a 'missed cleaning area' is floor left uncovered after the robot announces that cleaning is complete. For the X11, Ecovacs then tells owners to enable AIVI 3.0 in Standard Mode, check rugs or mats that block doorways, review Map Management → Edit Map → Carpet Settings → Bypass, and remember the robot is rated to climb up to 2.4 cm. That gives you four different causes that can look identical on the finished map: a software avoidance setting, a doorway/carpet rule, a physical threshold limit, or clutter that makes the robot deliberately keep distance to protect furniture.
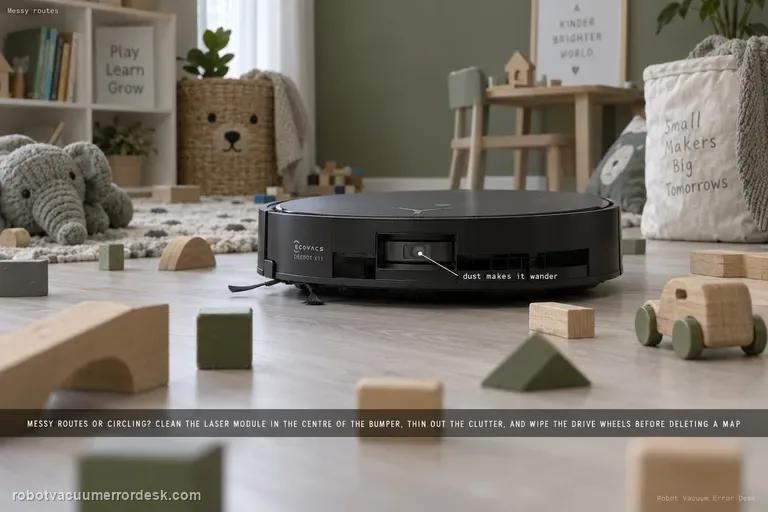
Messy cleaning routes
For X11 spinning, wandering or a route that suddenly looks messy, ECOVACS checks three physical/environmental inputs: dust on the laser module in the center of the bumper, a room with many obstacles that causes high-precision avoidance to make the path look irregular, and dirty drive wheels. Clean the laser with a dry paper towel, simplify one test area and wipe the wheels before deleting a map. A stable route in the controlled area points away from map corruption.
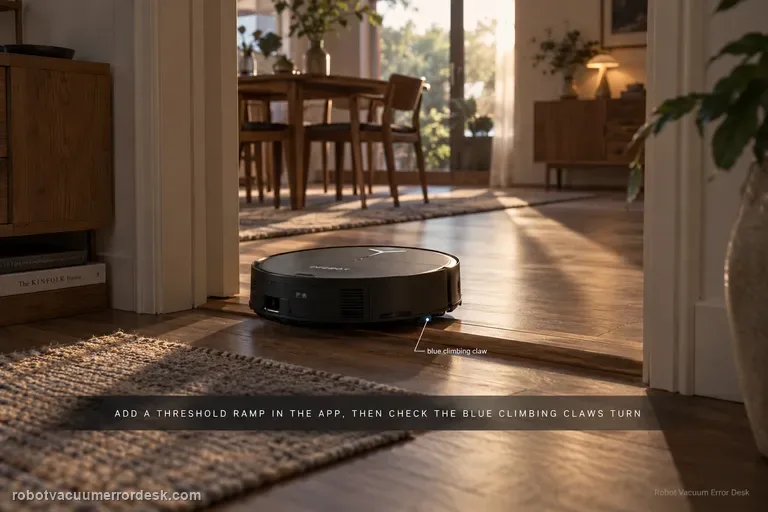
Cannot cross threshold
X11 threshold failures have a model-specific path that goes beyond generic “clean the wheels” advice. ECOVACS says to add a Threshold Ramp at the location in the app, power the robot off, remove the dirty-water box, clean the drive wheels and inspect the blue climbing claws for debris. Then press the trigger above a drive wheel while slowly rotating the wheel clockwise and confirm the blue claw rotates with it. A claw that does not rotate normally is an after-sales case.
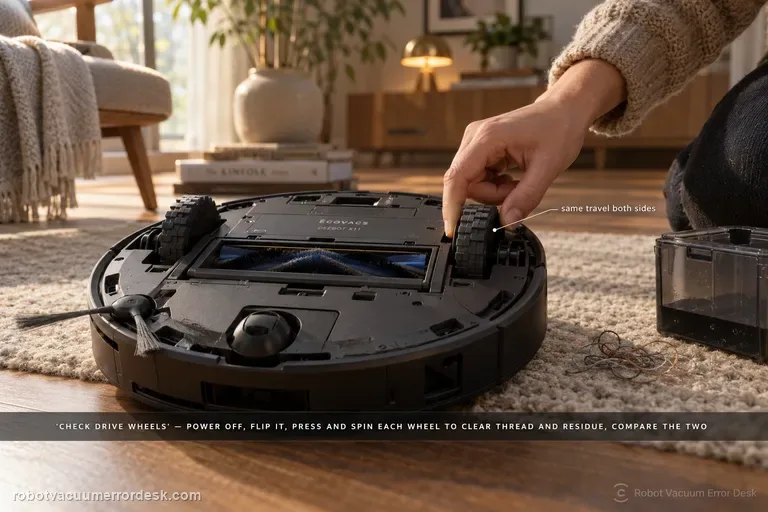
Drive wheel difficulty alarm
For the X11 “difficulty running / check drive wheels” alarm, ECOVACS tells you to power the robot off, remove the dirty-water box, turn the robot over, press and rotate the drive wheels to clear tangles, then wipe or brush away surface stains. The diagnosis should prove that each wheel can move through its travel without hair, thread or sticky residue. If one side remains mechanically different after cleaning, stop repeating cleaning missions and document that asymmetry for service.
Bumper stuck alert
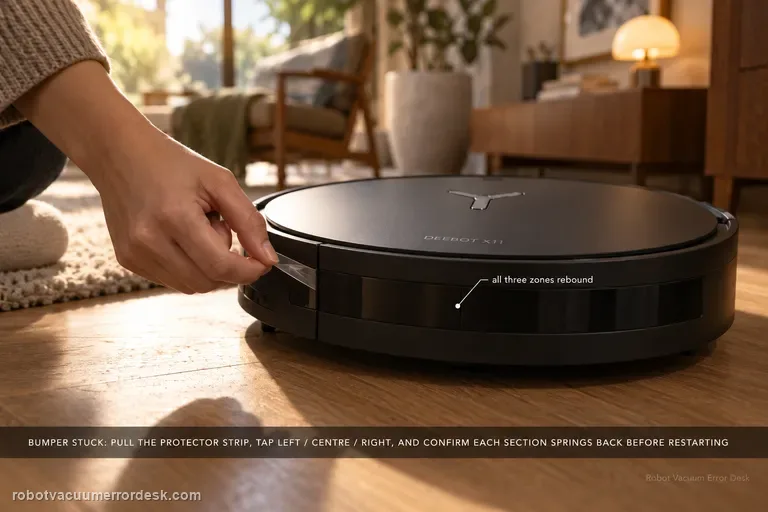
The X11 Bumper Stuck alert has a short official fix, but the useful diagnosis is to check the bumper across all three zones rather than just pushing once in the middle. Remove the bumper protector strip, gently tap the left, center and right sections, and confirm each area springs back. Restart the robot only after the mechanical response is normal. A section that stays depressed or feels different after accessible debris is cleared is the result to show ECOVACS.
Zone cleaning fails
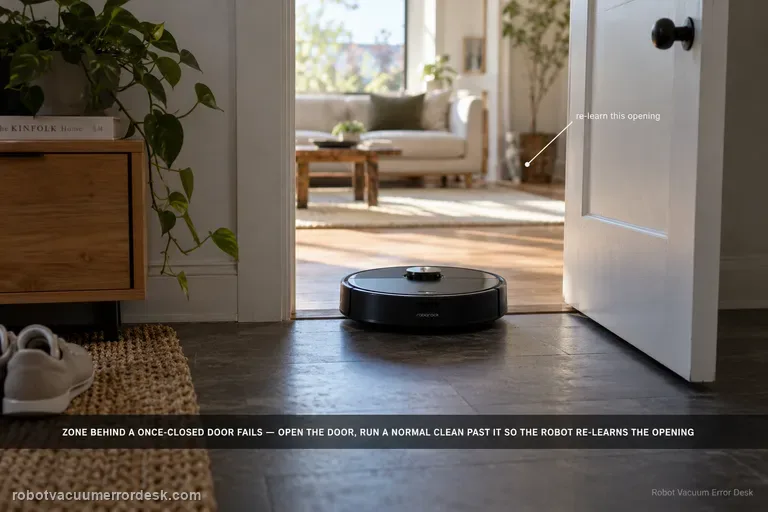
Zone cleaning on the Saros 20 Sonic can fail when the selected zone is in an area the robot previously understood as being behind a closed door. Roborock says to open the door, start a normal cleanup near that doorway so the robot recognizes the changed access, and then start zone cleaning again. The key is updating the robot’s local understanding of the doorway before repeatedly redrawing the same zone.
Misses cleaning areas
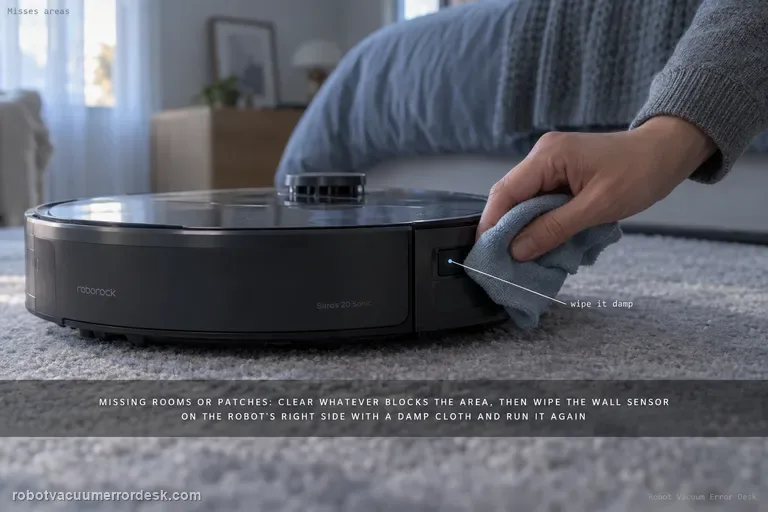
If a Saros 20 Sonic misses rooms or patches, Roborock starts with access obstacles and the wall sensor on the robot’s right side. Remove objects that block the missed area, then wipe the right-side wall sensor with a damp cloth and run another cleanup. Define “missed” only after the cleaning task finishes, and compare whether the same area is skipped again. Repeated misses with clear access and a clean wall sensor justify deeper map/navigation review.
Anti-drop sensor dust alert
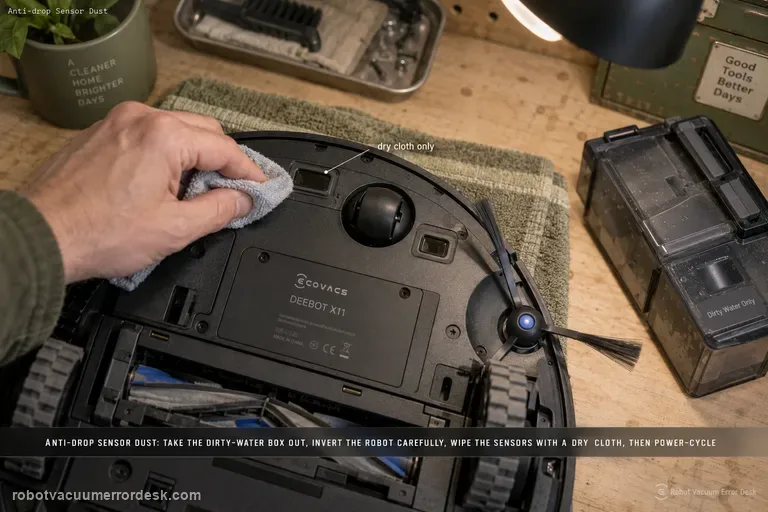
For the X11 “Anti-drop Sensors Dust Accumulation” or anti-drop sensor error, ECOVACS says to remove the dirty-water box, turn the robot over and gently wipe the anti-drop sensors with a soft, dry cloth. Reinstall the dirty-water box, then power the robot off and back on to check whether the alert clears. The important limits are dry cleaning, careful inversion and no attempt to defeat or cover the cliff sensors.
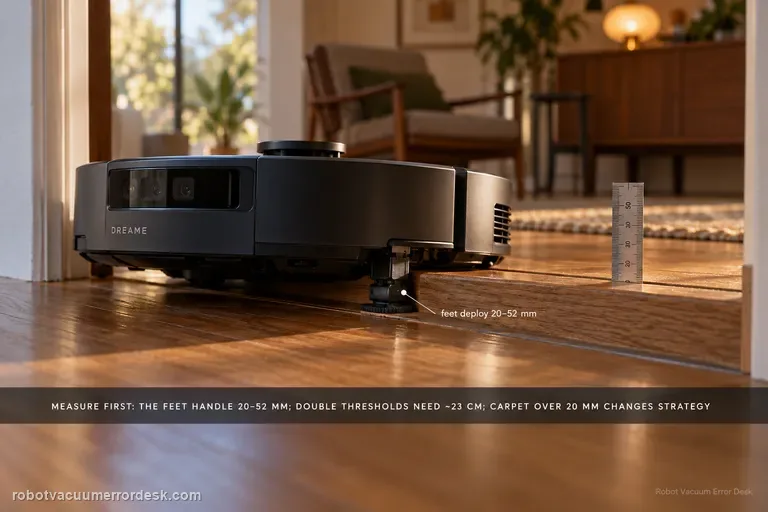
Cannot cross threshold
Measure the obstacle before calling the X60’s behavior a navigation fault. Dreame’s current X60 support page distinguishes obstacle height, double-layer width/geometry, dark surfaces, mechanical-foot behavior, chassis lifting and carpet strategy. The robot’s mechanical feet are used when a threshold is greater than 20 mm but less than 52 mm; if those feet do not reset in time, a tangling warning can appear. Double-layer obstacles add a width constraint of about 23 cm, and carpets thicker than 20 mm use a different chassis-lift strategy. Treat 52 mm as a conditional capability boundary, not a promise that every 52 mm doorway will be crossed regardless of shape, approach or surface.
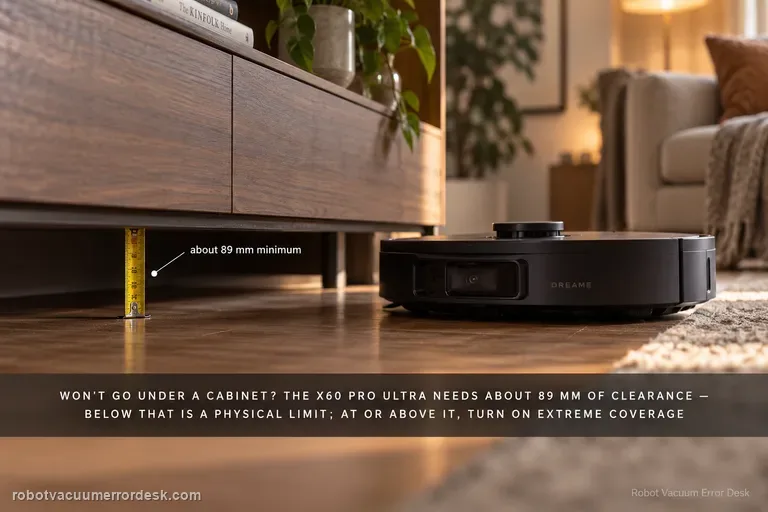
Cannot enter low furniture
Measure before changing settings. Dreame states that the X60 Pro Ultra Complete needs approximately 89 mm of furniture clearance; an opening below that is a physical limit, not a mapping fault. If the lowest usable opening is at or above that figure, check Settings → Ground Cleaning Settings → Extreme Coverage and, where useful, mark a Low-Height Area in map editing. Because Extreme Coverage lowers the robot’s profile, Dreame also warns you to inspect the floor and underside of furniture for protrusions such as loose nails or hidden cable channels before enabling the behavior.
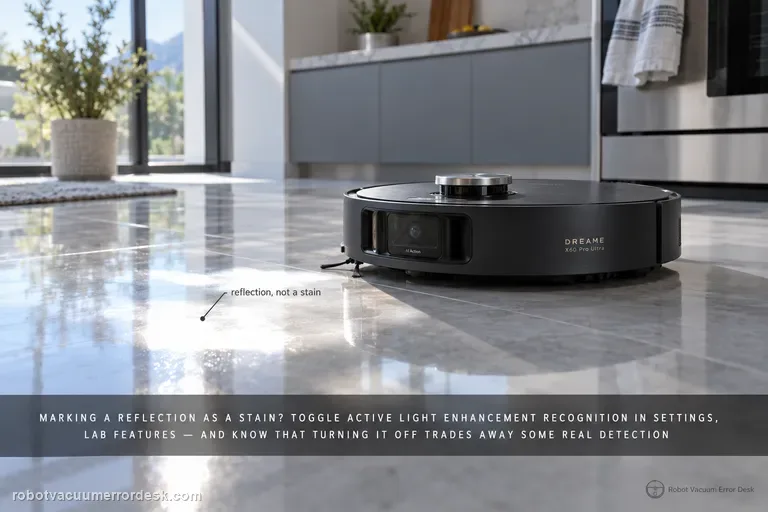
Stain detection wrong
First name the recognition error: reflection marked as a stain, dense pet hair not recognized, pet hair avoided instead of cleaned, blue active-light annoyance, a supported stain still missed, or a repeatable false positive. Dreame gives a different X60 action for each. Reflection false positives point to Active Light Enhancement Recognition in Settings → Lab Features. Dense pet-hair clumps need both Large Particle Boost and Active Light Enhancement Recognition; sparse low-profile hair may simply be handled by normal suction. You can disable the blue active light, but Dreame warns that stain-recognition ability will decrease. If a supported target is still missed or misidentified, update firmware, verify Stain Recognition/Large Particle Boost and use Report an Error with a controlled example rather than changing unrelated navigation settings.
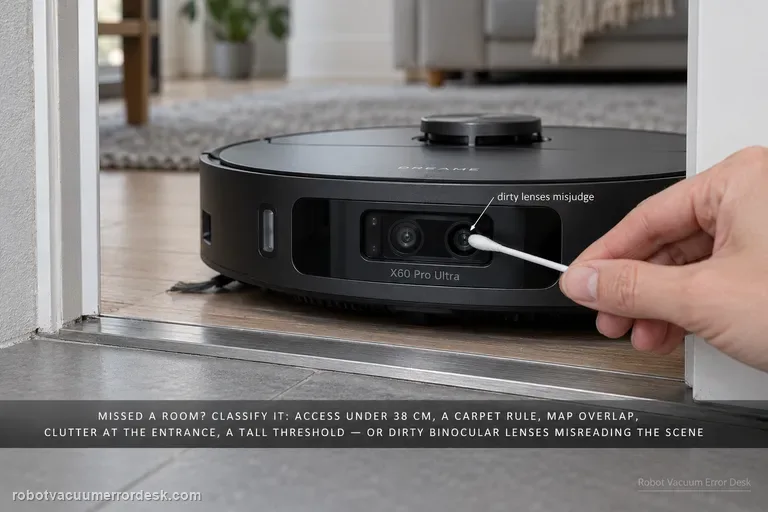
Missed cleaning areas
When the X60 misses a room or patch, do not delete the map first. Dreame’s X60 cleaning-function support page lists several distinct causes: access narrower than about 38 cm, carpet-avoidance rules, map overlap/positioning error, objects at entrances, thresholds beyond what the robot can cross, obstacle-avoidance behavior that leaves small margins, and dirty binocular lenses that can misjudge the scene. The fastest diagnosis is to classify the miss as physical access, intentional software avoidance, bad map position or perception. Preserve the map, measure the doorway, inspect carpet/threshold rules, clear only the entrance, clean the binocular lens, then run one targeted retest.
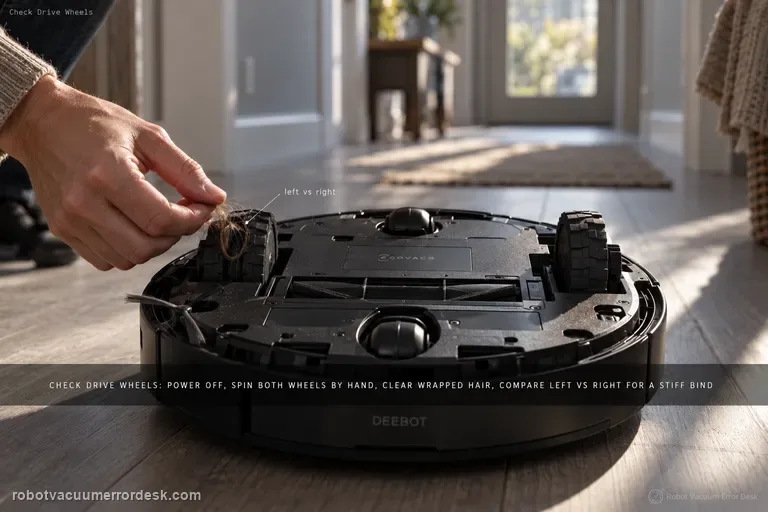
Difficulty running / drive wheels
For the T80 OMNI 'difficulty running / check drive wheels' alarm, keep the first pass mechanical and comparative. Power the robot off, remove the dirty-water box before inversion, then press and rotate both drive wheels to find wrapped hair, thread or a hard bind. Clean the tread with a damp-but-wrung cloth or brush, dry it, and compare left versus right spring and rotation on a flat hard-floor test. If one wheel remains stiff or the alarm returns immediately on a clean dry surface, stop treating it as a map problem.
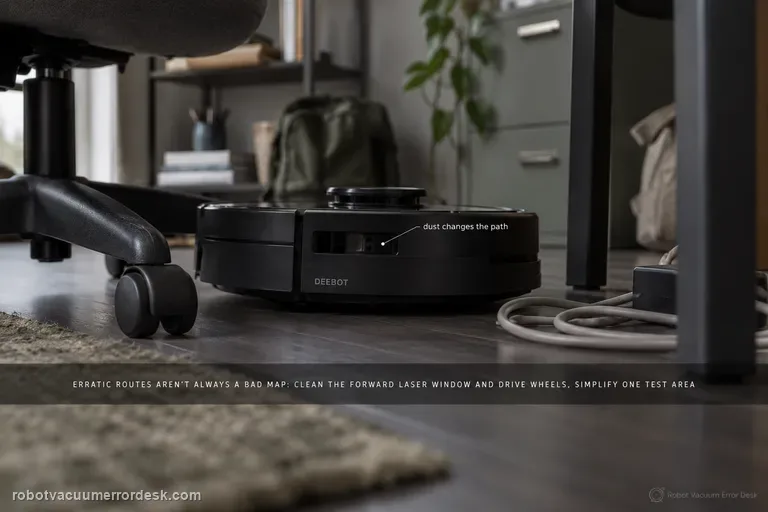
Erratic cleaning paths
Erratic T80 routes are not automatically a bad map. ECOVACS' exact-model article starts with three concrete causes: dust on the forward laser module, an obstacle-dense room that makes high-precision avoidance look irregular, and dirty drive wheels that change the robot's actual motion. Clean the optical and traction inputs, simplify one small test area, and compare a repeated route before restoring or deleting the map. Use the separate map-distortion path only when the saved map itself shows overlap or skew.
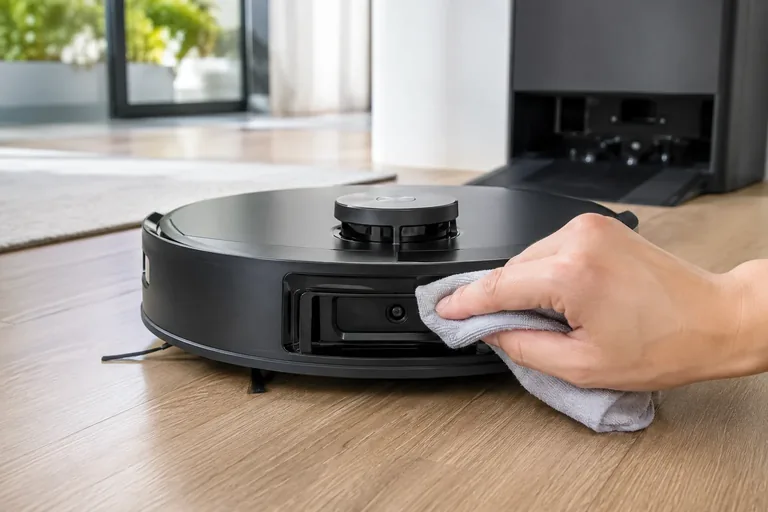
Laser Sensor Abnormal
For the T80 OMNI 'Laser Sensor Abnormal' alert, ECOVACS gives a short exact-model recovery path: gently orient the laser unit so its radar lens faces forward, clean that lens with a soft brush or clean cloth, power the robot off for a few seconds, then restart it. The important additions are diagnostic: do not force a laser unit that is mechanically stuck, do not use liquids on the optical window, and prove the result with a short open-floor run. If the alert returns immediately with a clean lens and free external movement, the fault has passed the sensible owner-maintenance boundary.
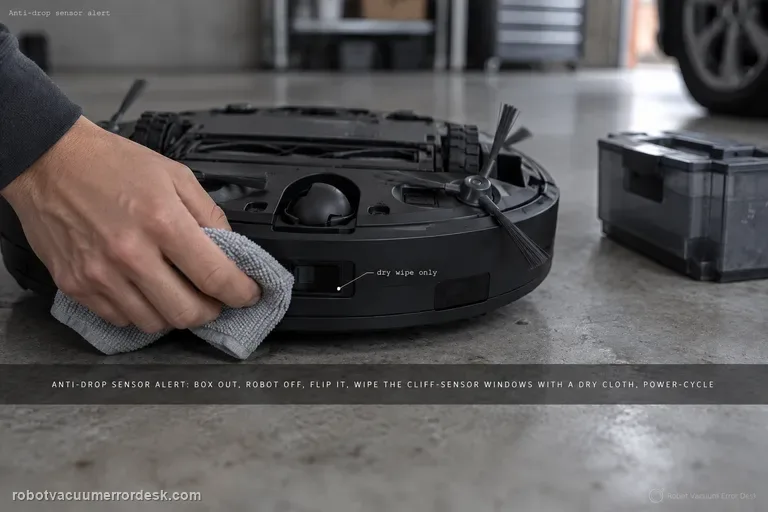
Anti-drop sensors dusty / error
For a DEEBOT T80 OMNI anti-drop sensor dust/error alert, use a dry optical-cleaning path rather than trying to defeat the cliff sensors. Remove the dirty-water box, switch the robot off, invert it safely, and wipe the anti-drop sensor windows gently with a soft dry cloth. Reinstall the box and power-cycle the robot, then test on level flooring well away from stairs. If the alert clears on a light, ordinary floor but returns only on a very dark or highly reflective edge condition, record that surface effect; if it returns immediately everywhere with clean sensor windows, the fault is no longer explained by surface dust.
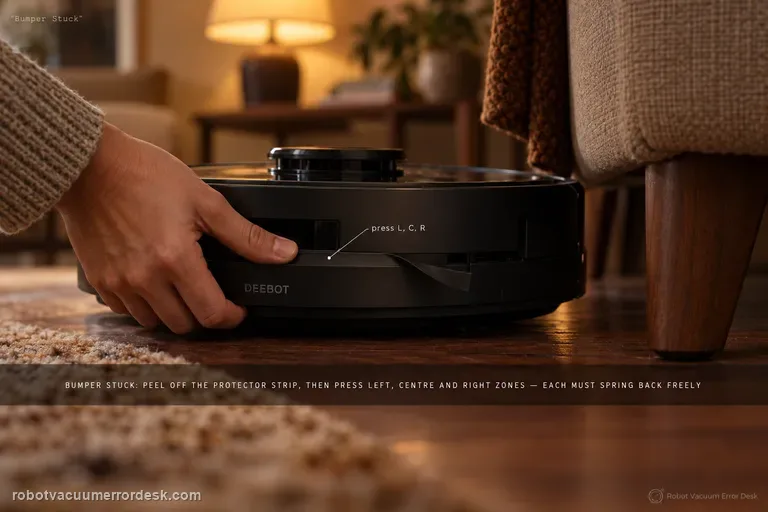
Bumper Stuck alert
For the T80 OMNI Bumper Stuck alert, ECOVACS asks for a direct mechanical spring-back test, not a map reset. Remove the bumper protector strip, then press/tap the left, center and right bumper zones separately. Each zone should move inward and return freely. Clean only accessible debris around the bumper seam, then run a short open-floor test. If one zone remains depressed, returns slowly or the alert recurs immediately with free visible movement, stop prying at the bumper assembly and send ECOVACS a video of the three-zone comparison.
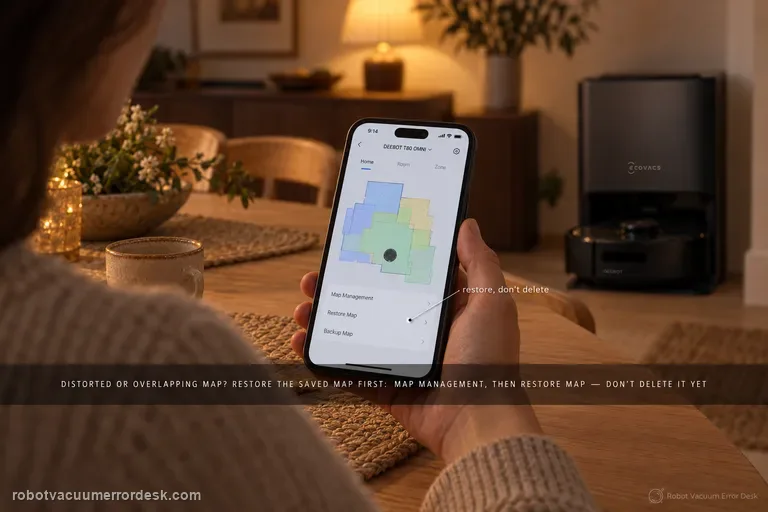
Map distorted or overlapping
Do not delete the T80 map first. ECOVACS’ exact distortion/overlap article says to use Map Management → Restore Map to revert to the original saved map. Only if that original map is inadequate does ECOVACS tell you to delete it and create a new one. When a rebuild is necessary, the T80 Mapping Guide adds the conditions that make the new test meaningful: open doors, remove floor obstacles, provide sufficient lighting, power the robot on, place it directly in front of the charging dock and let it dock, keep the robot online for Quick Mapping, wait for the “Mapping completed” announcement, and manually back up the map after editing.
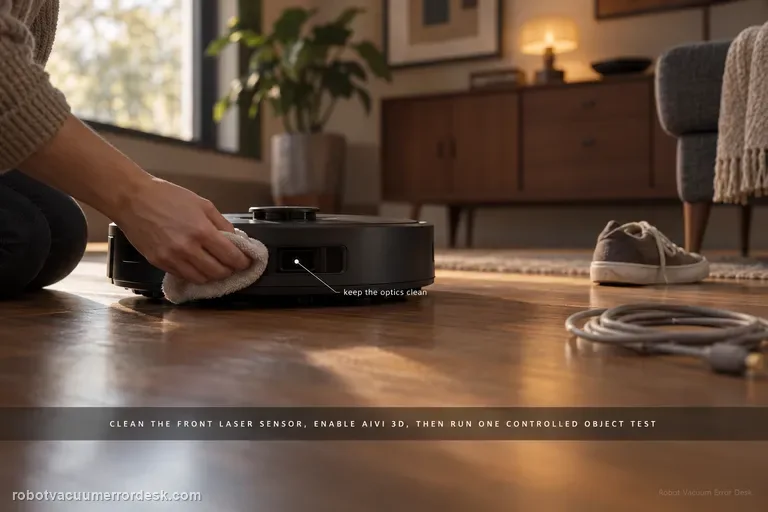
Obstacle avoidance not working
Do not judge the T80 from one bump. ECOVACS’ exact path says to clean the laser sensor centered on the front bumper and confirm Intelligent Avoidance/AIVI 3D is enabled. It also warns that black or thin objects may still be lightly touched. The useful test is therefore a controlled, repeatable obstacle in an open area: clean optics + enabled avoidance + a normal visible object. If that test fails repeatedly, you have evidence of a sensing problem rather than an object-class limitation.
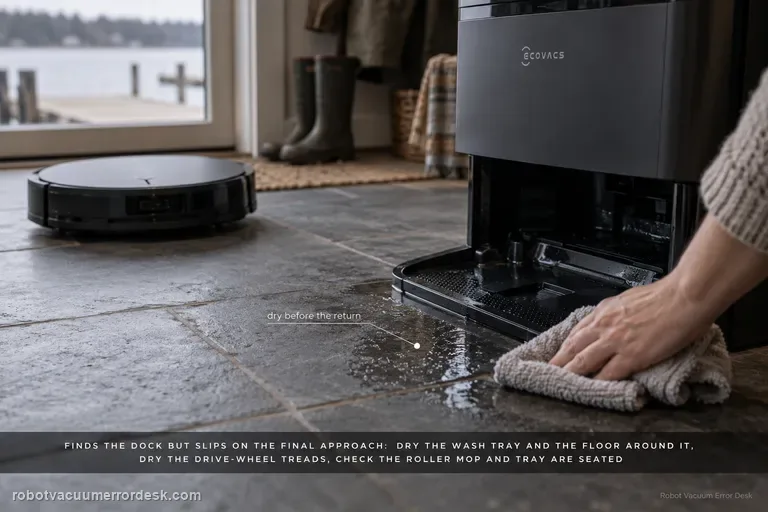
Finds station but slips returning
When a T80 OMNI finds the station but slips during the final approach, do not delete the map first—the robot has already demonstrated that it can locate the dock. ECOVACS' exact-model path is physical: dry excess water from the mop-washing tray and surrounding floor, clean then dry the drive-wheel treads, verify the roller mop is correctly installed, verify the mop-washing tray is seated, then place the robot directly in front of the base and press AUTO for a close return test. That test separates final traction/seating from long-range navigation.
Error 1
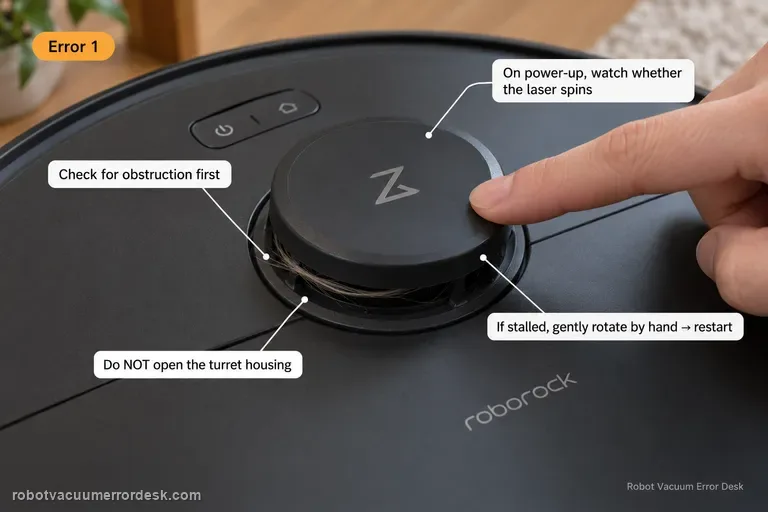
Q7 Max Error 1 means the LiDAR turret or laser is blocked. Check for physical obstruction first, then power the robot and watch whether the laser unit spins. If it is stalled, Roborock’s Q7 support says to gently rotate it manually and restart. Do not open the turret housing.
Missed Areas
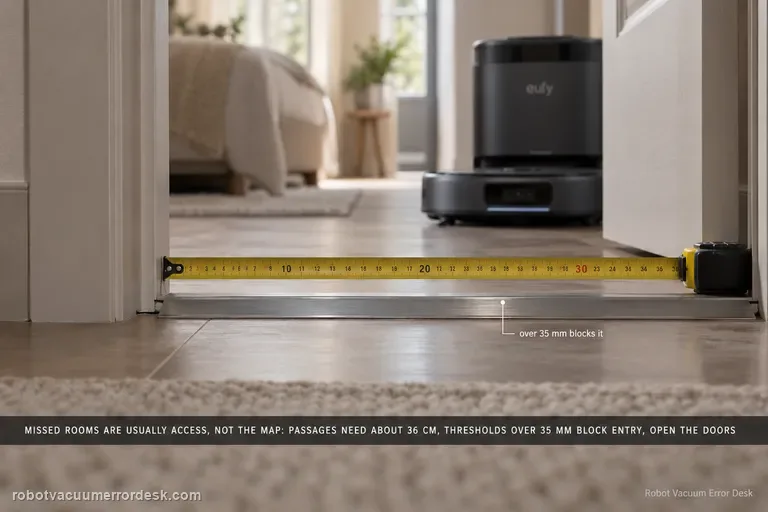
Before remapping an Omni S2, prove the space is physically accessible. eufy lists concrete limits: passages need about 36 cm, thresholds over 35 mm can block room entry, some high/long-pile carpets are intentionally avoided, and furniture clearance below 10.5 cm is not reachable. Open doors, clear false obstacles, then use Spot Clean for an area skipped after objects moved.
Stuck on carpet / rug
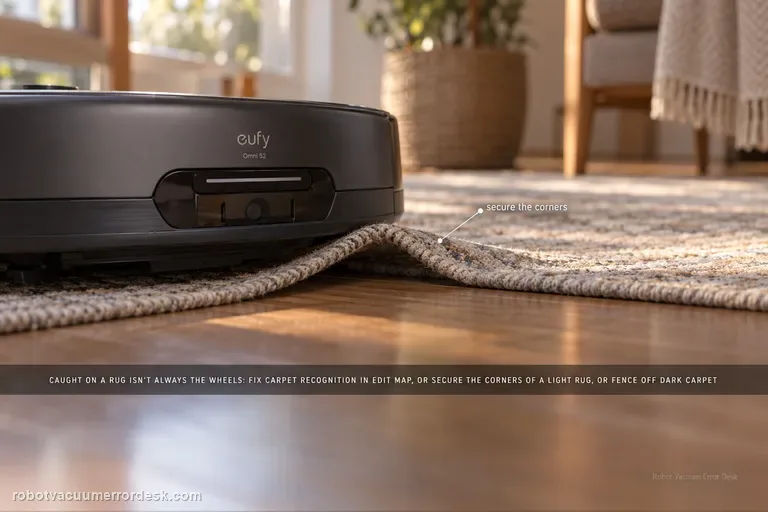
An Omni S2 that gets stuck because a rug edge or carpet material is caught is not automatically a drive-wheel failure. eufy's exact S2 path first checks carpet recognition: manually add the carpet in Edit Map > Carpet Editing > Add Carpet when detection is wrong. For thin/lightweight rugs that the bumper or brushes push or lift, secure the corners or create a no-go zone. Very dark or black carpets can also be misrecognized, so use a controlled comparison and isolate that surface rather than deleting a good map or replacing wheel hardware first.
Spins in circles
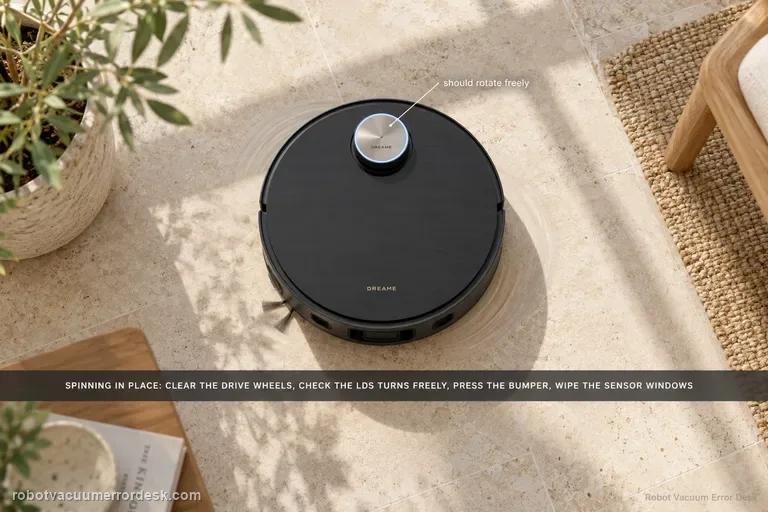
Dreame’s exact X50 article gives a seven-check path for a robot that spins or keeps turning in the same place. Start with foreign material around the drive wheel, then confirm the LDS is rotating and that its upper cover rebounds normally. Check for hair/debris in the LDS rotating area and for a lifted/cocked sticker or larger object on the robot’s top surface. Then press the impact plate/bumper to confirm it rebounds and wipe the line-laser and AI-identification sensor windows clean. Restart only after those physical states are known. This is not the same intent as ‘map will not save’: a circling robot has a live movement/localization problem, while a map-save problem can occur after otherwise normal driving. Do not force the retractable LDS tower or dismantle a drive wheel. If the X50 still spins after the documented checks, preserve a short video and escalate.
LDS sensor malfunction
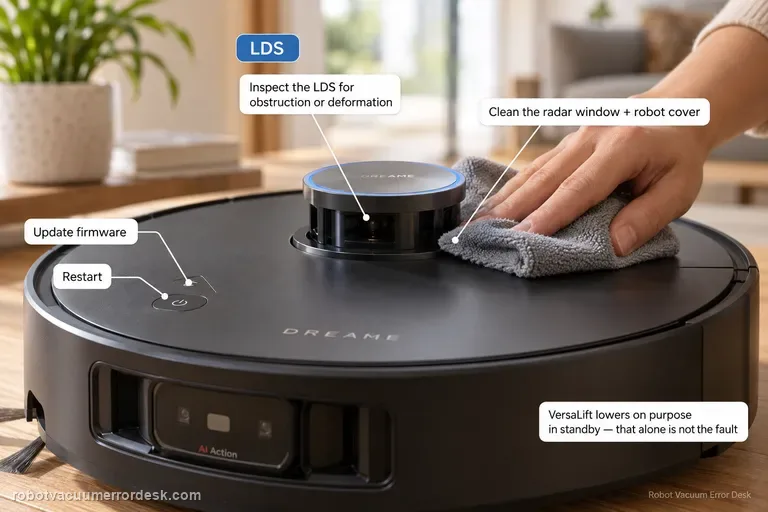
Use this page when the X50 reports an LDS sensor malfunction or the localization sensor itself appears obstructed/deformed—not merely because the retractable LDS will not raise or lower. Dreame’s exact model article gives four owner checks: update firmware, inspect the LDS for anything obstructing it or for deformation, clean the radar and robot cover, and restart. The manual identifies the retractable top unit as the VersaLift sensor and says it is intentionally lowered while the robot is in standby, charging, or cleaning low-clearance areas, so a lowered tower by itself is not proof of malfunction. If the problem is specifically that the LDS cannot raise/lower on command, switch to the separate lifting-function guide, which includes the app’s radar-lifting setting and remote-control test. For a true malfunction that persists after a clear/clean sensor and restart, do not dismantle the turret; send Dreame the exact message and a video.
LDS won’t raise/lower
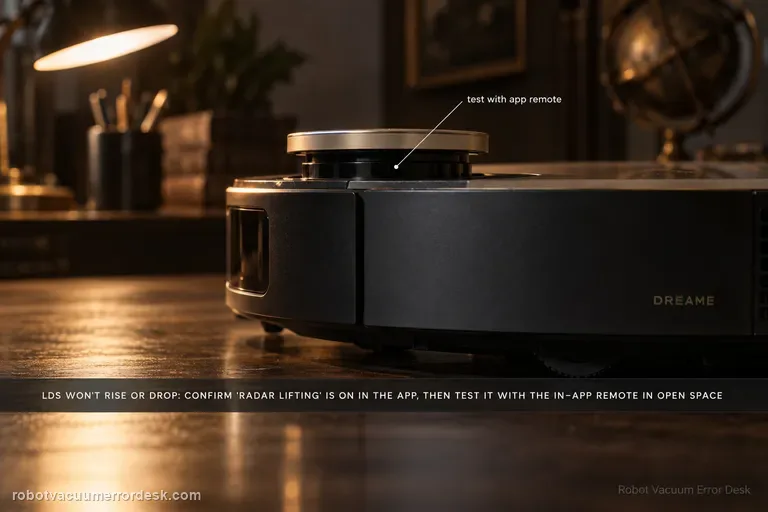
For an X50 whose retractable LDS specifically will not raise or lower, use the lifting-function branch rather than the generic LDS-malfunction page. Dreame’s exact support article says to check current firmware, move the robot to an empty unobstructed area, verify that the radar lifting function is turned on in the app, and use the remote control in the app’s accessibility settings to test whether the radar can raise/lower normally. Then inspect the radar surface and top cover for lifted stickers or debris, clean them, and restart. The manual is important context: the VersaLift sensor is intentionally lowered in standby, while charging and during low-clearance cleaning. So ‘tower is down on the dock’ is not a failed lift test. Do not pull the tower upward or disassemble it. If the remote-control lift test fails in an open area after cleaning/restart, capture that exact result for Dreame.