Roborock troubleshooting
Q, S and Qrevo families. Start with the exact model, then match the error code, light pattern, voice alert or symptom.
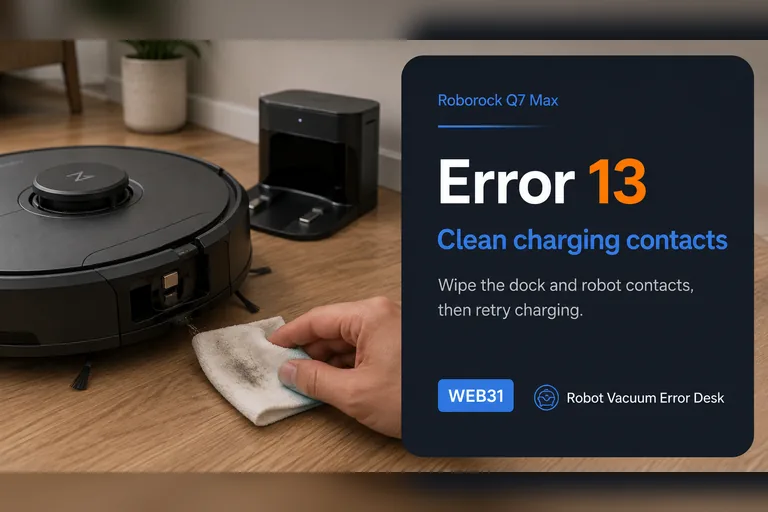
Roborock Q7 Max
Error-code and dock diagnostics.
6 live diagnostics →S SeriesRoborock S7
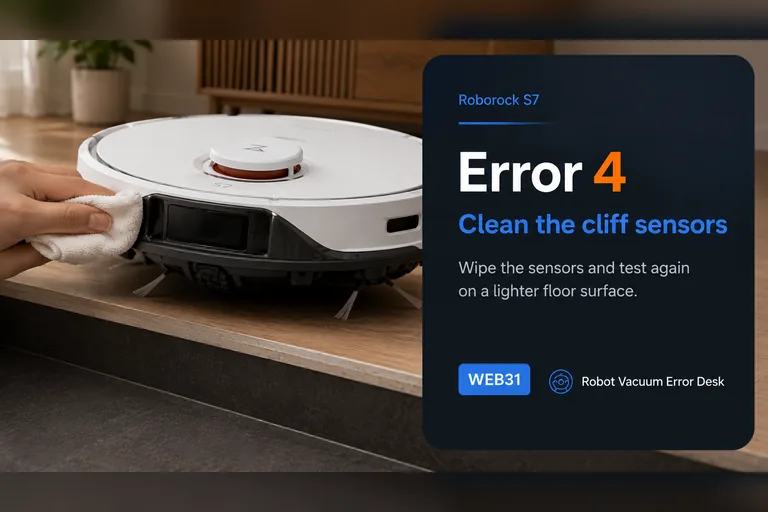
Sensor, map, docking and charging error paths.
4 live diagnostics →S SeriesRoborock S8 / S8 Pro Ultra
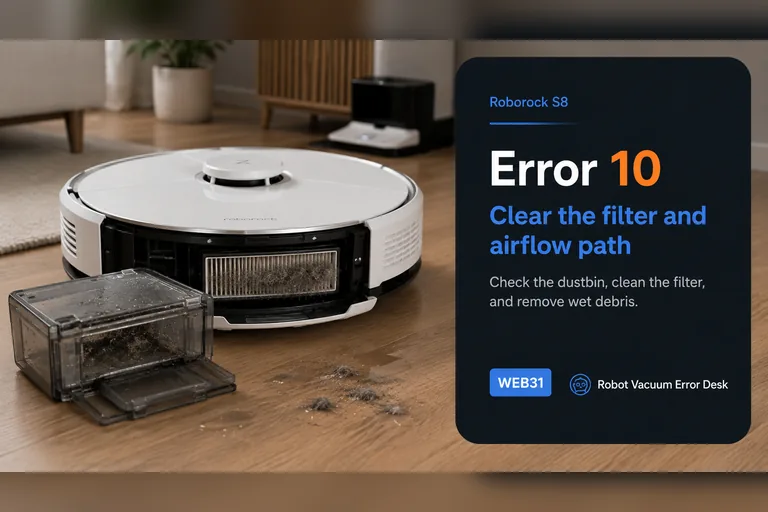
Filter, fan, charging and dock diagnostics.
4 live diagnostics →QrevoRoborock Qrevo
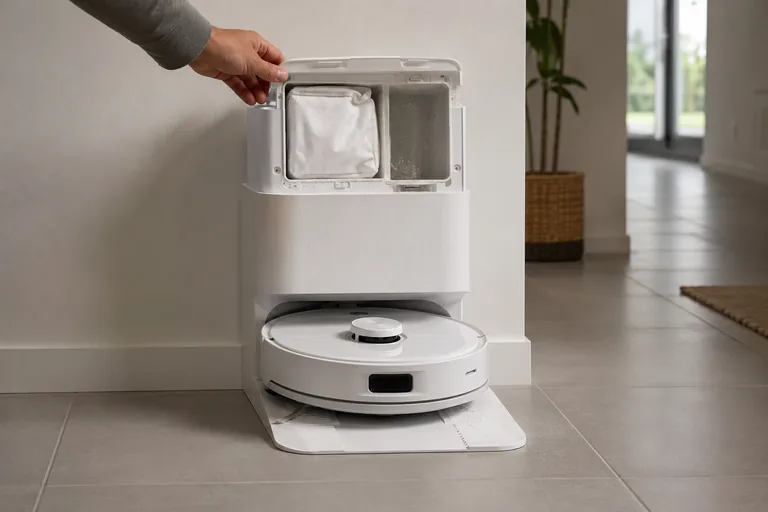
Auto-empty and dock behavior.
4 live diagnostics →QrevoRoborock Qrevo Curv / CurvX
Current Qrevo charging, docking, Wi-Fi, auto-empty, mop-wash and auto-drying diagnostics from the official manual.
6 live diagnostics →SarosRoborock Saros 20 Sonic
Exact error-code, charging, docking, mapping and noise diagnostics from model support.
25 live diagnostics →All Roborock diagnostics
49 guidesError 13
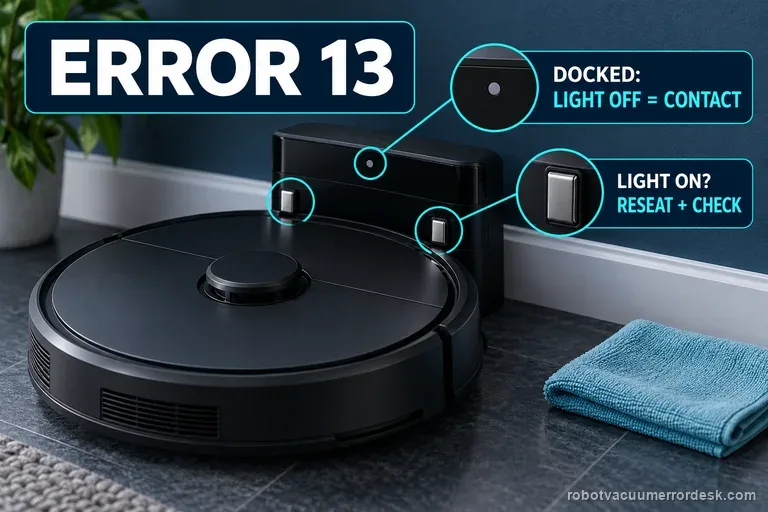
Roborock Q7 Max Error 13 is a charging fault. First prove the charging connection with the dock indicator, then clean both contact sets, fully seat the dock power cable, power-cycle the dock for about two minutes and compare a known-good outlet. Once the dock light confirms contact, use a timed battery-percentage test instead of repeatedly repositioning the robot.
Error 4
Roborock S7 Error 4 is the cliff-sensor path. The official S7 support sequence is short but diagnostic: wipe the underside cliff sensors and make sure the robot is not sitting on dark or shag carpet. Do that comparison on a bright, flat hard floor well away from stairs. If the error disappears there and returns only on one rug, treat the surface as the trigger and exclude it in the map. Never tape over cliff sensors to force the robot onto that surface.
Error 8
The Q7 Max manual defines Error 8 as “Robot trapped.” First clear obstacles around the robot and relocate it. If the problem repeats, manually compare the drive wheels and, when a water tank is installed, remove it for an isolation test before escalating.
Error 10
Roborock S8 Error 10 is the blocked-or-wet filter path, not the same fault as Error 18. Empty the dustbin, clean the filter, let it dry completely and reinstall it correctly before testing again. Inspect the accessible inlet for compacted debris while the bin is out. If a clean, genuinely dry, known-good filter still triggers Error 10, stop repeatedly washing the same filter and escalate; a persistent airflow or sensing fault needs a different branch.
Error 18
S8 Error 18 is Roborock’s fan-error path. The official S8/S8+ support sequence is to empty the dustbin, clean the filter and dry it outside, replace it with a brand-new filter if necessary, and update the robot to the latest firmware. That sequence deliberately rules out airflow load before you conclude the fan itself has failed. Run only a short proof test after those checks; if Error 18 promptly returns or the fan sounds stalled, stop cycling the robot and escalate.
Map tilted
A tilted S7 map is usually a reference problem, not proof that the LiDAR is physically crooked. Roborock ties abnormal map orientation to dock placement and recommends correcting the dock environment before rebuilding Map Saving. Square the dock to a straight wall, keep it fixed, let the S7 localize and complete a normal run, and only then create a fresh map if the angle persists. Preserve a screenshot first so you can compare the old and new reference rather than deleting evidence.
Auto-empty not working
First decide whether Q Revo auto-emptying never starts or starts but leaves debris behind—Roborock documents different branches. If the cycle does not start, check that Auto-Emptying is enabled, the dock dust-container cover is installed, the robot actually returned after a cleaning task, and Do Not Disturb is not configured to disable auto-emptying. Roborock also says manually putting the robot on the dock does not trigger automatic emptying. If the cycle starts but emptying is ineffective, shift to the airflow/mechanical branch: confirm the main brush and brush cover are installed correctly, then clear the filter, air duct, suction inlet, air inlet and dustbin. This trigger-vs-airflow split prevents unnecessary dock disassembly.
Error 13
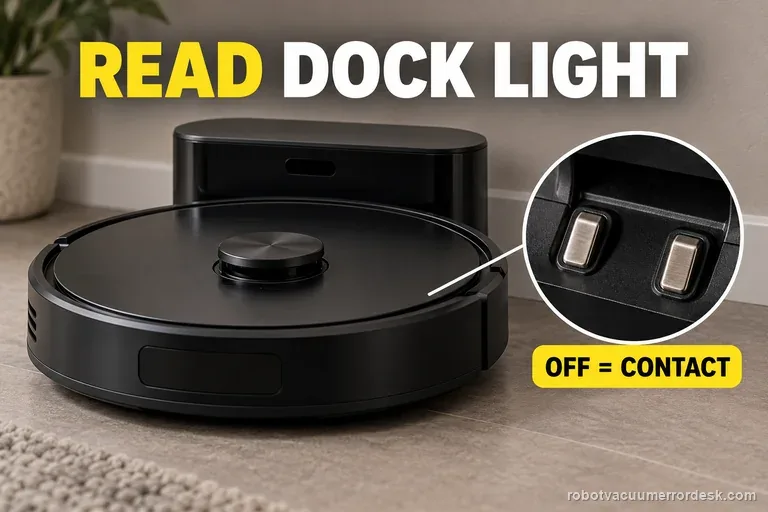
Qrevo Error 13 is the charging-contact branch. Roborock’s current Qrevo support says to remove stains or rust from the dock and rear robot contacts, verify the dock indicator changes from on without the robot to off when it is properly seated, push the station power cable fully into its socket, unplug the dock for about two minutes and try another outlet if needed. Prove sustained battery gain after those checks before suspecting the battery or internal charging hardware.
Wi-Fi won't connect / offline
If a Roborock Qrevo will not connect to Wi-Fi, disappears from the Roborock app, or stalls during pairing, treat it as a network-stage problem before resetting the whole robot. Roborock’s Qrevo support says the robot uses 2.4 GHz Wi-Fi, the password must be correct, phone permissions can matter, the home Wi-Fi must be selected instead of the temporary robot network, WEP is not supported, and VPN or cellular routing can interfere. The Qrevo manual also gives a dedicated Wi-Fi reset: open the top cover, locate the Wi-Fi indicator, hold the documented button combination until the robot announces “Resetting WiFi,” then wait for the indicator to flash slowly before adding the robot again. A Wi-Fi reset is different from a factory reset and is the safer recovery step when the robot itself still cleans normally.
Can't find dock
For a Qrevo that cannot find its RockDock, separate navigation from station functions. Roborock’s support says return can fail after manual relocation, a different start point, obstacles, poor dock clearance or dirty homing surfaces. Keep the station against a wall with about 0.5 m clear on each side and 1.5 m in front, clean the dock signal area and robot front sensor, then compare a near return with an automatic return after a real cleaning task. Do not treat a charging or mop-wash fault as the same problem once the robot has actually reached the dock.
Can't find dock
For an S7 that cannot find its dock, separate final homing from whole-home localization. Roborock says return can fail if the robot started elsewhere, was moved manually, meets an obstacle, or cannot see a correctly placed dock. Give the dock about 0.5 m of side clearance and 1.5 m in front, clean the dock signal area and robot front sensor, then run a nearby return. If nearby docking works but a normal mission fails, focus on the map/dock reference rather than charging hardware.
Error 7
The Q7 Max manual defines Error 7 as “Wheels jammed. Move the robot and restart.” Before restarting, compare the two drive wheels for normal rotation and suspension travel and remove accessible hair or debris around the wheel openings.
Unable to charge
Start with the dock indicator while the Qrevo Curv is seated. Roborock’s current model support says the dock light should turn OFF when the robot and dock charging contacts are properly connected and charging is working; if the light stays ON, the contacts are not making the expected connection. Reposition the robot until the light turns off, then clean both contact sets if needed. Roborock allows a dry cloth, a cloth lightly moistened with alcohol, or an eraser for stains/oxidation. If contact alignment still fails, prove the dock power cable and wall outlet. This sequence is more useful than replacing the battery first because it tells you whether the electrical interface has even been established.
Won't return to dock
Do not delete the map first. For Qrevo Curv / CurvX, Roborock’s manual says reliable automatic return depends on starting from the dock, leaving the dock in place during the task, keeping the dock on a hard and flat surface, and keeping the dock-location beacon unobstructed. Its troubleshooting table then narrows a failed return to obstacles near the dock, excessive distance, or dirty wall/cliff/carpet sensors. A close-range return test is useful because success from nearby proves the robot can still see and physically seat on the dock, shifting the investigation toward route context or long-range localization rather than a dead dock.
Won't connect to Wi-Fi
Qrevo Curv does not need a map or system reset just because app connectivity fails. Roborock documents a dedicated Wi-Fi reset, and its current Qrevo Curv support page says the robot connects on 2.4 GHz rather than 5 GHz. Prove that a usable 2.4 GHz network exists, reset only the robot's Wi-Fi, pair near strong coverage, and only then work on router band settings. A successful Wi-Fi reset followed by repeated failure on one router points away from the map and toward network configuration.
Error 13
Roborock Error 13 on the Saros 20 Sonic is a charging-contact diagnosis. The model support page says the dock indicator should be OFF when the robot is docked and charging correctly; if it stays ON, reposition the robot, clean the contacts on robot and dock, then prove dock power and the wall outlet. Use the light state as the key pass/fail signal instead of replacing a battery before contact alignment and power are proven.
Can't find dock
When a Saros 20 Sonic cannot find its dock, first separate localization from charging. Roborock says return can fail if the robot was started somewhere else, hit an obstacle, or was moved manually. Place the dock against a wall with about 0.5 m clearance on each side and 1.5 m in front, then clean the dock’s front signal-transmission area and the robot’s front sensor. A direct return test from the same mapped floor is the clean proof.
Map wrong angle
A Saros 20 Sonic map that appears rotated or at the wrong angle is usually handled as a dock-placement/map-orientation issue. Roborock says the map should display horizontally or vertically. Move the dock to a clearer location with roughly 0.5 m at each side and 1.5 m in front; if orientation stays wrong, switch Map Saving off and back on so the next cleanup creates a new map. Preserve a good map before rebuilding.
Abnormal noise
Roborock’s Saros 20 Sonic noise test is a component-isolation sequence, not “clean everything and hope.” Test briefly after each change: remove the main brush and cover, then the side brush, then the front wheel; press/rotate the drive wheels by hand; clean the dustbin/filter or use lowest suction; finally remove the mop mount or use Vacuum Only. When the noise disappears after one change, reinstall that component correctly and retest.
Error 1
Error 1 is a laser-unit fault path, not a reason to delete the map first. Roborock’s exact Saros 20 Sonic support says to power the robot on and verify that the laser unit is spinning. If it is not spinning, gently rotate it manually and restart. The key is the physical pass/fail observation: spins normally, does not spin but frees gently, or remains bound/fails again. Preserve the map while you prove that hardware state.
Error 4
Saros 20 Sonic Error 4 points to the cliff/anti-drop sensing path. Roborock says to wipe the cliff sensors and make sure the robot is not operating on dark or shag carpet, which can confuse the downward-facing sensing. Clean every accessible cliff-sensor window, move the robot to a normal light hard floor, restart and test there. A repeatable Error 4 on a safe ordinary floor after cleaning is the point to escalate.
Error 5
Roborock Error 5 on the Saros 20 Sonic is the main-brush jam path. Remove hair and debris not only from the visible bristles but from both brush-installation slots and both ends of the brush. Reinstall it correctly, then run a short test with Carpet mode enabled as Roborock specifies. If the brush rotates freely by hand but Error 5 returns immediately in a clear test area, stop buying brushes at random and escalate with the cleaned end/slot condition.
Error 7
Saros 20 Sonic Error 7 is a wheel-stuck diagnosis. With the robot stopped and safe to handle, press and spin each drive wheel manually and compare left versus right movement. Remove hair, thread or debris that prevents free travel. Then run a short test on clear hard floor before adding rugs or thresholds back. If one wheel still binds or Error 7 returns without environmental obstacles, document that side for Roborock support.
Error 8
Roborock’s Saros 20 Sonic support lists Error 8 as a trapped-robot check: clear obstacles and press/spin the drive wheels to find a bind. That support entry also includes a generic “remove the water tank if installed” step. The current Saros 20 Sonic manual does not show an owner-removable robot water tank; it shows a self-filling port on the robot and removable clean/dirty tanks in the dock. Do not open the robot or try to remove an internal tank. Clear the chassis, compare both drive wheels on safe hard flooring, and run one short control test. If Error 8 returns with free wheels and no obstruction, escalate with the exact code and a short video.
Error 10
Roborock’s exact Saros 20 Sonic Error 10 instruction is deliberately simple: clean the filter, dry it thoroughly, reinstall it and try again. The important diagnostic work is proving those words rather than doing them approximately. A damp filter can look clean while still restricting airflow; a dusty bin/filter seal or poorly seated assembly can produce the same practical symptom. Use a known-dry filter and a short controlled suction test before treating Error 10 as a fan failure.
Error 18
Saros 20 Sonic Error 18 points to the fan/airflow path. The exact model page tells owners to clap the side of the robot several times to try to clear debris from the fan. Roborock’s broader Error 18 support also advises emptying the dustbin, cleaning and fully drying the filter, trying a new filter, and updating firmware. Use those owner-safe airflow checks before assuming the suction motor itself has failed.
Error 9
Roborock Error 9 on the Saros 20 Sonic is a filter-detection check. The model support page says to look for the magnet on the side of the filter; if the magnet is missing, replace the filter and try again. First remove and inspect the filter carefully, clean its seating area, and reinstall it correctly. A present magnet plus correct seating but immediate Error 9 points beyond a simple missing-filter-magnet case.
Fan speed lowered error
The Saros 20 Sonic “fan speed lowered” message is an airflow restriction check. Roborock says to inspect the blocked strainer and replace the filter to see whether the problem is solved. Empty the dustbin, clean accessible airflow surfaces, use a known-clean dry filter, then run the same suction mode again. If suction remains lowered with a clear bin/strainer and known-good filter, record the message and actual airflow behavior for support.
Internal error
For a Saros 20 Sonic Internal Error, Roborock’s exact model page tells owners to reset the system using the Reset button under the top cover. That reset returns current settings to factory defaults, including Wi‑Fi and scheduled cleanups, so record the network name, schedules and important app settings first. Perform one reset, reconfigure only what is necessary for a simple test, and escalate if the internal error returns.
Zone cleaning fails
Zone cleaning on the Saros 20 Sonic can fail when the selected zone is in an area the robot previously understood as being behind a closed door. Roborock says to open the door, start a normal cleanup near that doorway so the robot recognizes the changed access, and then start zone cleaning again. The key is updating the robot’s local understanding of the doorway before repeatedly redrawing the same zone.
Misses cleaning areas
If a Saros 20 Sonic misses rooms or patches, Roborock starts with access obstacles and the wall sensor on the robot’s right side. Remove objects that block the missed area, then wipe the right-side wall sensor with a damp cloth and run another cleanup. Define “missed” only after the cleaning task finishes, and compare whether the same area is skipped again. Repeated misses with clear access and a clean wall sensor justify deeper map/navigation review.
Mop cloth almost dry
For a Saros 20 Sonic that leaves the mop cloth almost dry, use the current model manual as the owner-safe baseline: its Common Issues table says to increase water flow in the mobile app when there is no or little water during mopping. If that does not change the cloth, verify the dock can support a normal wash/refill cycle—clean-water tank seated and filled, dirty-water tank seated with capacity, and the cleaning-sink water filter installed correctly. Then run one dock-started mopping test without changing several settings at once. Do not open the robot’s internal water path, probe outlets with a needle, or remove an internal tank; those actions are not part of the current Sonic manual’s owner procedure.
Error 13 charging
For S8 Error 13, use the dock indicator as the first electrical clue. Roborock says the dock light is off when the robot/dock charging contacts are properly connected; if it remains on with the S8 seated, reposition and clean both contact sets. Then verify the dock cable and wall outlet, power-cycle the dock if needed, and watch for sustained battery increase. This is a charging-contact diagnosis, so do not delete maps or start with battery replacement.
Cannot find dock
Treat 'cannot find the dock' as a homing problem until the S8 actually reaches the station. Roborock says return failures can follow a different starting location, manual movement, obstacles, poor dock placement or dirty homing surfaces. Keep the dock against a wall with about 0.5 m clear on each side and 1.5 m in front, clean the dock signal-transmission area and the robot’s front sensor, then compare a nearby Home test with a full cleaning return started from the dock. If nearby docking works but whole-room return fails, map/localization becomes stronger. If the S8 reaches the dock but will not charge, stop using this guide and switch to charging/Error 13 diagnostics.
Error 1
Q7 Max Error 1 means the LiDAR turret or laser is blocked. Check for physical obstruction first, then power the robot and watch whether the laser unit spins. If it is stalled, Roborock’s Q7 support says to gently rotate it manually and restart. Do not open the turret housing.
Error 5
Q7 Max Error 5 means the main brush is jammed. Remove the brush, clear hair from the brush and bearings, clean the two installation slots and both ends, then reinstall it correctly. Roborock’s Q7 support suggests a Carpet-mode test after the tangles are removed.
Error 23
Q7 Max Error 23 means the robot could not return to the dock. The exact manual says to clean the dock location beacon and retry. Also keep at least 0.5 m clear on each side and more than 1.5 m in front, avoid direct sunlight/blocking the beacon, clean the robot’s front sensor and run a short return test before moving the dock again.
Error 13
S7 Error 13 means charging failed, but it does not automatically mean the battery is bad. Roborock’s S7 manual identifies Error 13 as a charging error, and its current support path checks the robot/dock contacts, dock indicator, power-cable seating, a roughly two-minute dock power cycle and another outlet. Manually place the S7 on the dock so navigation is removed from the diagnosis, then prove that charging remains active long enough for the battery percentage to rise.
Auto-empty won't start
Do not treat every Qrevo Curv emptying complaint as a clogged dock. Roborock's Curv manual separates a cycle that never starts from a cycle that starts but empties poorly. Automatic emptying can be disabled, is suppressed after a return during DND, does not trigger when the robot comes back without cleaning, does not trigger when you place the robot on the dock by hand, and is blocked below 10% battery. The dock dust-container cover also has to be installed. After those trigger conditions are proven, run one manual emptying cycle. If manual emptying starts strongly, the hardware can create suction and the remaining fault is automatic trigger/state logic. If the motor starts but airflow is weak or noisy, switch branches and inspect the main brush/cover, filter, air duct, suction and air inlets, robot dustbin and disposable bag instead of repeating app resets.
Mop wash won't start
Treat 'no mop wash' as a trigger-and-water-path problem, not as the same issue as weak washing or cold wash water. Roborock's Qrevo Curv manual says mop cloths are not washed if they were not used, and the robot will not return for washing if it did not start from the dock or if the dock is not found on the active app map. For a valid wash trigger, run a small mopping task from the mapped dock and let the robot return naturally. Then check the clean-water tank is filled and seated, the dirty-water tank is emptied and seated, and the cleaning-tray module/filter is correctly installed. Finally start one manual mop-wash cycle. If manual washing works, the dock water system can operate and the remaining problem is the automatic trigger/map state. If manual washing also fails, preserve tank/tray status and any dock error for support instead of deleting the map immediately.
Auto-drying won't start
For a Qrevo Curv drying complaint, first distinguish three states: drying never starts, drying starts but ends early, or drying completes and the mop cloths still feel damp. Roborock's Qrevo Curv manual says Auto-Drying can be disabled in the app, that drying begins as needed after mop washing or cleaning, and that it can be started or stopped manually in the app. The troubleshooting table adds two key discriminators: leaving the dock during drying ends the cycle early, and high humidity may require a longer drying duration. The same Curv manual says the DND period can be configured to allow or suppress drying, so a failure that appears only overnight is a settings clue rather than immediate evidence of failed dock hardware. Therefore prove Auto-Drying, the DND drying permission and a valid post-wash trigger first, keep the robot docked for the test, then adjust duration for humidity before escalating.
Mop cloth will not wash
If the Roborock Saros 20 Sonic will not wash its mop cloth, first separate a normal no-wash condition from a dock fault. The manual says the mop will not be washed if it was not used, and the robot will not return for mop washing if it did not start from the dock or no dock is present on the app map. After those conditions pass, check clean-water supply, dirty-water capacity and the cleaning-sink water filter. A controlled mop task that starts at the dock is the cleanest proof because it tests the full return-and-wash path without mixing in manual relocation.
Auto-drying will not start
When Saros 20 Sonic auto-drying does not start, check the setting before treating the dock as failed. Roborock’s manual says auto-drying can be disabled in the app. If drying starts but ends early, the manual gives a different discriminator: the cycle ends in advance if the robot departs the dock. A third branch is performance rather than startup—high humidity can require a longer drying duration. Keep those three states separate: disabled, interrupted by departure, or complete but insufficient in humid air.
Hot-water mop wash not working
If the Saros 20 Sonic is washing the mop but the hot-water function seems absent, the model manual gives one owner-facing control: check that Mop Washing Temperature is set to Hot Water in the app. That makes this a setting-first diagnosis, not a reason to descale, dismantle the dock or add hotter water manually. Confirm the exact setting, trigger one normal mop-wash cycle, and distinguish 'wash does not run at all' from 'wash runs but hot-water mode appears not to engage.' The manual also marks dock water outlets and drying areas as hot surfaces, so avoid touch-based temperature tests.
Side brush will not extend
A Saros 20 Sonic side brush that does not extend at every corner is not automatically broken. Roborock’s manual says to verify FlexiArm Design Extended Cleaning is enabled, and it explicitly notes that the side brush does not extend for every corner or every pass along a wall. That normal selective behavior is the key discriminator. Only after the feature is on and the robot reaches a suitable edge should you check whether the side brush is physically jammed. Use one repeatable wall/corner test instead of expecting extension continuously across the room.
LiDAR will not raise or lower
The Saros 20 Sonic’s moving LiDAR should not be judged by whether it raises or lowers continuously. Roborock’s manual says the LiDAR sensor lowers itself only when the robot cleans under furniture or appliances. That means a raised sensor in open floor is normal. If the sensor fails to move when the robot actually enters a low-clearance situation, the owner check is to inspect for objects stuck around the LiDAR sensor. Do not press, pry or force the tower; use a controlled open-floor versus under-furniture comparison to decide whether the behavior is normal context-aware movement or a repeatable mechanism fault.
Mop mount will not detach or reinstall
When the Saros 20 Sonic will not automatically detach or reinstall its mop cloth mount, the manual gives a multi-branch checklist. First verify Auto-Detach/Reinstall Mop Cloth Mounts is enabled; the feature works only under specific conditions, so a non-detach event is not always a fault. Then check whether the mount is jammed, whether it is placed in the position where removal occurs, whether it is installed correctly on the robot, and whether anything is sitting in the cleaning sink. Run one controlled dock cycle after those conditions are set instead of manually forcing the mount.
Mop cloth will not extend
The Saros 20 Sonic mop cloth does not extend continuously. Roborock’s manual says to verify FlexiArm Design Extended Mopping is enabled and notes that the mop extends only along walls and certain obstacles. That selective rule is the first thing to preserve when diagnosing a 'mop will not extend' search. If the feature is enabled and you test a suitable wall/obstacle route, then check whether the mop extension structure is stuck. A pad that remains centered in open floor can be normal; a pad that never extends across repeated valid edge interactions is the stronger fault pattern.
Climbing arm will not extend
For the Saros 20 Sonic climbing arm, Roborock’s manual gives a deliberately narrow owner check: look for foreign objects obstructing the climbing arm’s swing area. That means the safest diagnosis is mechanical observation, not a reset sequence or internal repair. First confirm the complaint is tied to an actual obstacle/threshold attempt, power the robot down, inspect the visible swing area and remove accessible debris. Then run one safe repeat. Do not pull the arm outward by hand or assume it must extend continuously; the useful evidence is whether a clear mechanism still fails during a repeatable crossing attempt.